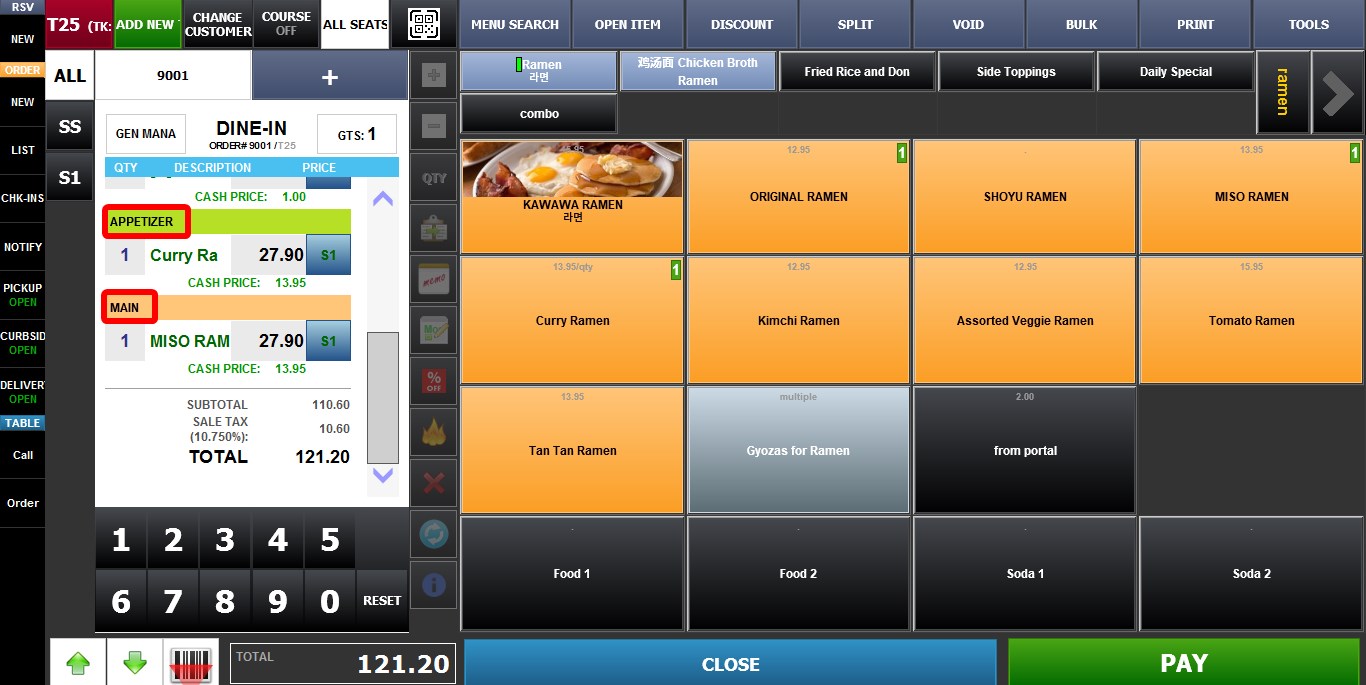
Course
The Courses feature allows restaurant staff to organize ordered items into different serving stages. This helps the kitchen prepare and send items in the correct order during table service.
MAIN SCREEN> NUMBER PAD> OPEN A TABLE> COURSE BUTTON.
Before using Courses, make sure the Courses feature is enabled and course names are configured in the Courses settings.
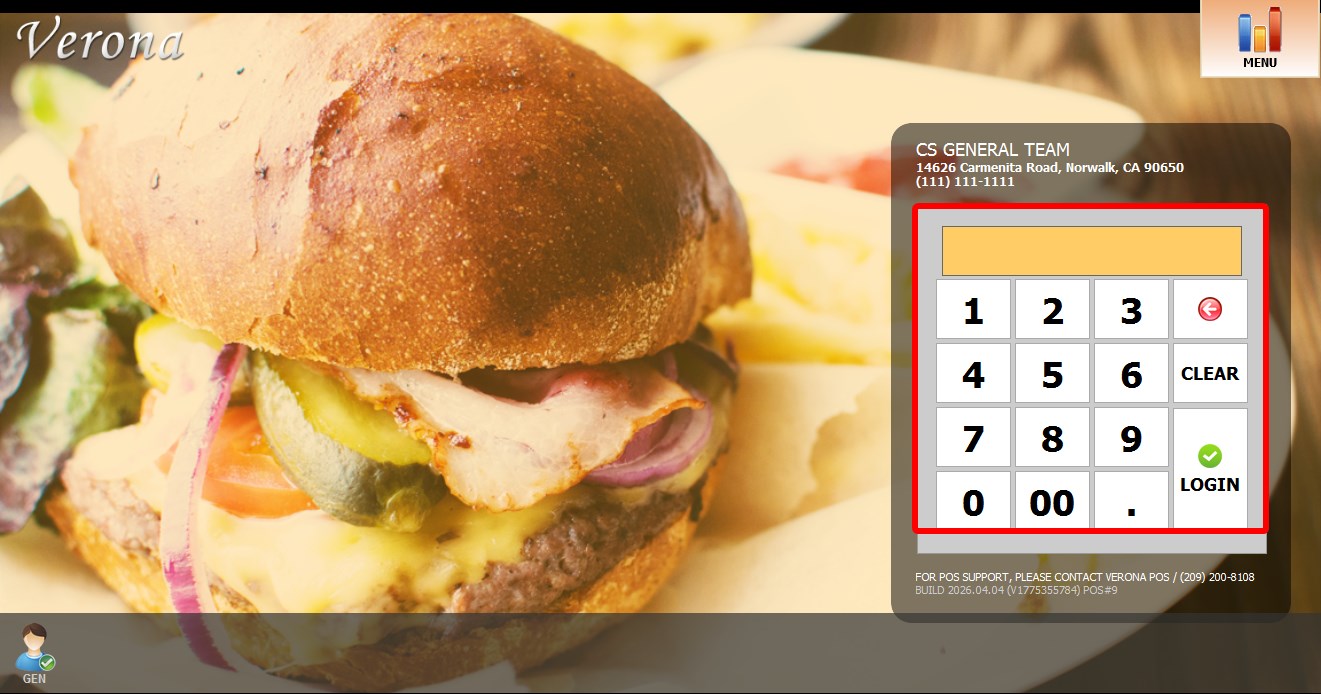
Enter on the numberpad your personal pasword to go to the Sales Screen.
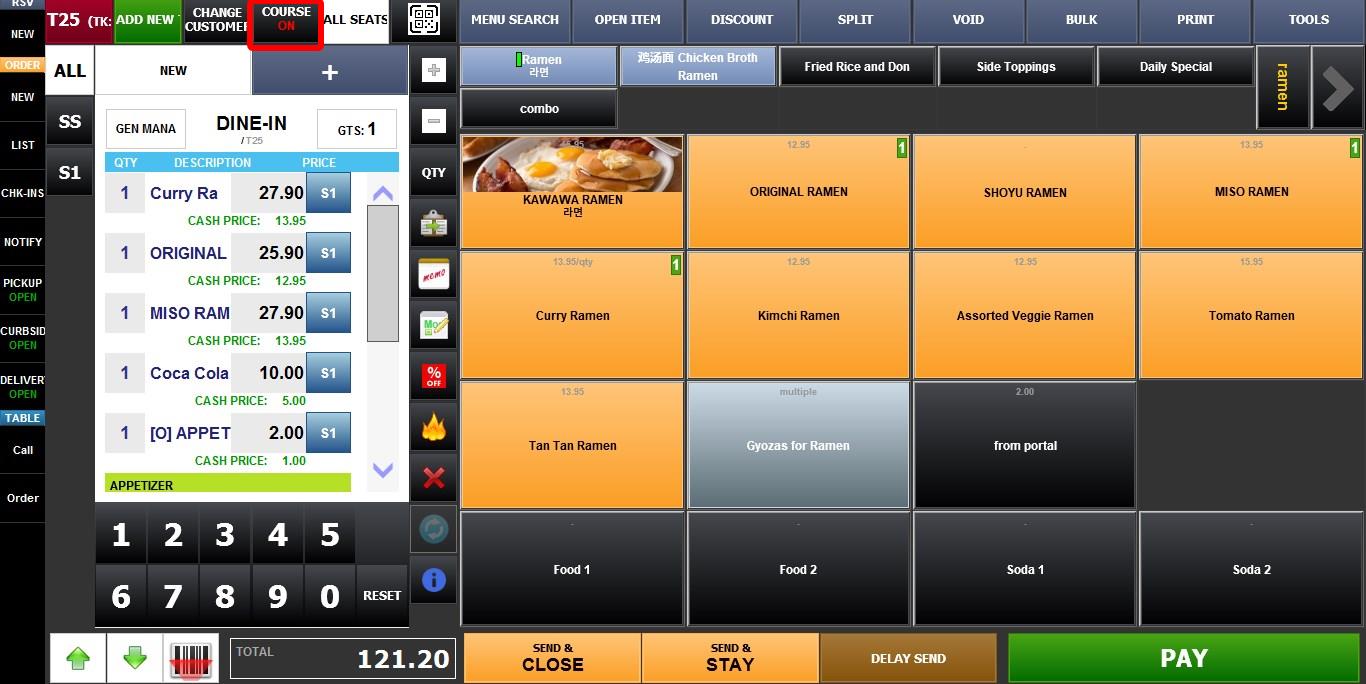
Open a table and add items to the order.
USING COURSES ON AN ORDER.
Press the COURSE button.
A popup window will appear with the following options:
ON: Enables Courses for the current table. Ordered items can now be assigned to specific courses.
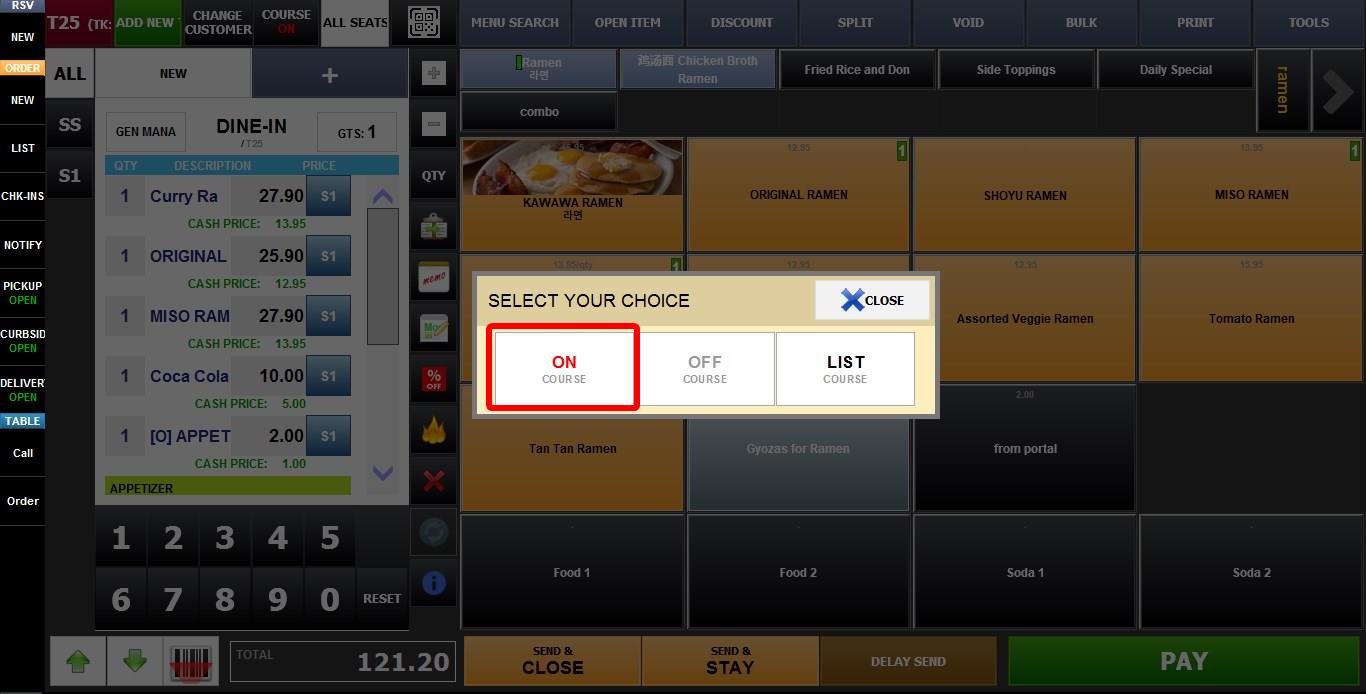
OFF: Disables Courses for the current table. All items will remain grouped together without course separation.
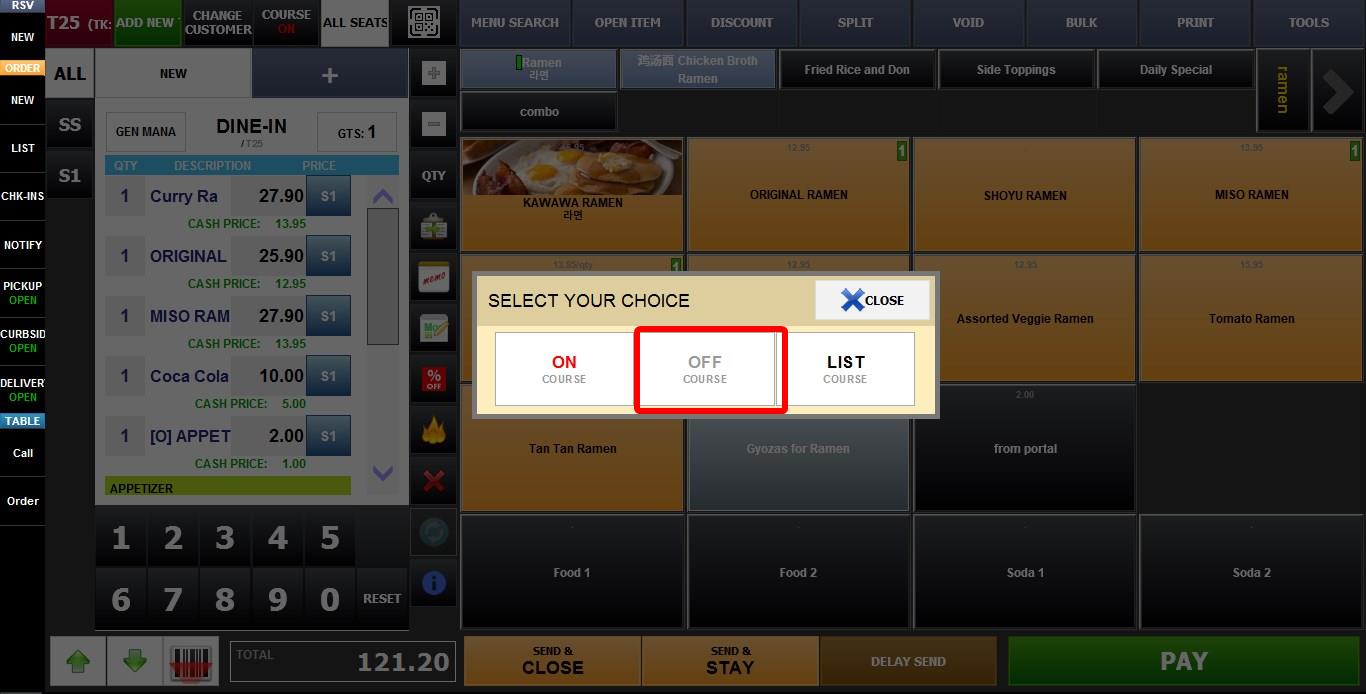
LIST: Opens the Course Assignment screen where items can be organized into different courses.
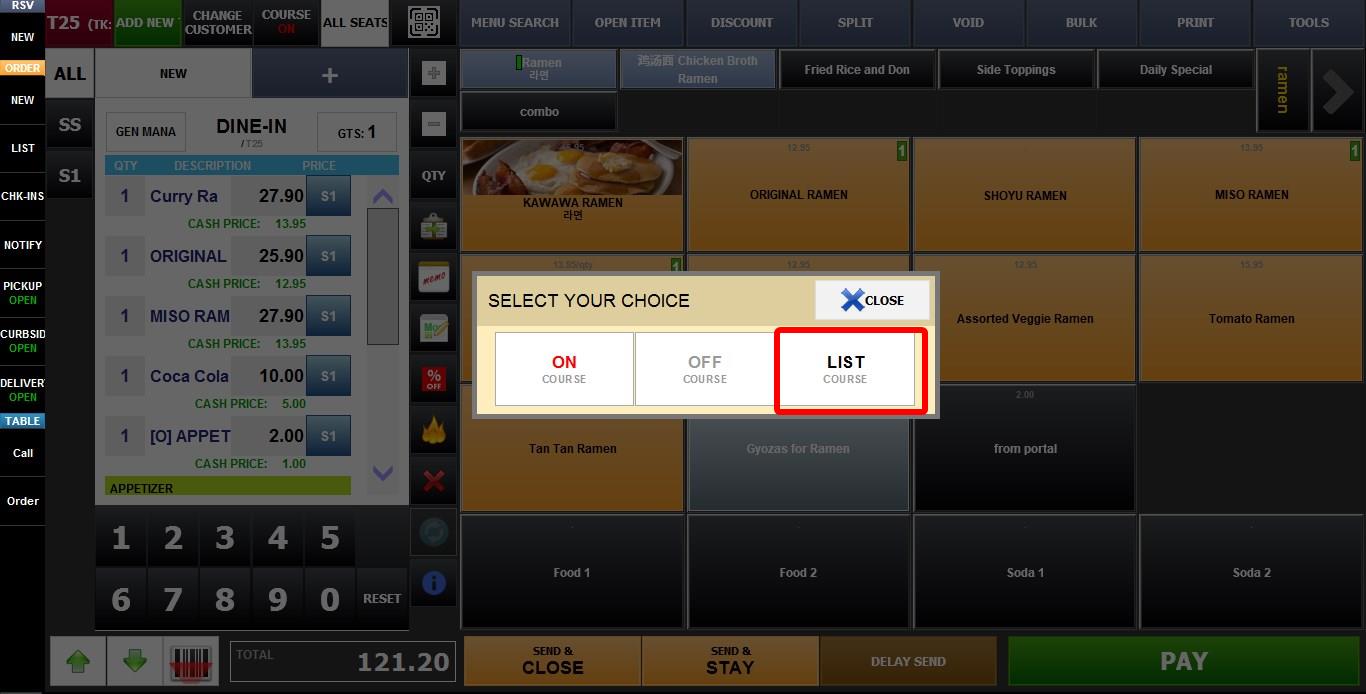
COURSE ASSIGNMENT SCREEN
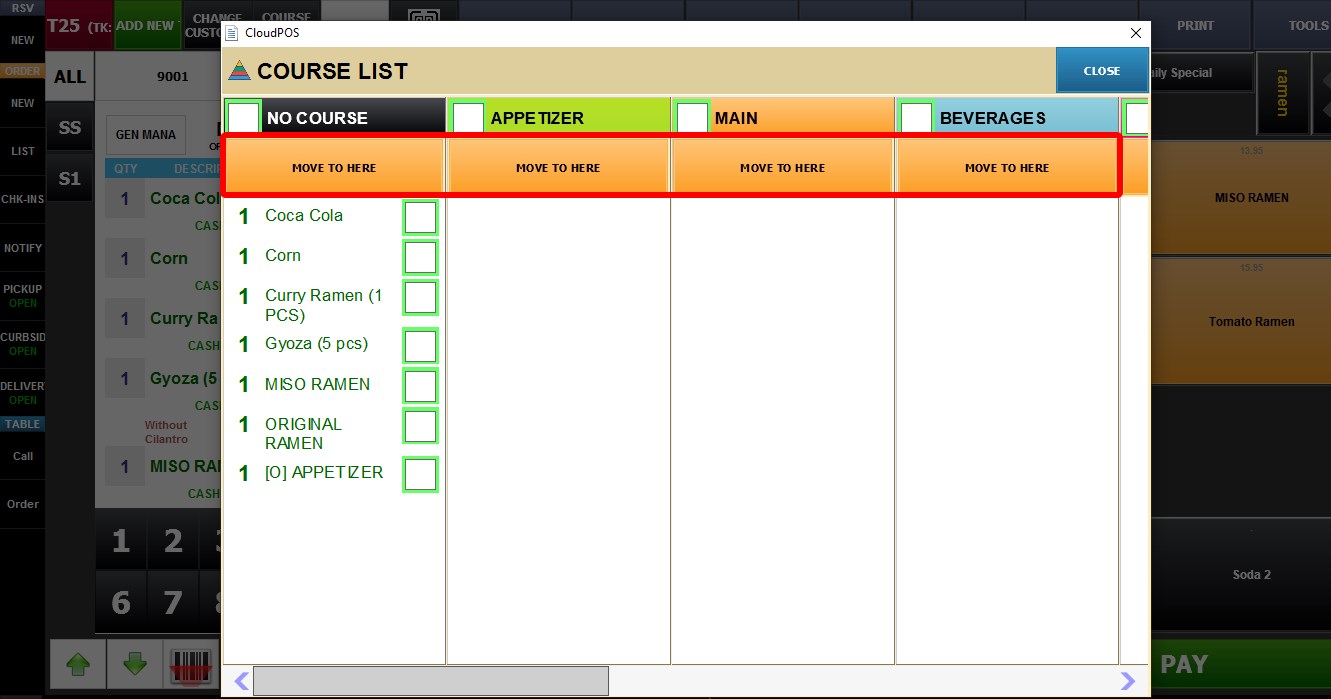
After pressing LIST, a new screen will appear showing all configured course names (e.g Entree, Drinks, etc) as separate columns.
A NO COURSE column will also appear. By default, all newly ordered items will initially be placed in this column until they are assigned to a course.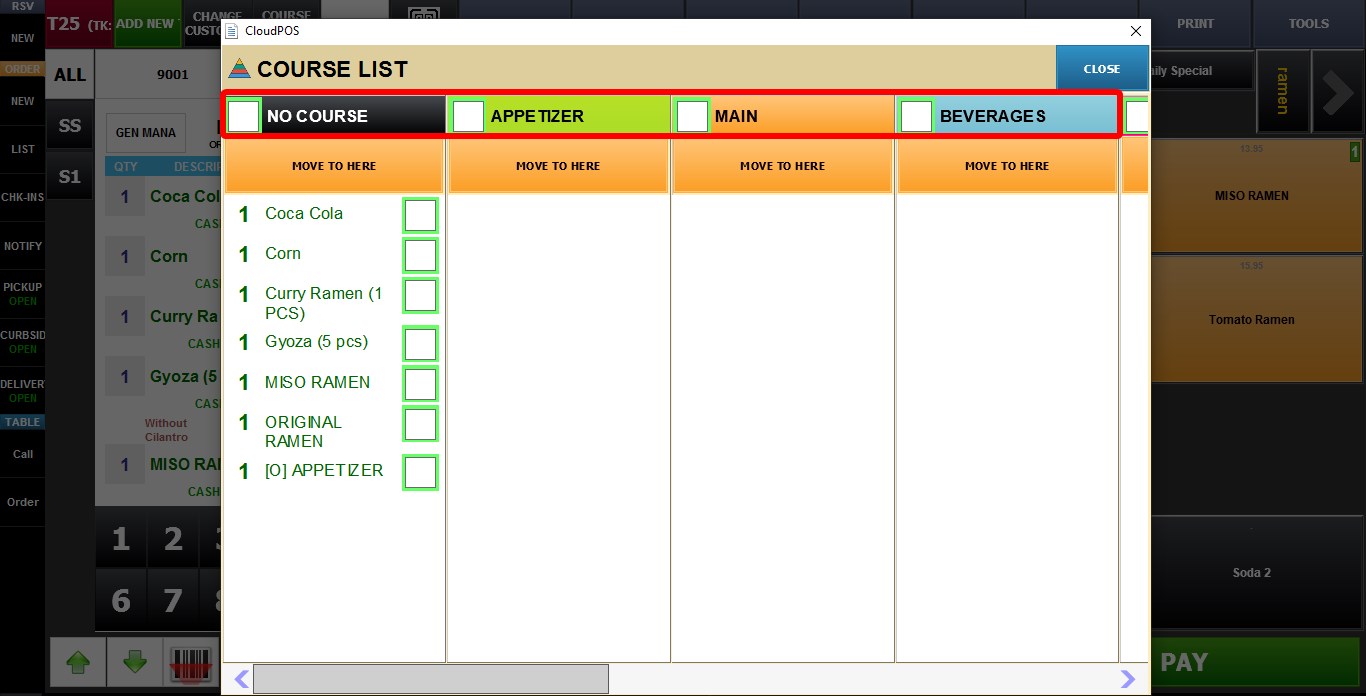
Hint: You can set automatic course assignment for categories in the Menu Edit. See the Courses Categories KB to learn more.
MOVING ITEMS BETWEEN COURSES
To move items into a course. Select individual items using the checkbox next to each item. Or select all items in a column using the checkbox next to the course name
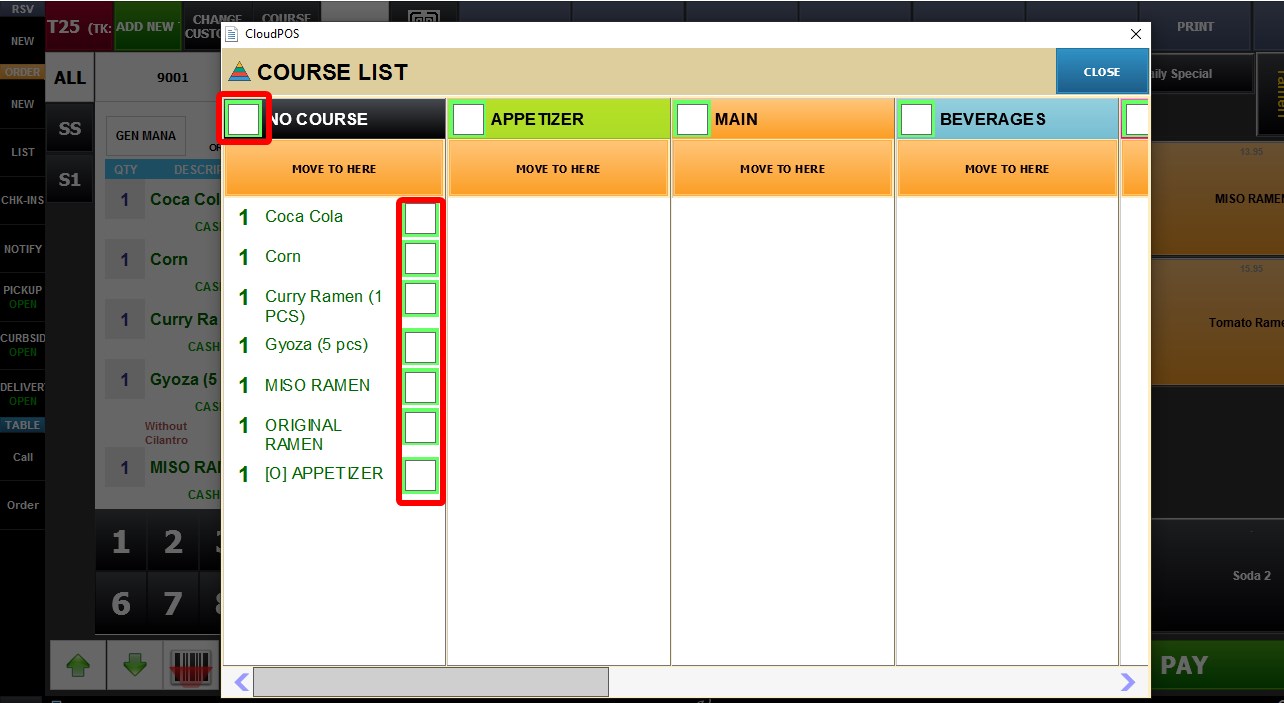
After selecting items, press MOVE TO HERE under the desired course column.
The selected items will now appear under the chosen course.
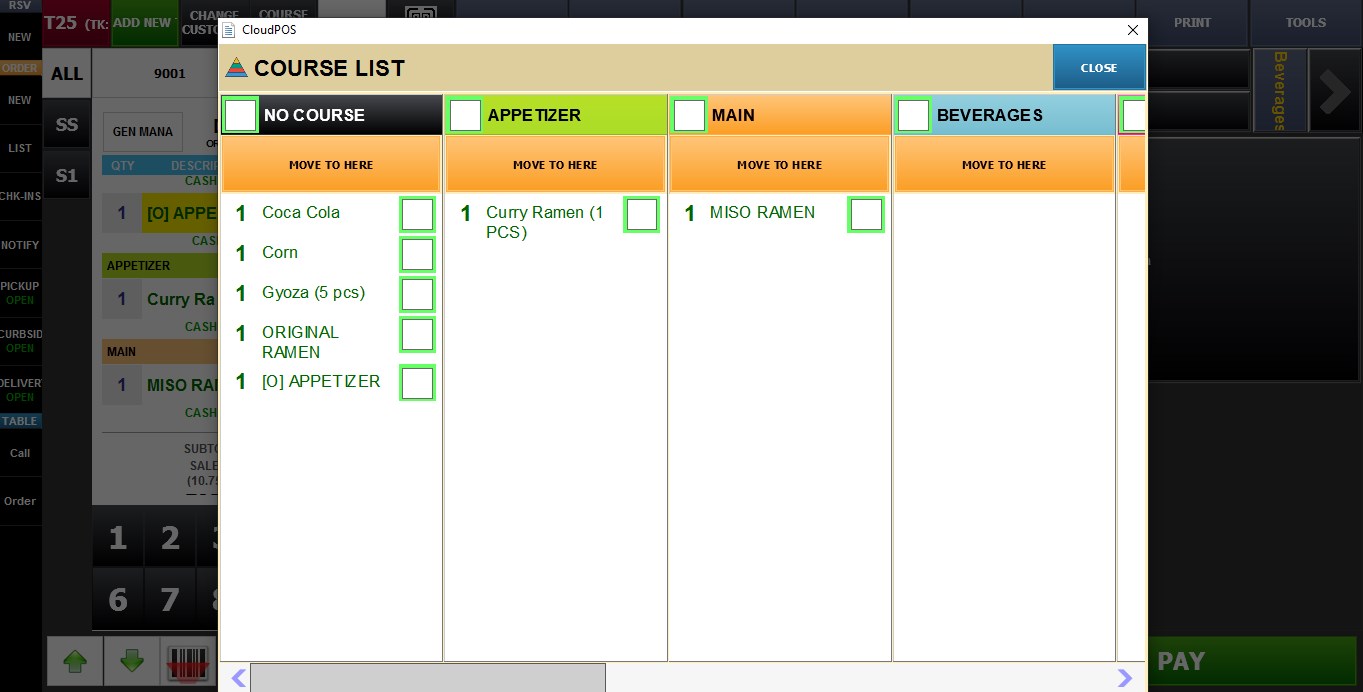
After organizing the items, press CLOSE to save and return to the order screen.
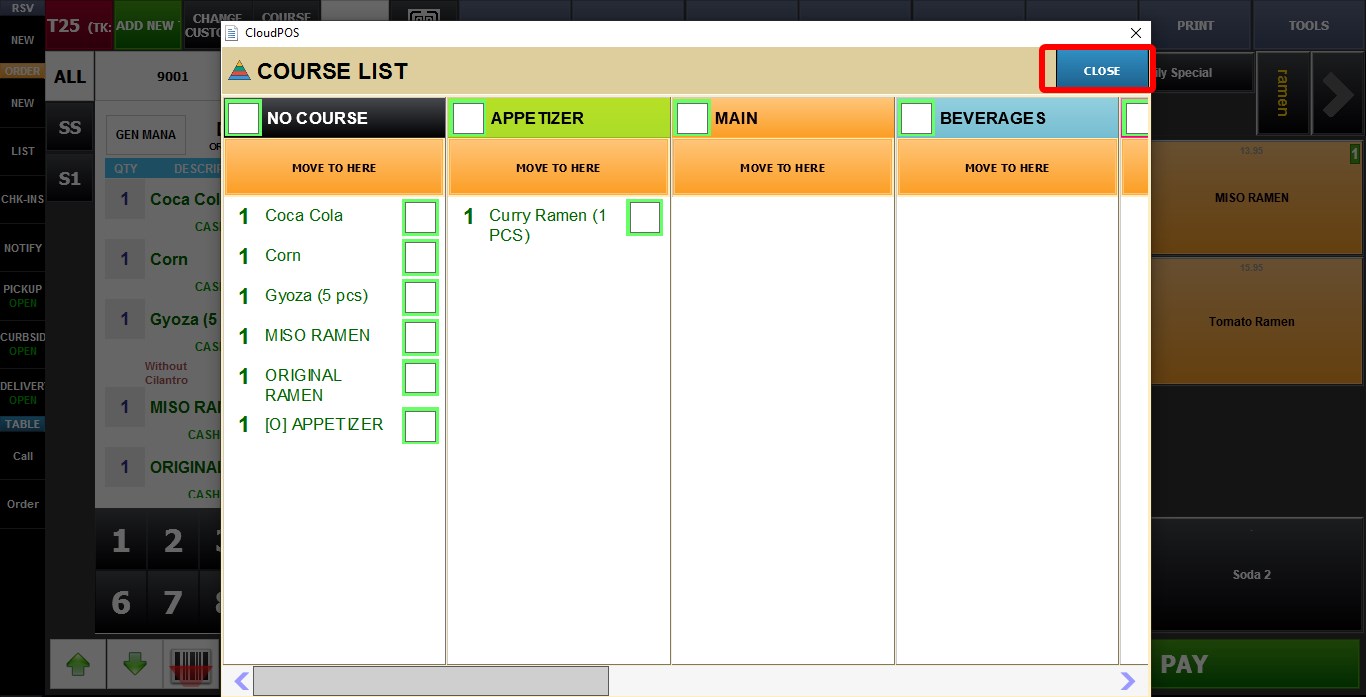
The order screen will now display the course dividers separating the items by course.