POS Setting for Otter
These settings control how orders received through the Otter integration are processed, matched with your POS menu, and routed to kitchen printers. Configure these options to determine how incoming online orders are handled before they reach the kitchen.
MENU > SETTINGS > MENU11 > OTTER > ORDER
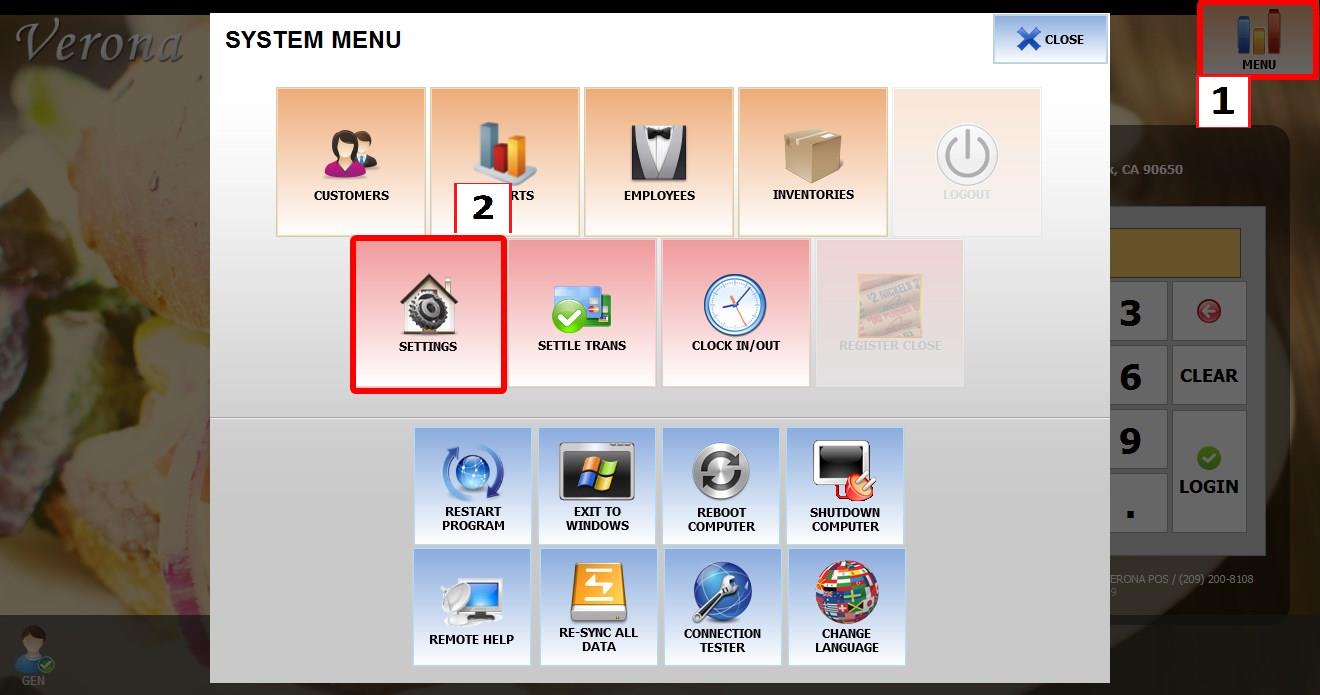
From the MAIN SCREEN, click MENU, then select SETTINGS.
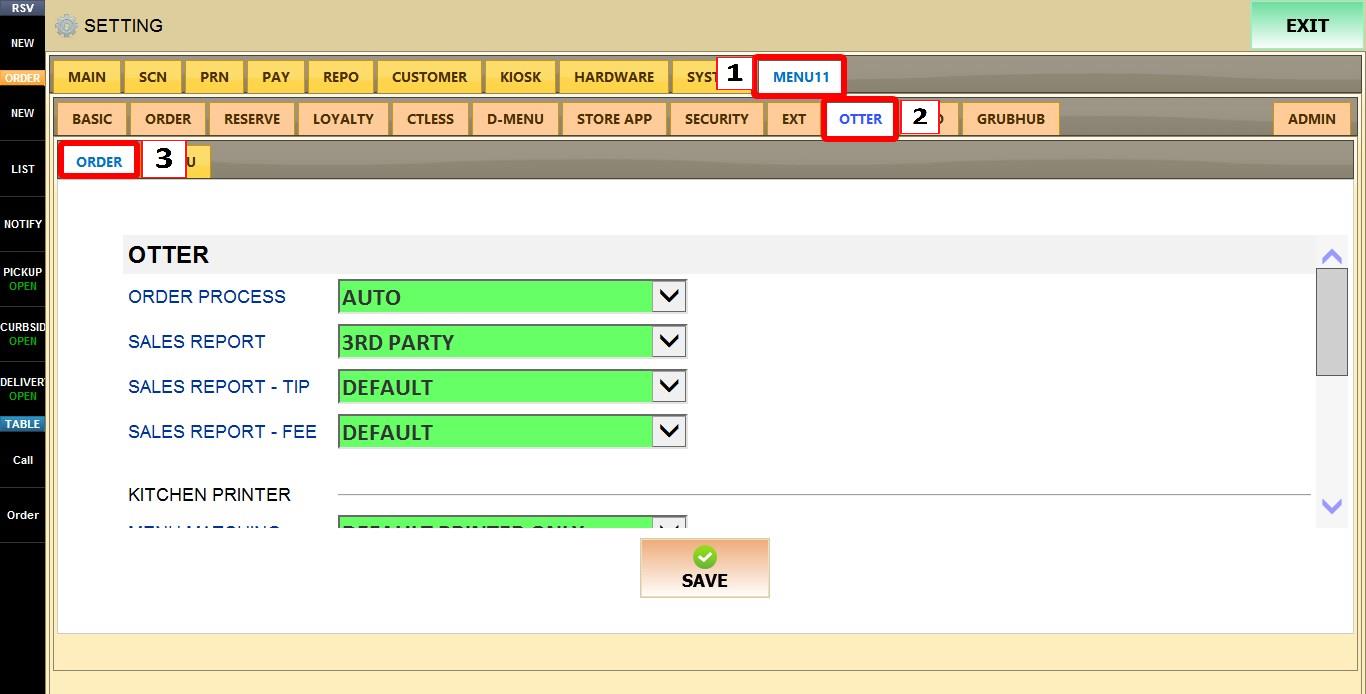
Open the MENU11 tab, then OTTER, then select ORDER.

ORDER PROCESS
Determines how incoming Otter orders are processed.
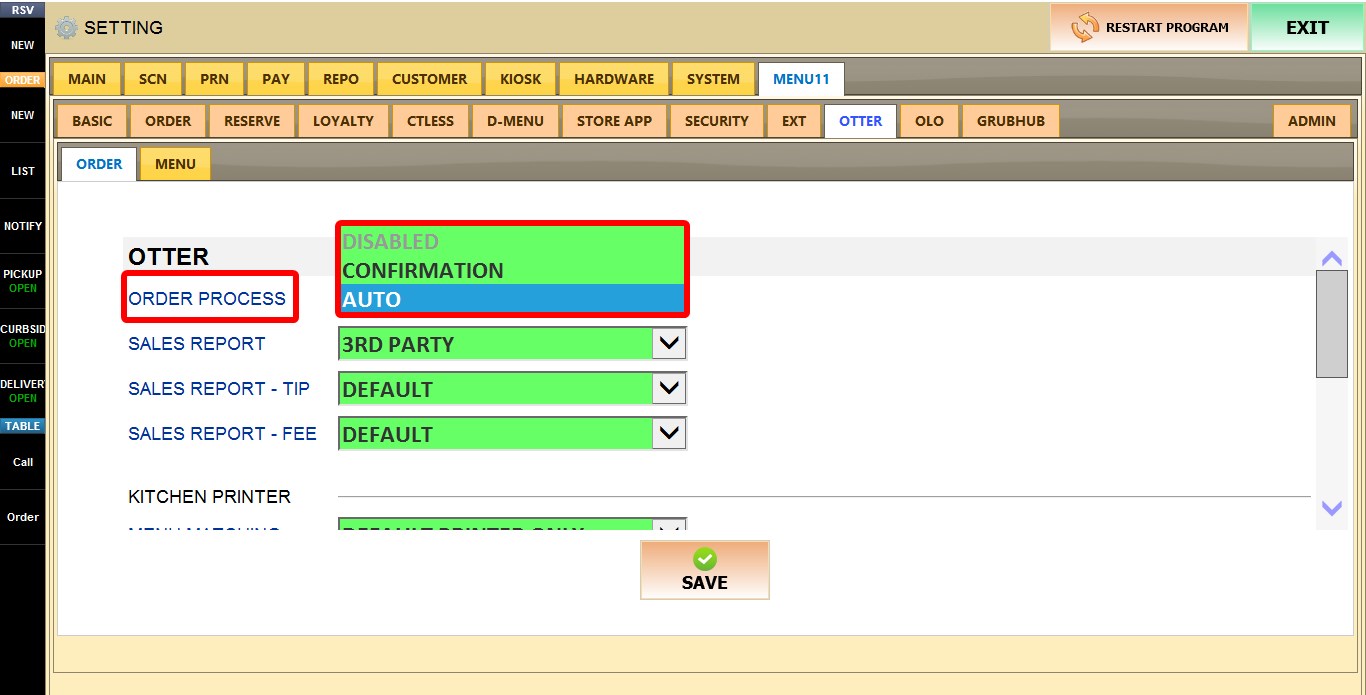
1. DISABLED: Disables Otter order processing.
2. CONFIRMATION: Requires a user to manually confirm each incoming order before it is processed.
3. AUTO: Automatically processes incoming orders without requiring confirmation.
KITCHEN PRINTER
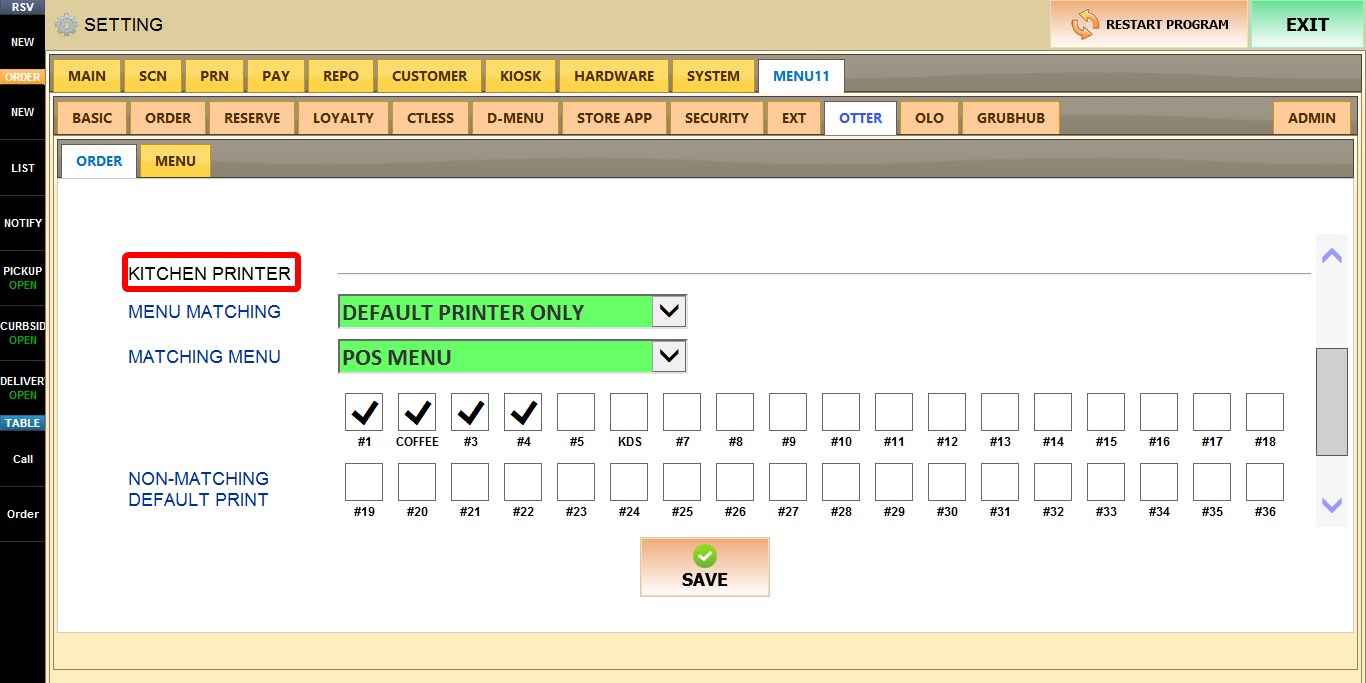
MENU MATCHING
Determines how kitchen tickets are routed when incoming Otter items are matched to POS menu items.
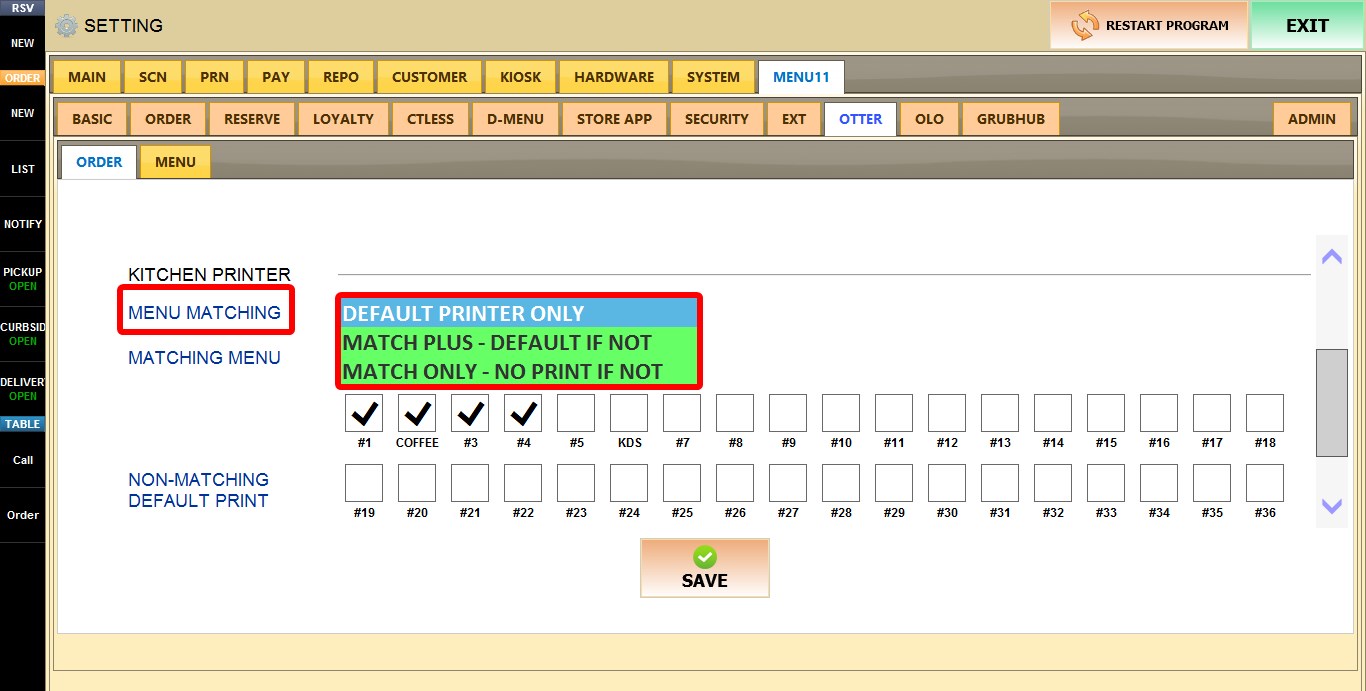
1. DEFAULT PRINTER ONLY: Prints all items to the configured default kitchen printer.
2. MATCH PLUS - DEFAULT IF NOT: Prints matched items to their assigned kitchen printer. If an item cannot be matched, it prints to the default kitchen printer.
3. MATCH ONLY - NO PRINT IF NOT: Prints only matched items. Items that cannot be matched are not printed.
MATCHING MENU
Determines which menu is used as the primary reference when matching incoming Otter orders.
1. POS MENU: Uses the POS menu as the primary source for item matching.
2. OTTER MENU > POS MENU: Uses the Otter menu first, then falls back to the POS menu if a matching item cannot be found.
NON-MATCHING DEFAULT PRINT
Determines which kitchen printer(s) receive items that cannot be matched to the POS menu.
Select one or more kitchen printers using the available checkboxes. Any unmatched items will be printed to the selected printer(s).

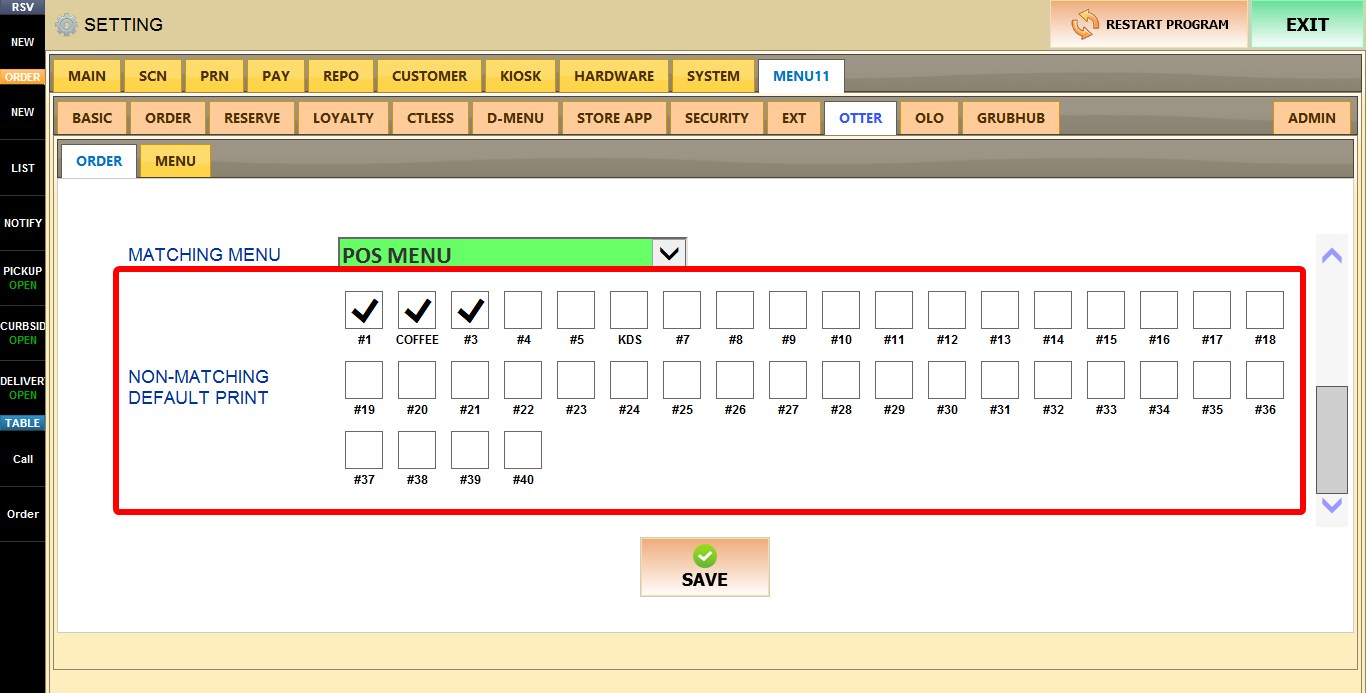
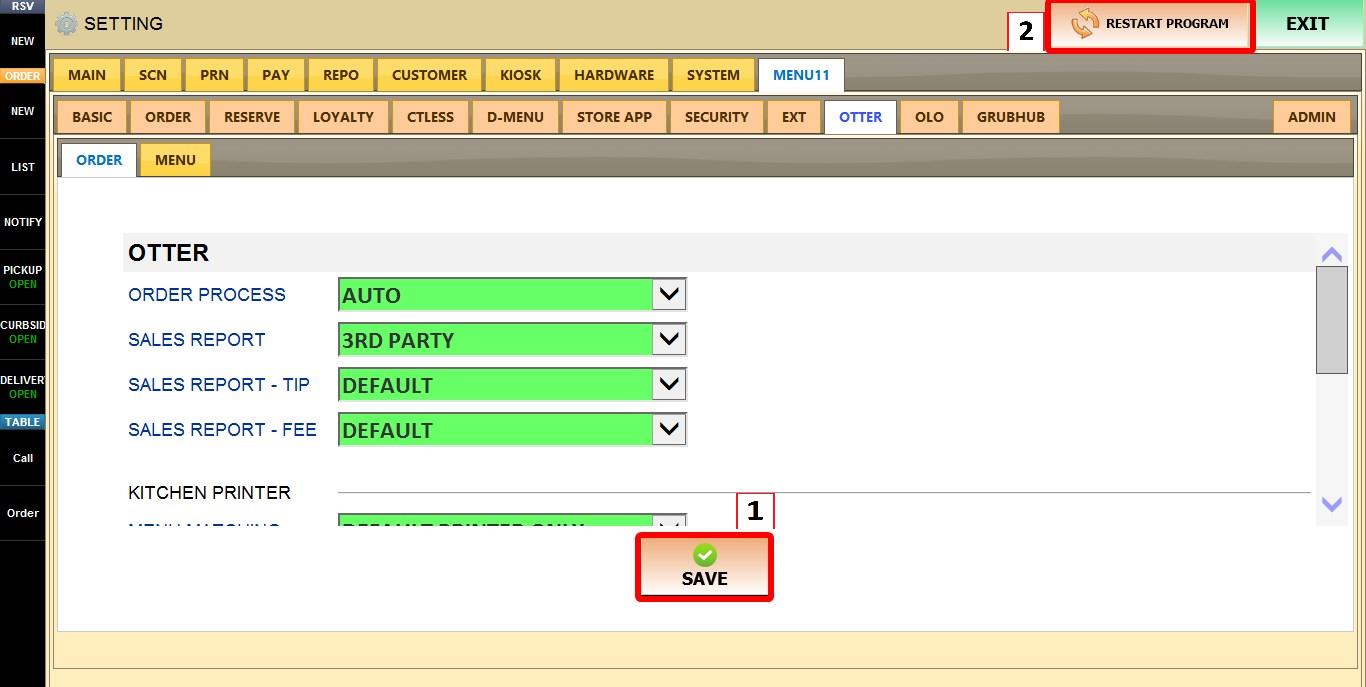
After you are done configuring the settings, click SAVE, then RESTART THE PROGRAM for the changes to take effect.