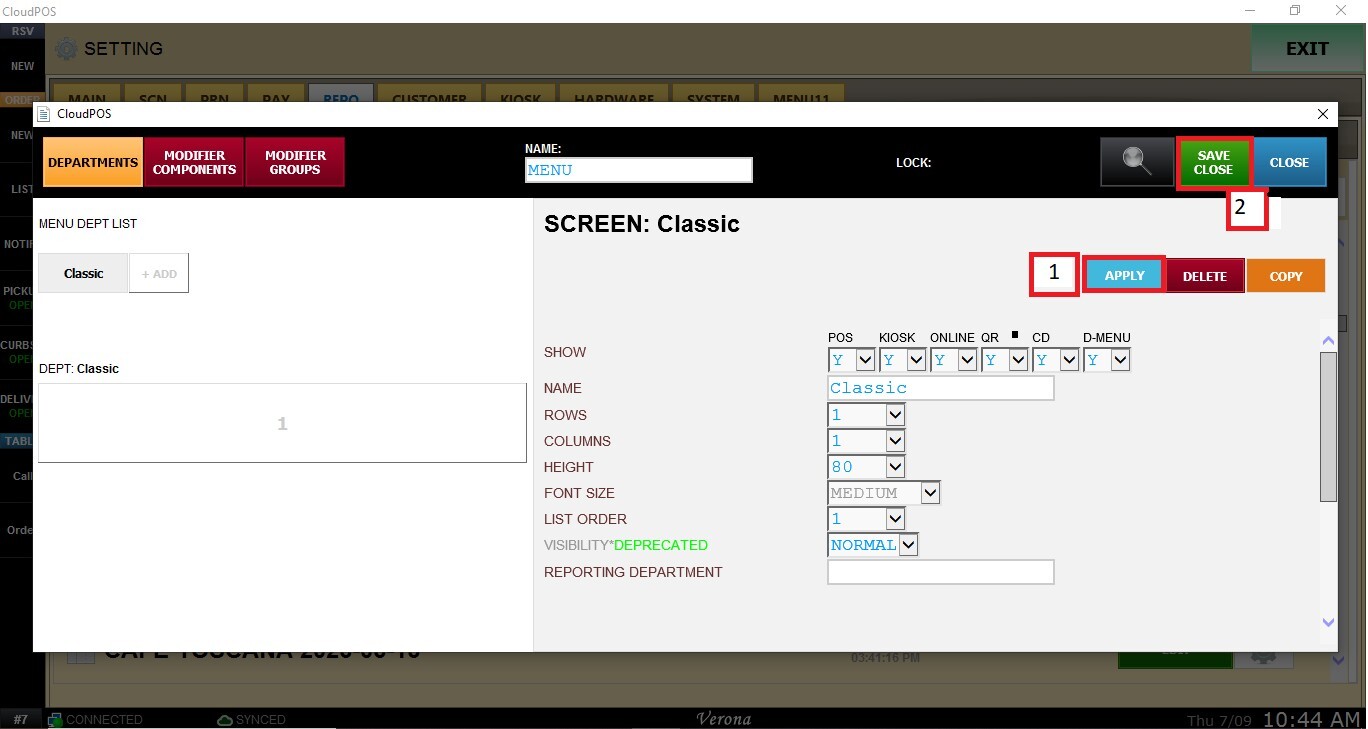
Department Display and Configuration
This section allows you to customize how a Department is displayed throughout the system. From here, you can control where the department appears, customize its name and appearance, define its display order, and assign it to a reporting department for sales reporting purposes.
Main Screen > MENU > SETTINGS > REPOSITORY > EDIT
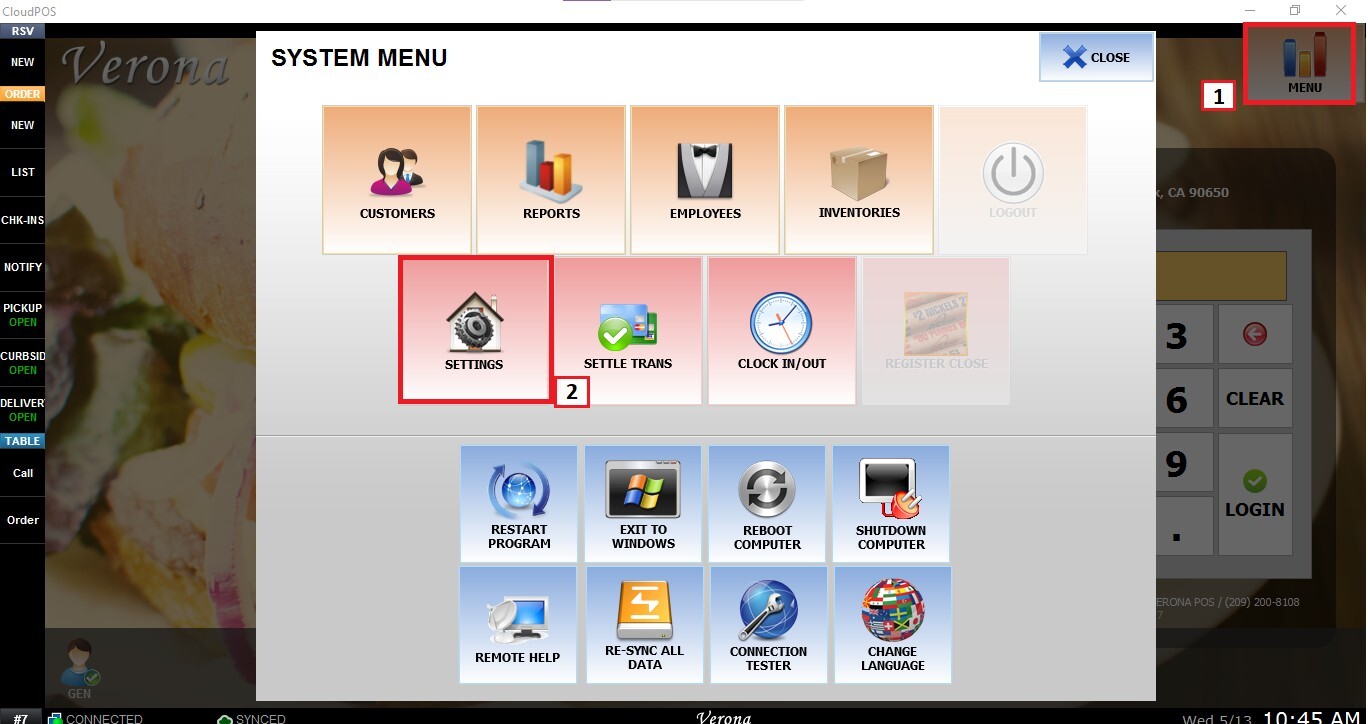
From the Main Screen, go to MENU and then SETTINGS.
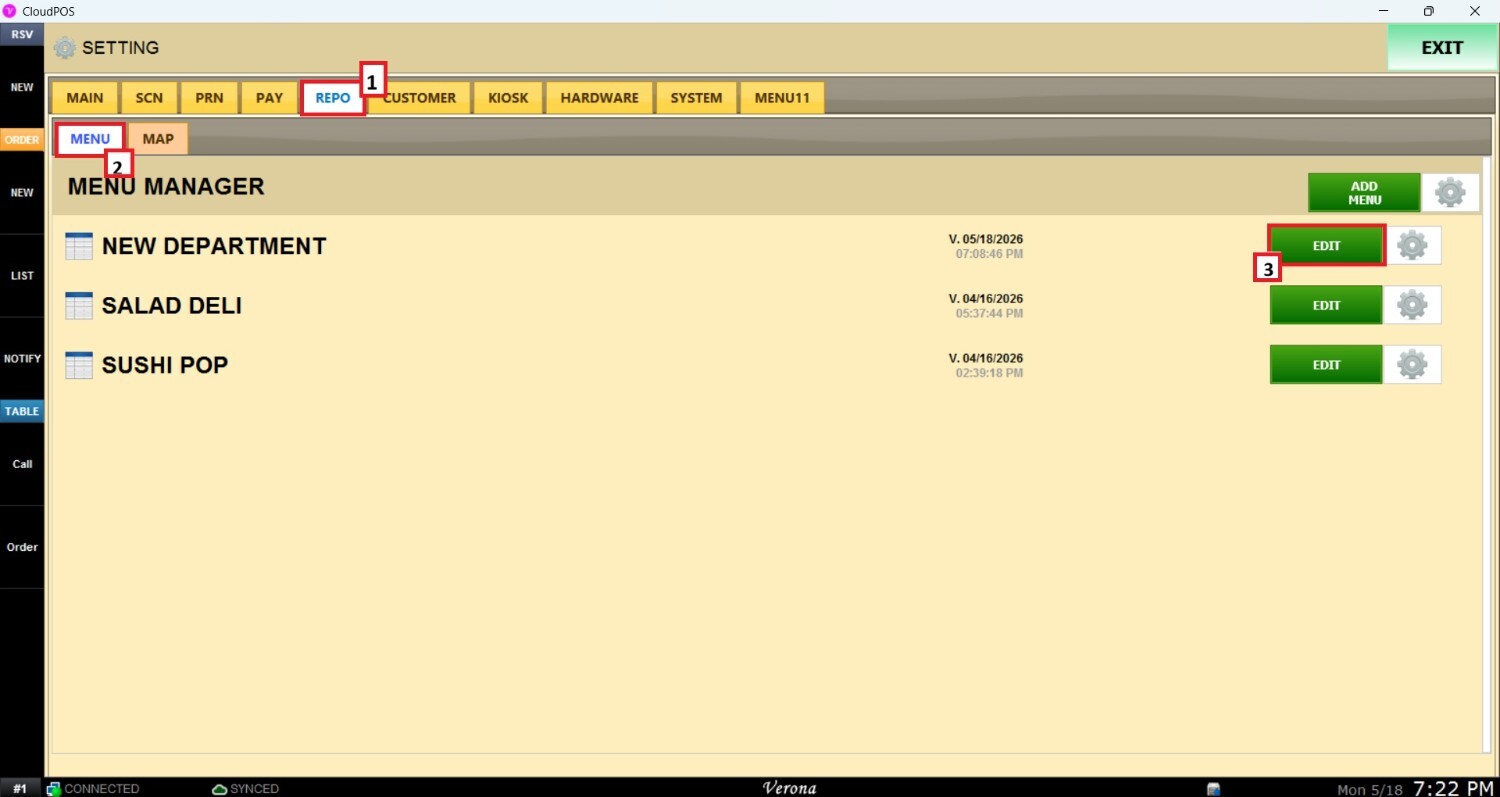
On the settings screen, click on REPO (REPOSITORY), then MENU, and EDIT on the right side of the menu to modify.
Configuring a Department
Select a department
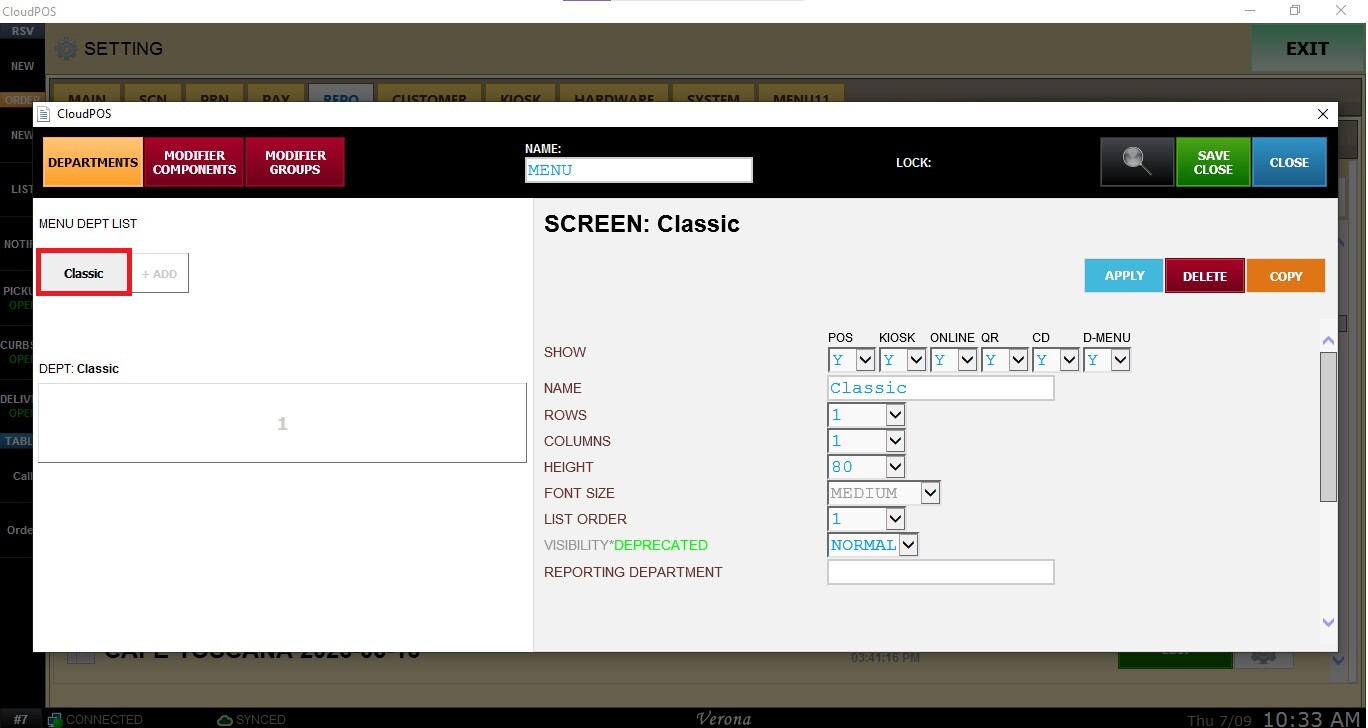
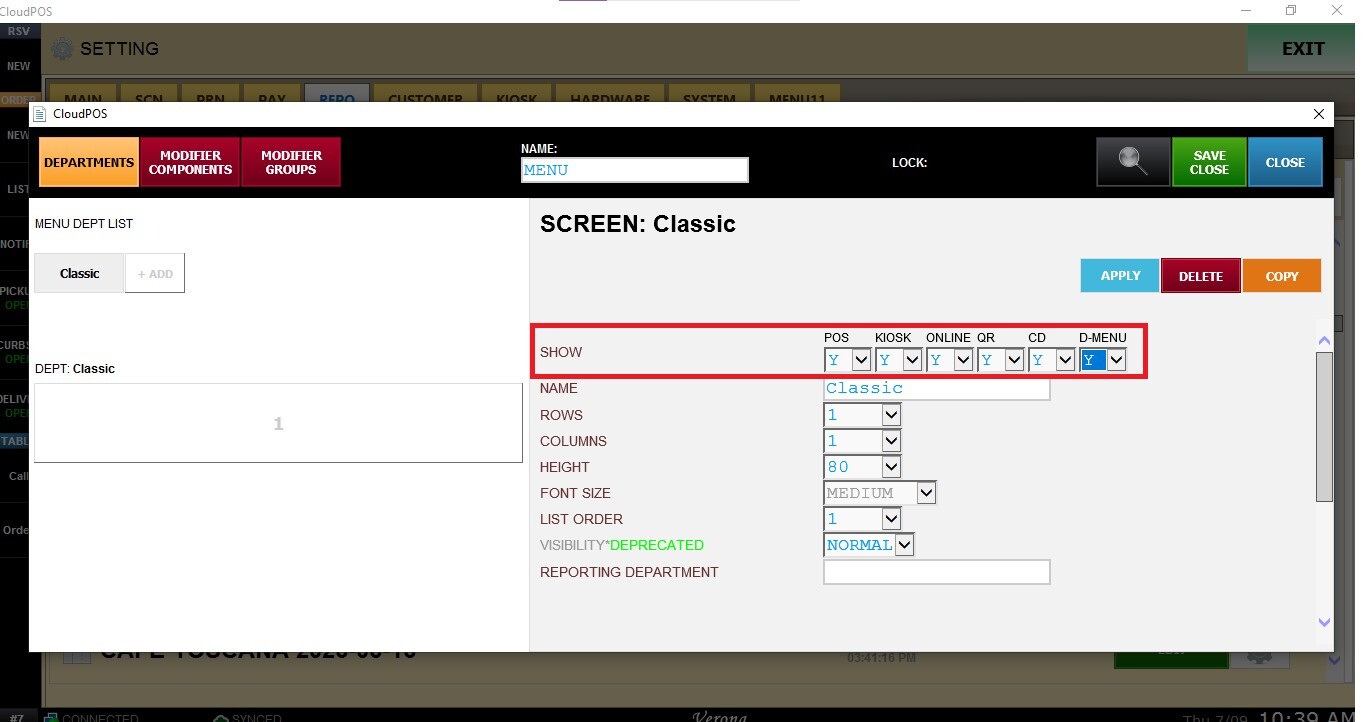
SHOW: determines where the department will be available throughout the system.
For each destination, select:
- Y (Yes): Displays the department in the selected module.
- N (No): Hides the department from the selected module.
Available destinations include:
- POS: Displays the department in the Point of Sale.
- KIOSK: Displays the department in Self-Service Kiosk.
- ONLINE: Displays the department on the Online Ordering website.
- QR: Displays the department for QR Ordering.
- CD: Displays the department in the Customer Display.
- D-MENU: Displays the department in the Digital Menu.
HEIGHT: Defines the height of the department button displayed on the ordering screen.
FONT SIZE: Select the font size used to display the department button.
LIST ORDER: Defines the position of the department within the department list.
REPORTING DEPARTMENT: Assign the department to a Reporting Department for sales reporting and analytics.
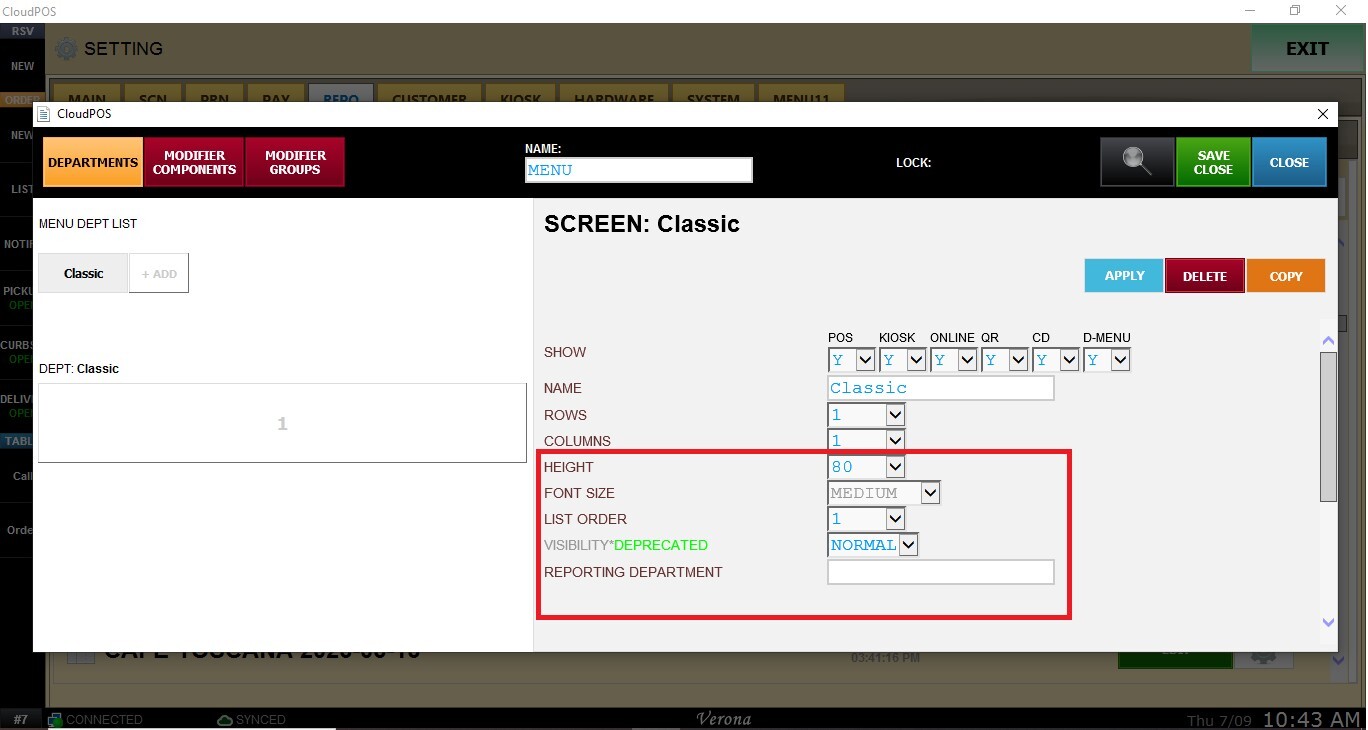
Click APPLY and SAVE AND CLOSE to save the configuration.