[Verona] When POS speed gets slower
If Verona POS is running slowly, experiencing connection issues, or failing to communicate correctly with CloudPOS or payment services, perform the maintenance steps below before attempting more advanced troubleshooting.
PREPARE THE SYSTEM
Run a credit card settlement. Refer to the CREDIT CARD SETTLEMENT guide.
Close the Verona POS program before continuing.
VERIFY INTERNET CONNECTION
Verify that the POS has an active and stable internet connection.
Refer to the Network Setup Guide to verify the active network profile is set to PRIVATE.
Refer to the Windows Security Settings Guide to temporarily disable WINDOWS DEFENDER, WINDOWS FIREWALL, and SMARTSCREEN.
If a third-party antivirus is installed, temporarily disable it before testing.
RESET INTERNET OPTIONS
Ensure Microsoft Edge is installed and updated to the latest version.
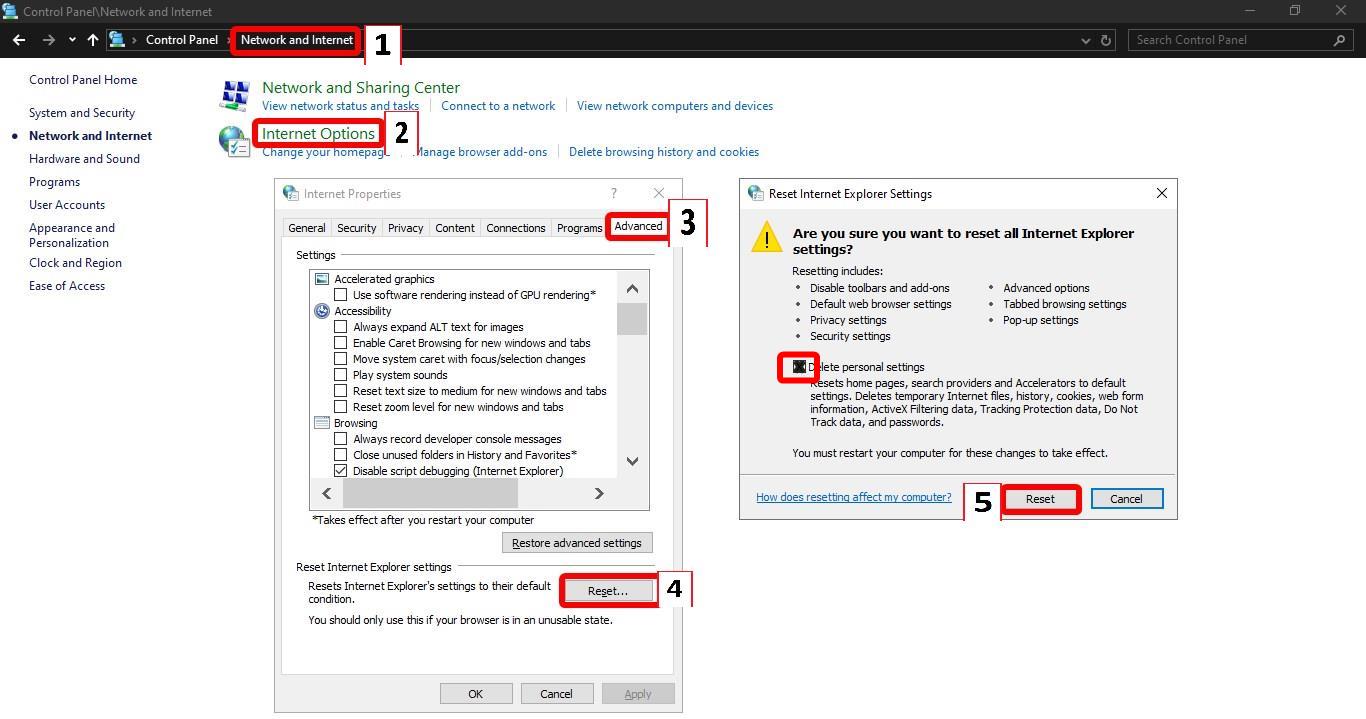
Next open CONTROL PANEL then NETWORK AND INTERNET then INTERNET OPTIONS then ADVANCED, then click RESET.
Enable DELETE PERSONAL SETTINGS checkbox, then click RESET.

DISK MAINTENANCE
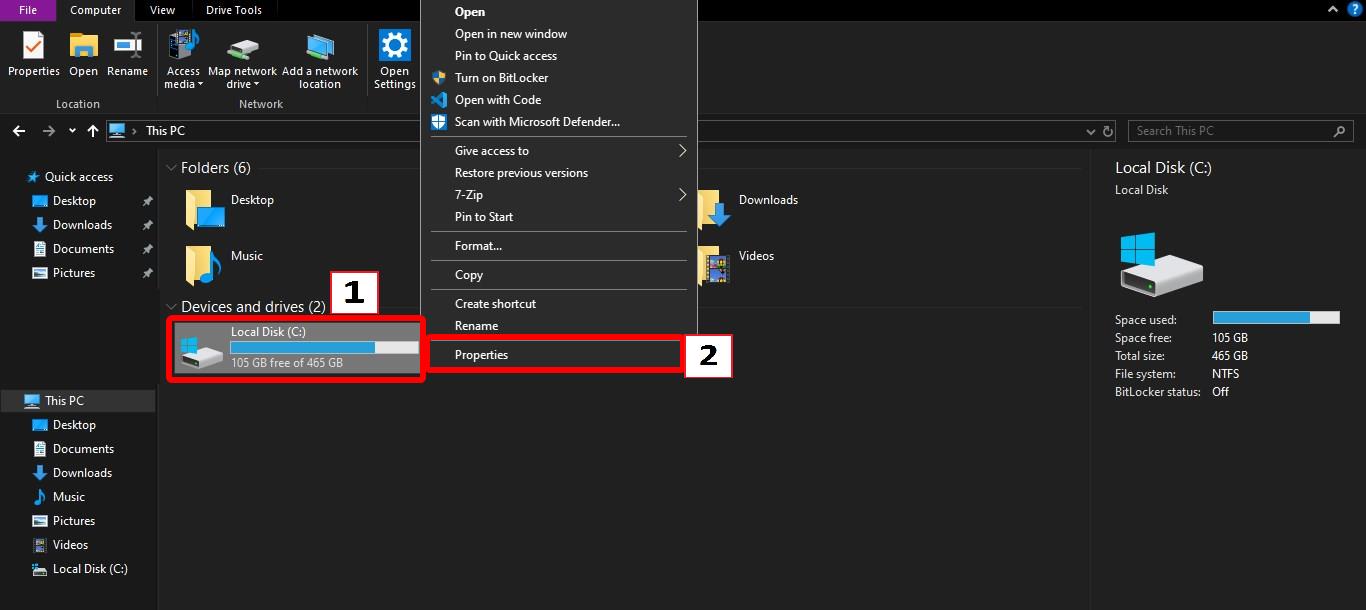
Open FILE EXPLORER, right-click the drive where Verona POS is installed, then select PROPERTIES.
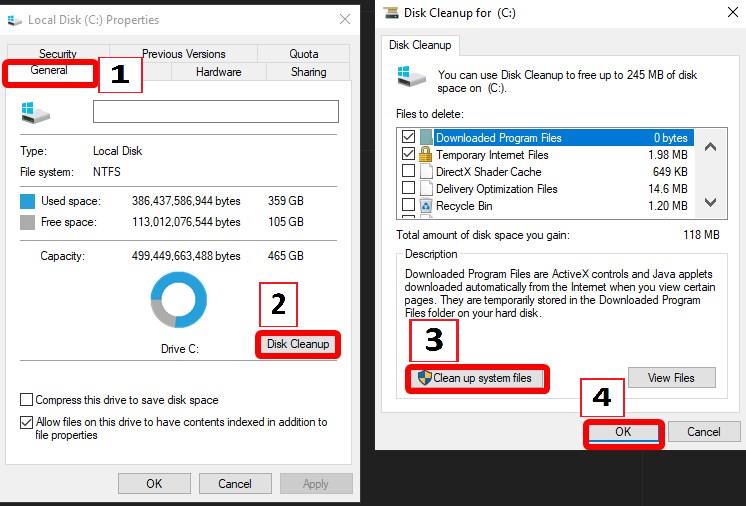
On the GENERAL tab, click DISK CLEANUP, then CLEAN UP SYSTEM FILES.
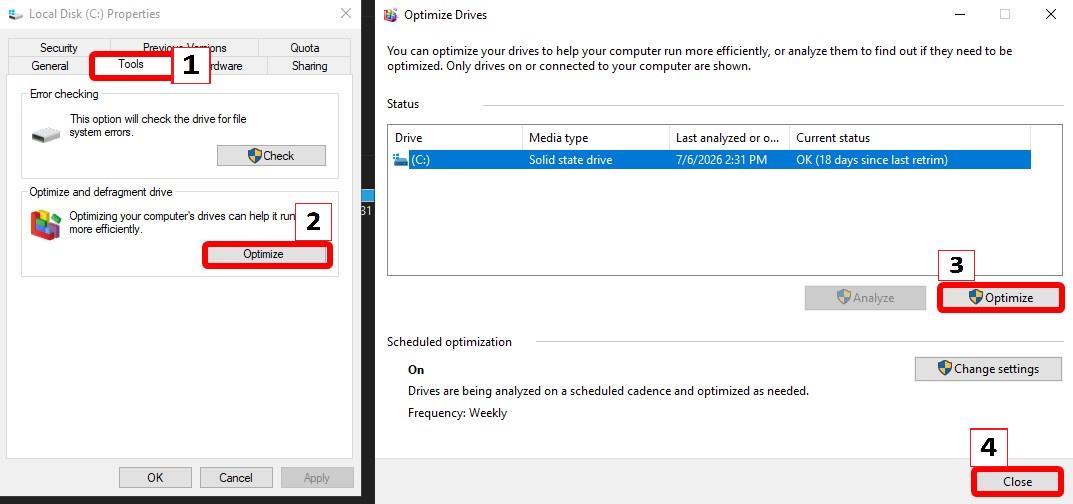
Next open the TOOLS tab, click OPTIMIZE, select the drive, then click OPTIMIZE again, then click CLOSE.
DELETE SALES_CLOSED AND LOG FILES
From the MAIN SCREEN, go to SETTINGS > SYSTEM > STORAGE and note the configured STORAGE PATH.
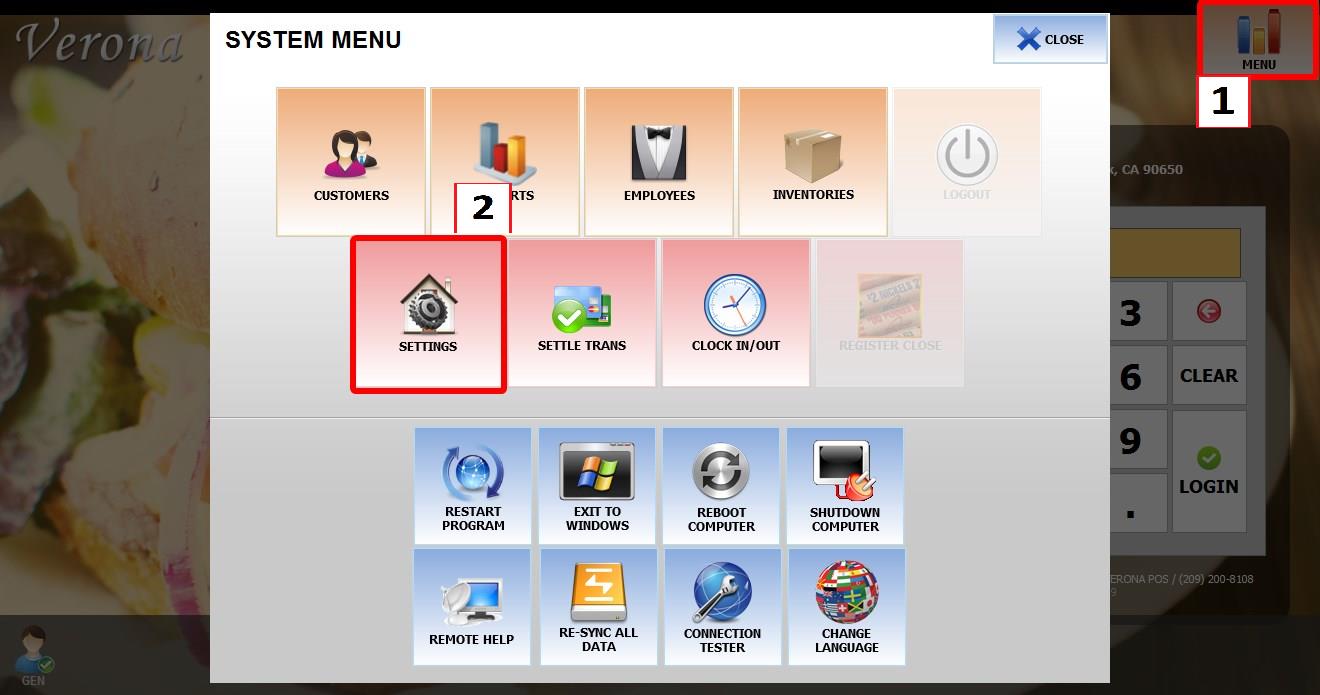
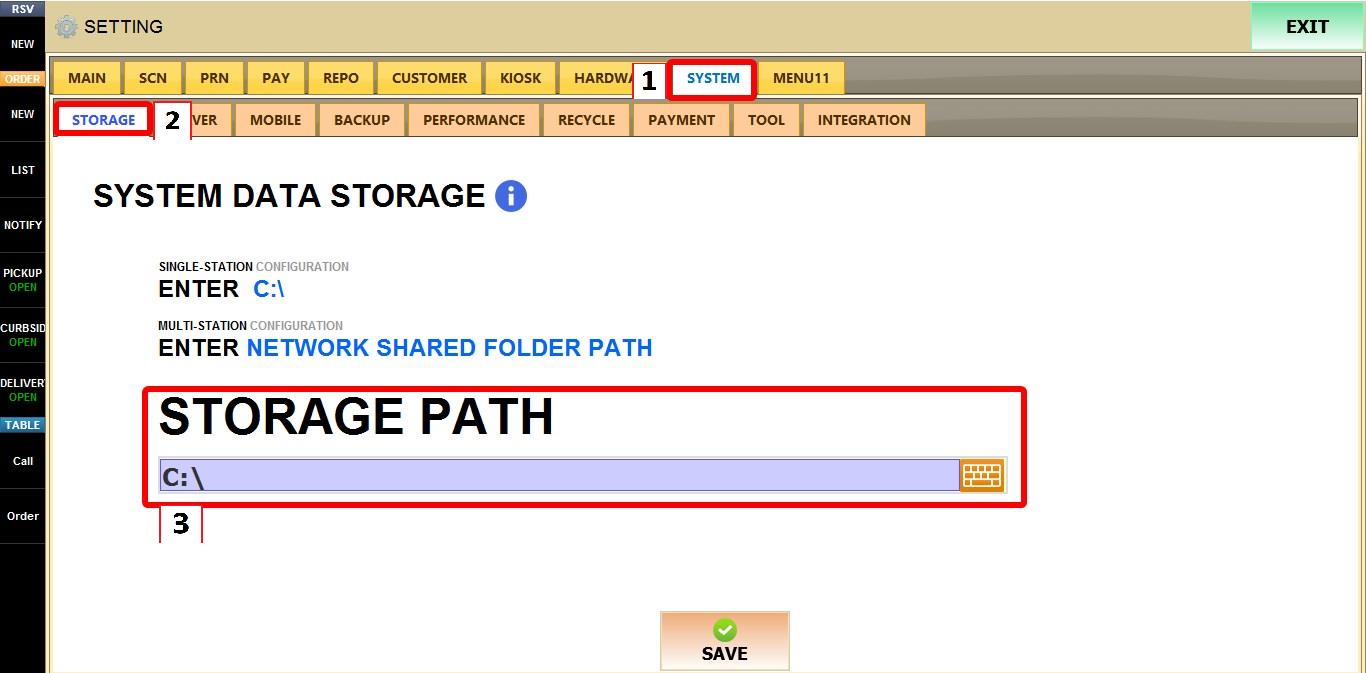
Navigate to that folder using FILE EXPLORER.
Open the SALES_CLOSED folder and delete all files inside. Next go back and Open the LOG folder and delete all files inside.


If the issue persists after completing the maintenance steps above and disk errors continue to occur, the storage drive may be failing. Check the drive's health and replace it if necessary.