Modifier
The Modifier setting of an item sets which modifiers appear when the item is ordered. By default, the item uses the modifiers of its category, but specific modifiers can be assigned to an item.
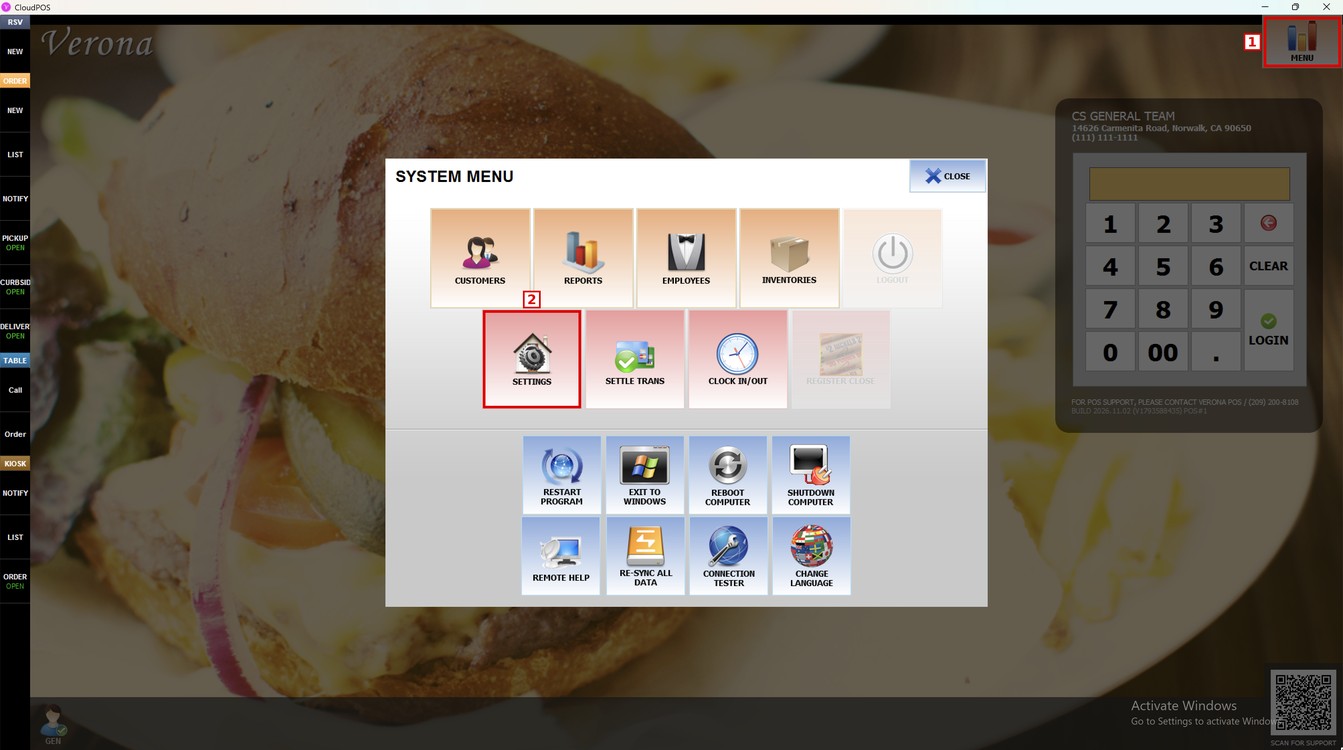
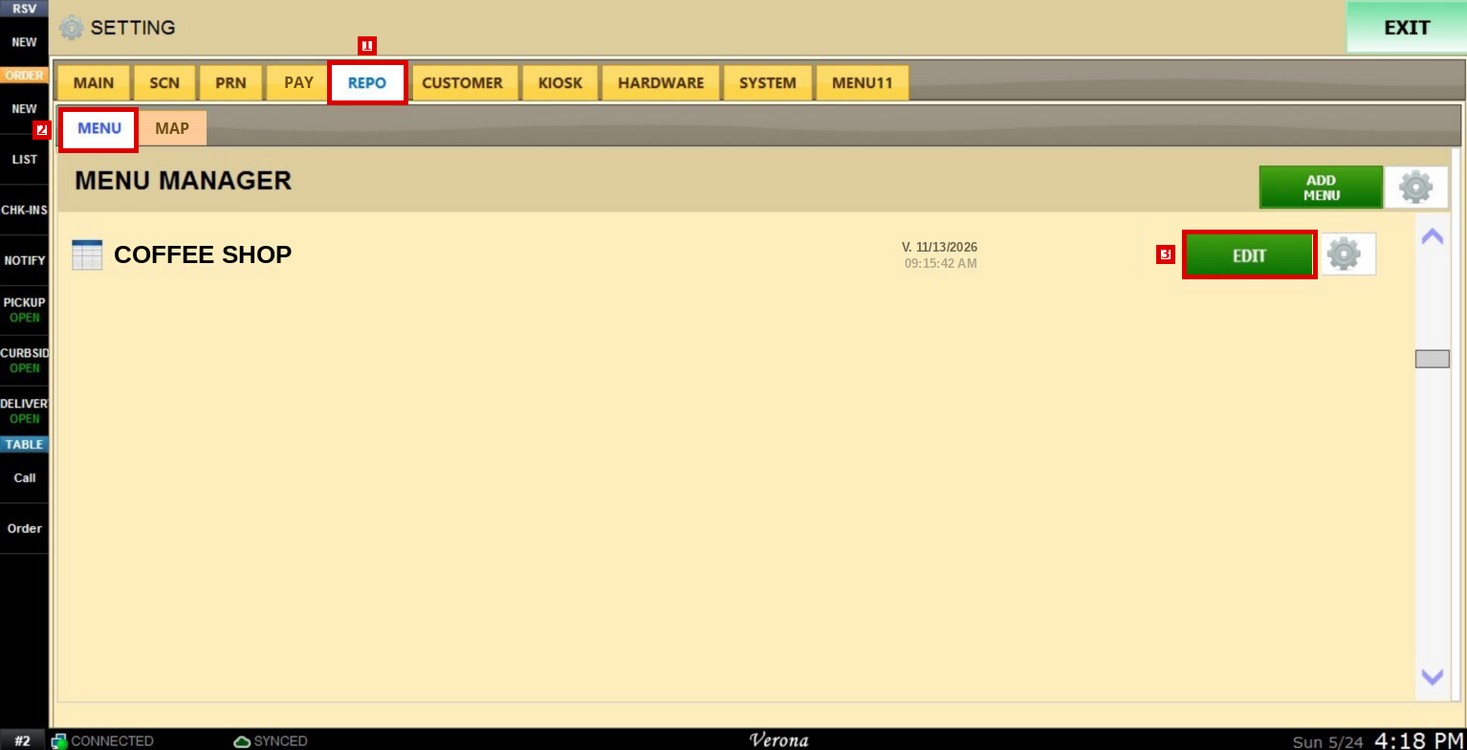
Main Screen> MENU> SETTINGS> REPO> MENU> EDIT> ITEM> MODIFIER
Go to MENU and press SETTINGS.
Press the REPO tab, then MENU, and press EDIT next to the menu.
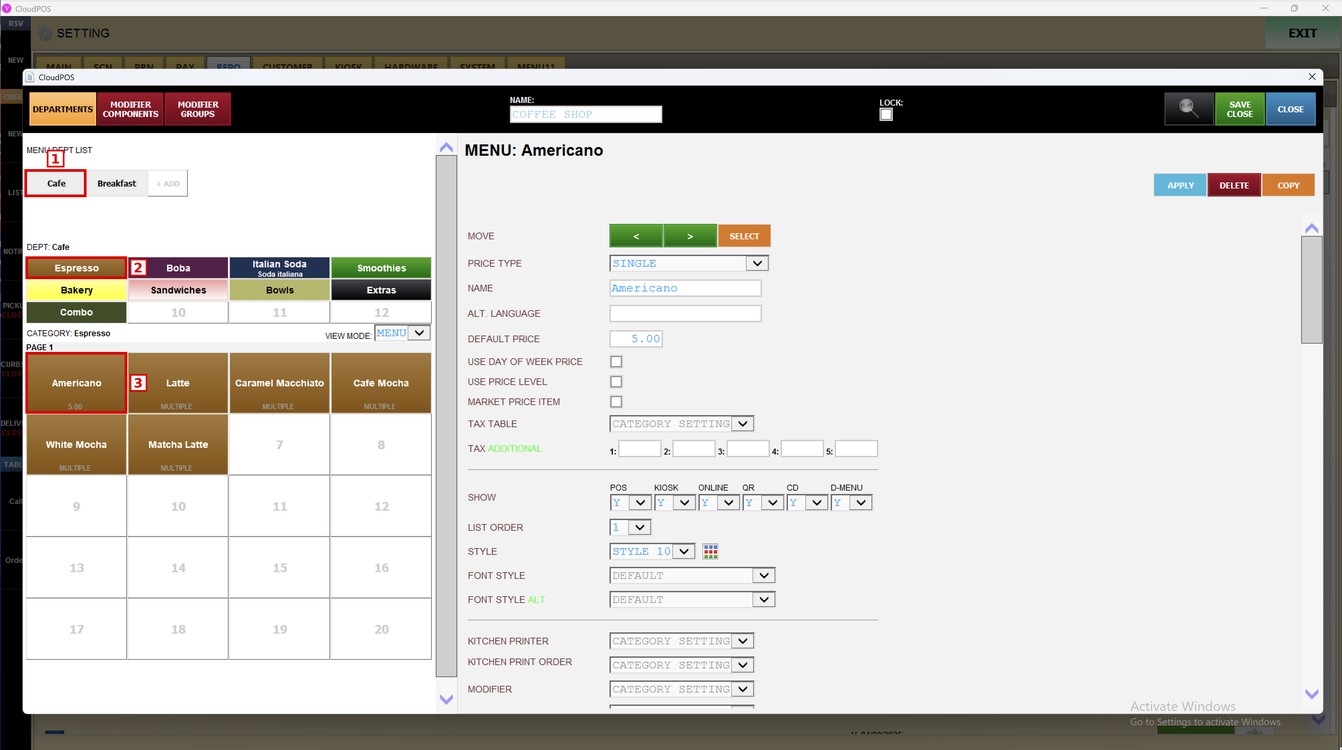
Select the department, the category, and the item.
Modifier:
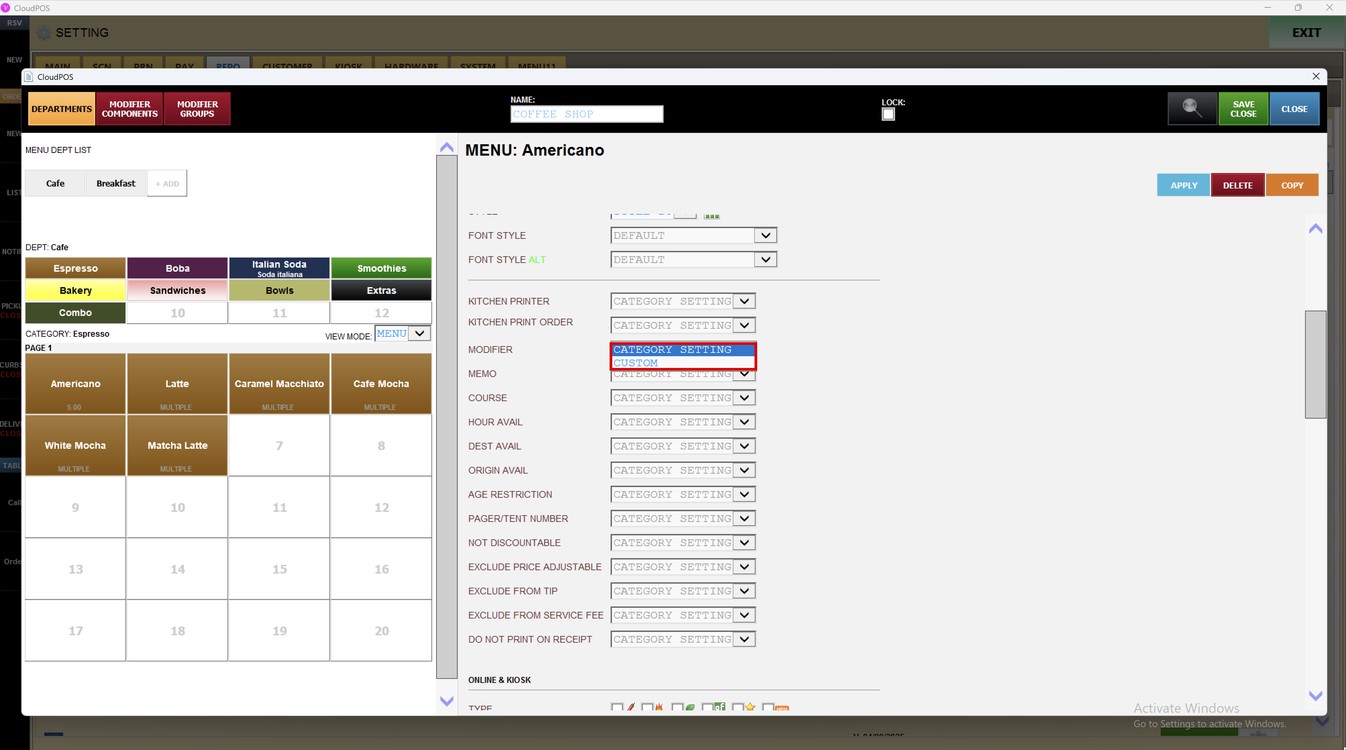
Scroll down to the MODIFIER dropdown.
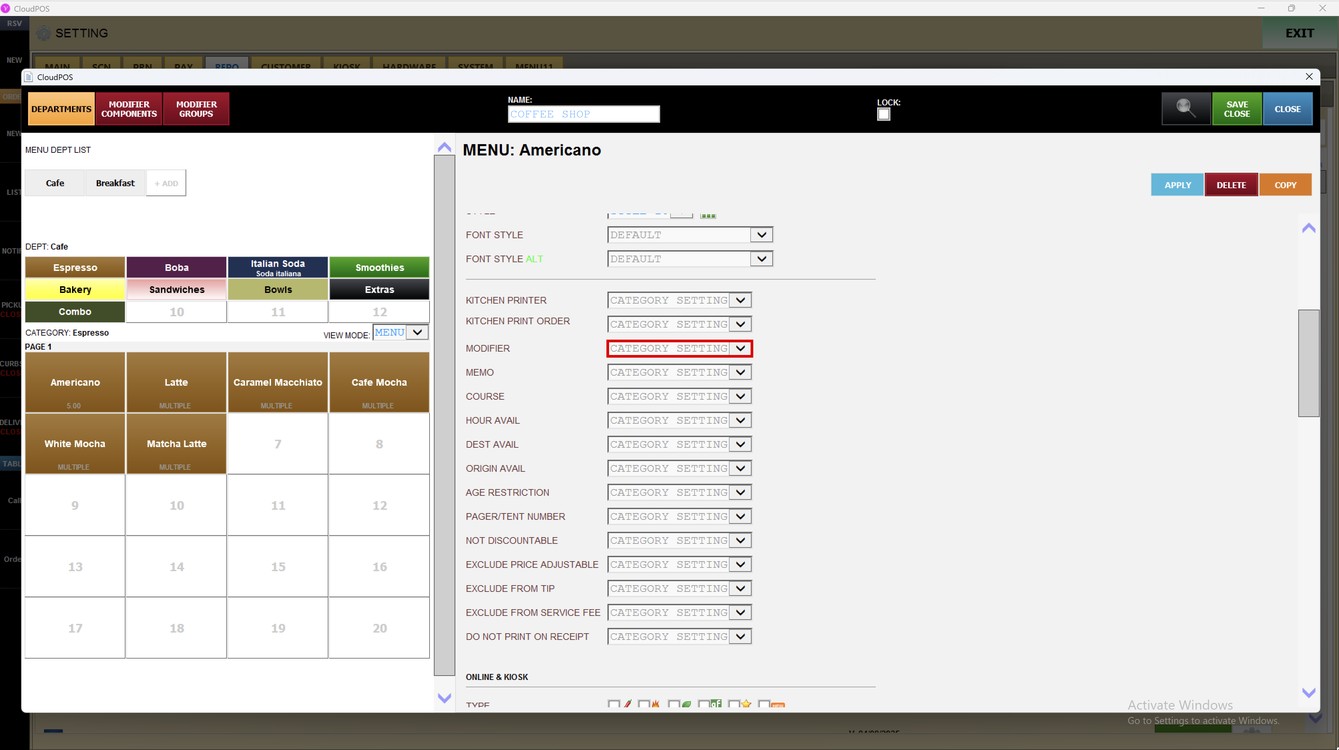
Press the dropdown and select an option.
1. CATEGORY SETTING: The item uses the modifiers set for its category.
2. CUSTOM: The item uses its own modifier group.
Custom Modifier Group:
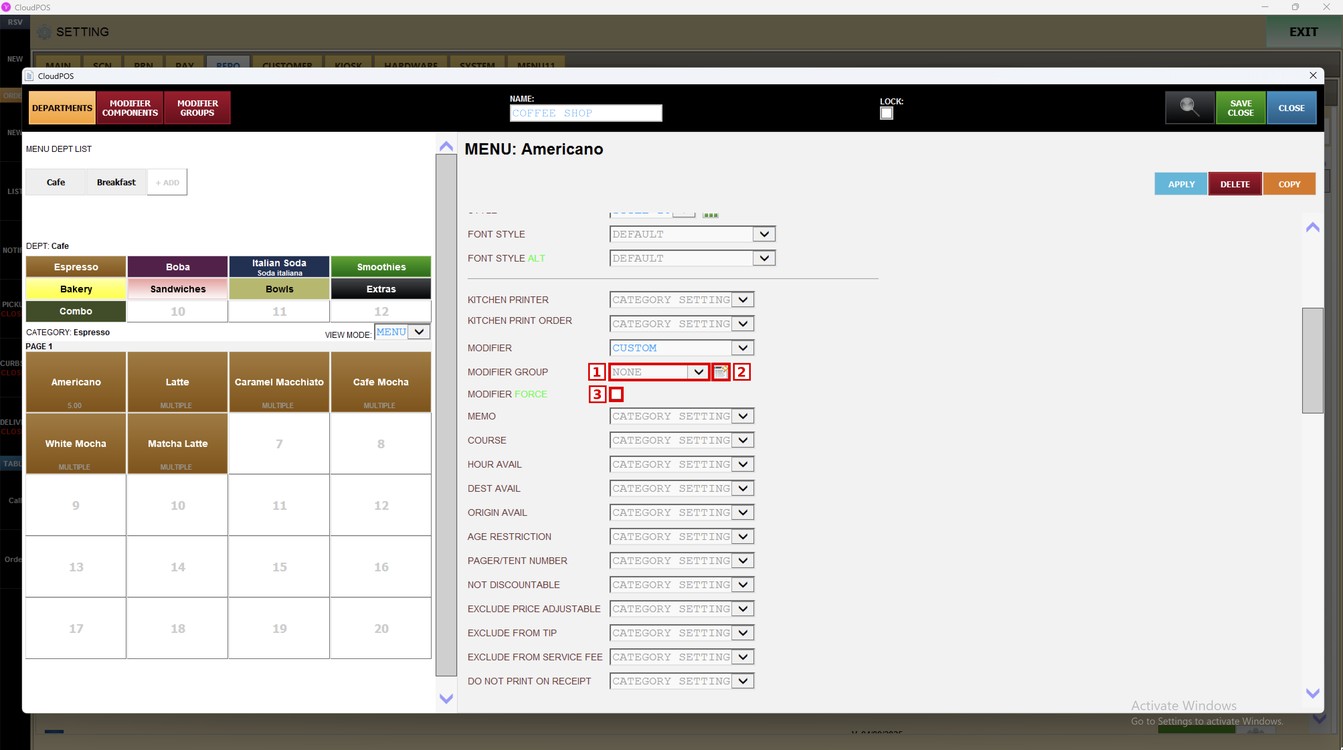
When CUSTOM is selected, the MODIFIER GROUP (1) and MODIFIER FORCE (3) options appear. There are two ways to assign the modifiers to the item: select a modifier group from the MODIFIER GROUP dropdown (1), or press the icon (2) to select the modifier components from a list.
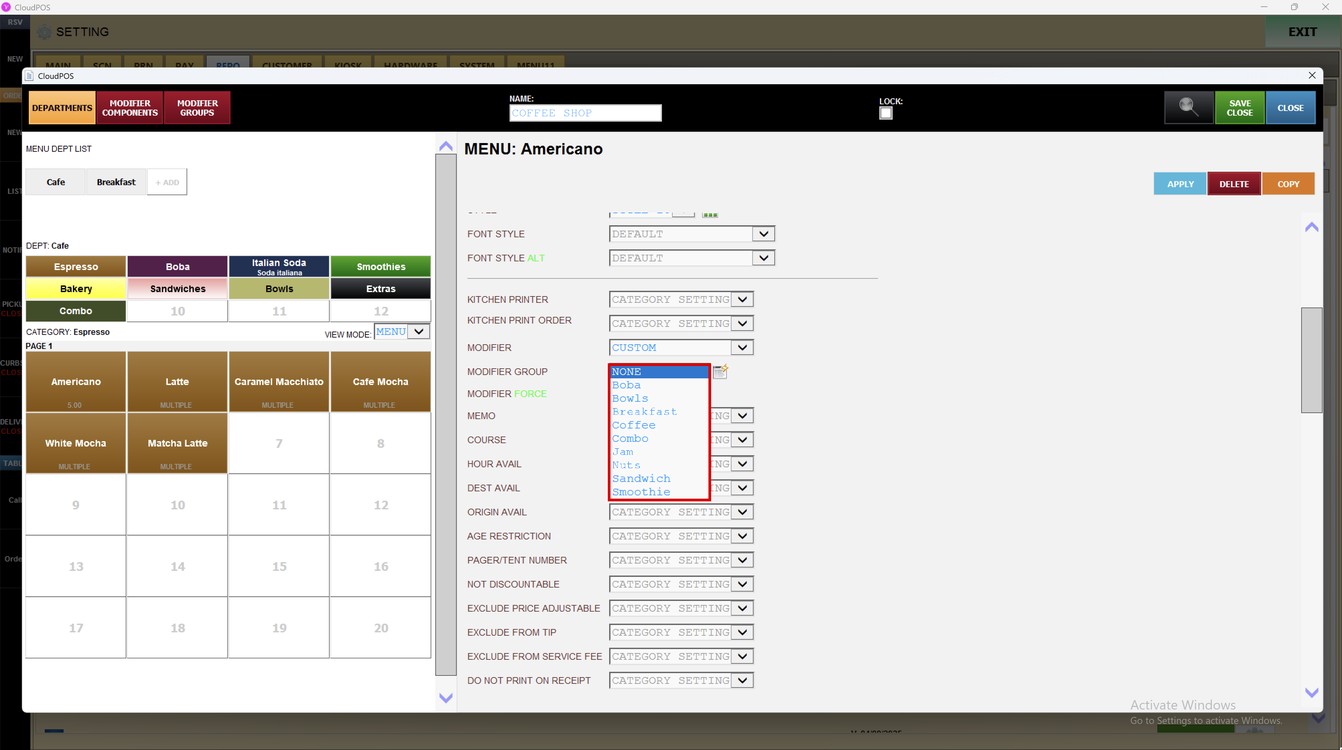
Option 1: press the MODIFIER GROUP dropdown and select the modifier group to assign to the item.
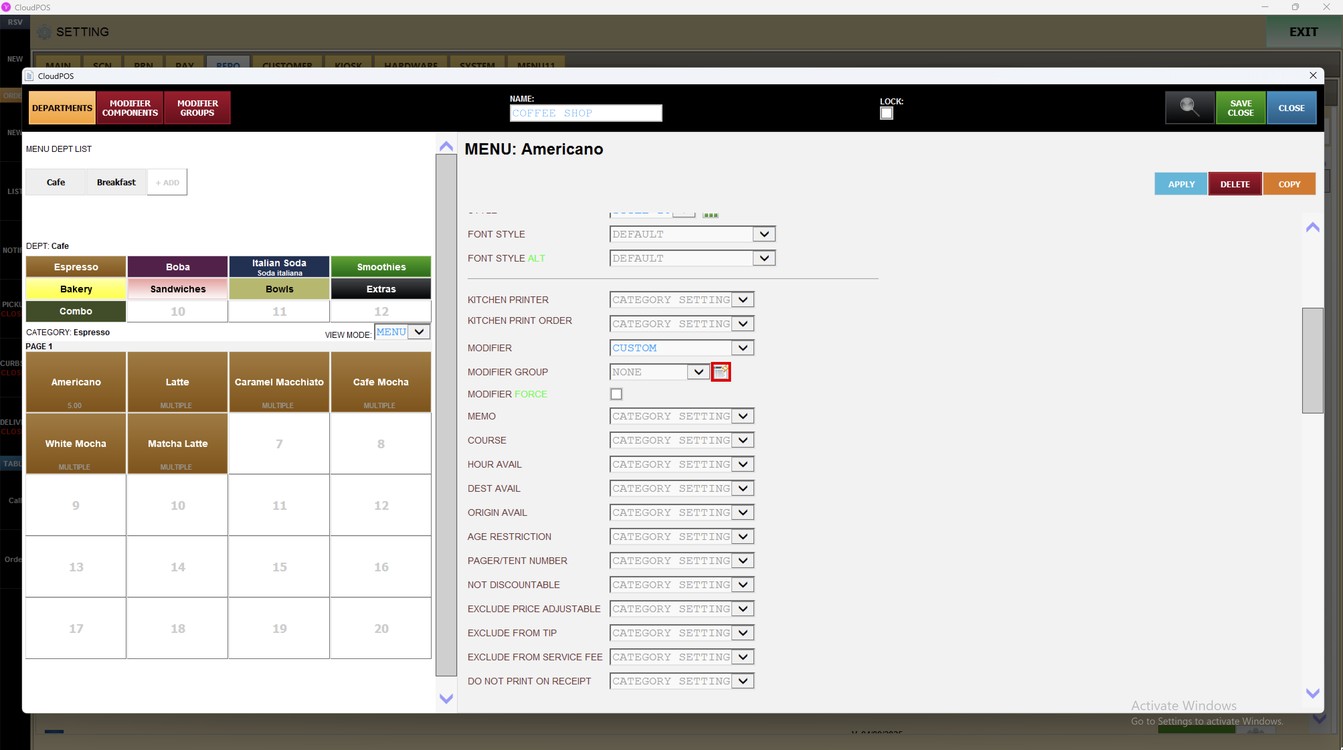
Option 2: press the icon next to MODIFIER GROUP.
The icon opens the SELECT YOUR CHOICE window. Check the modifier components to enable for the item and press OK.
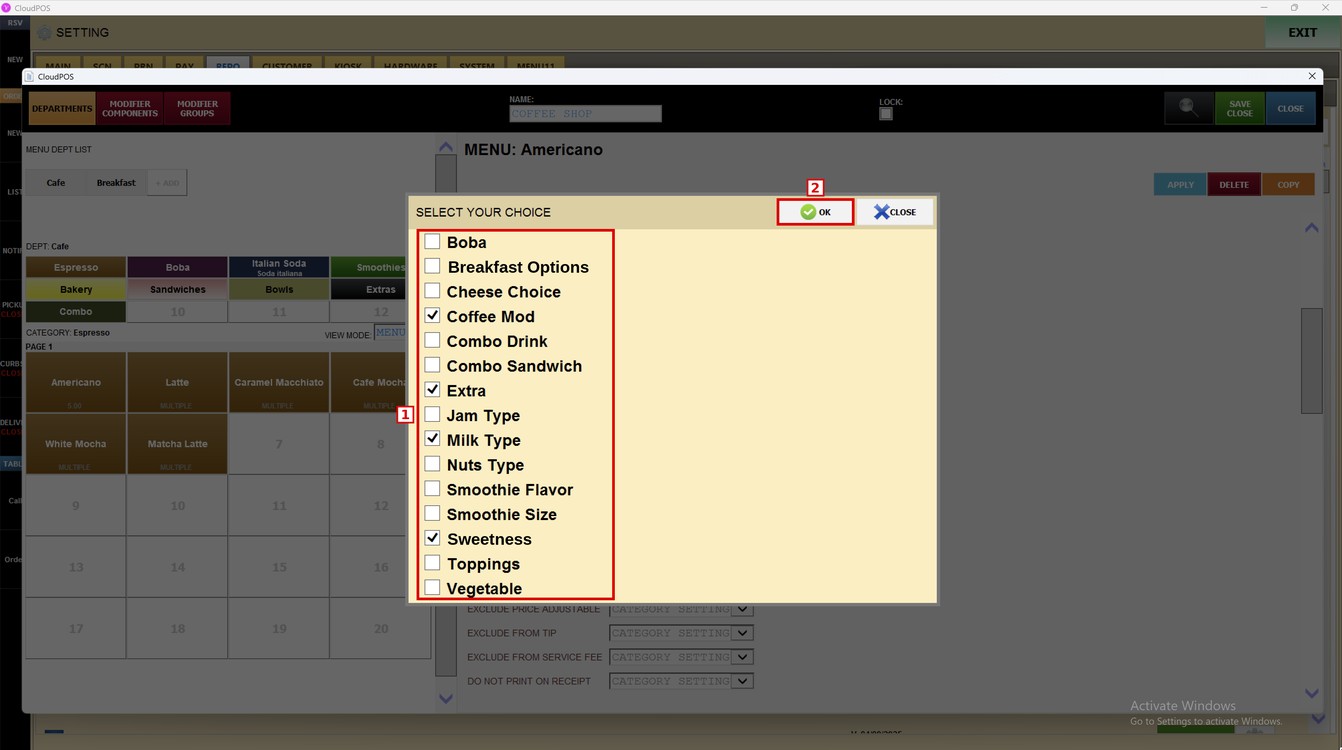
The selected modifier components are assigned to the item and shown in MODIFIER GROUP.
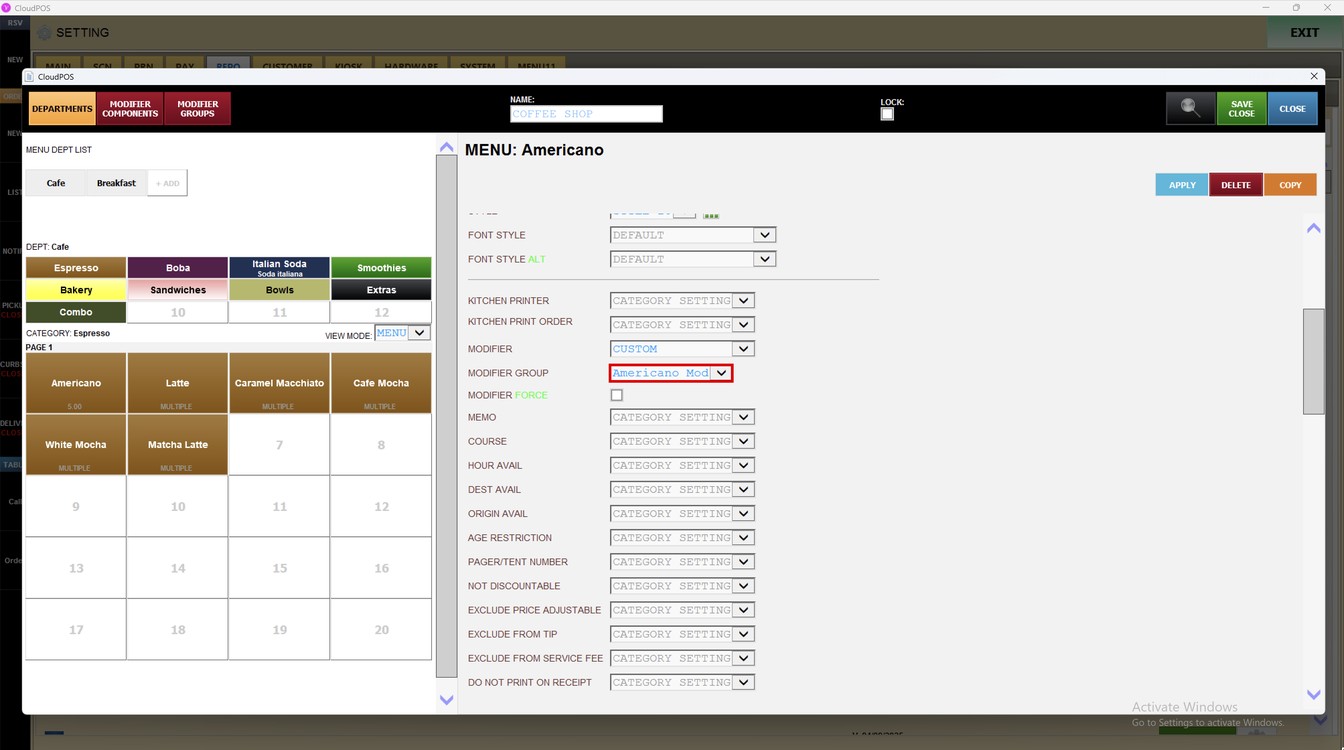
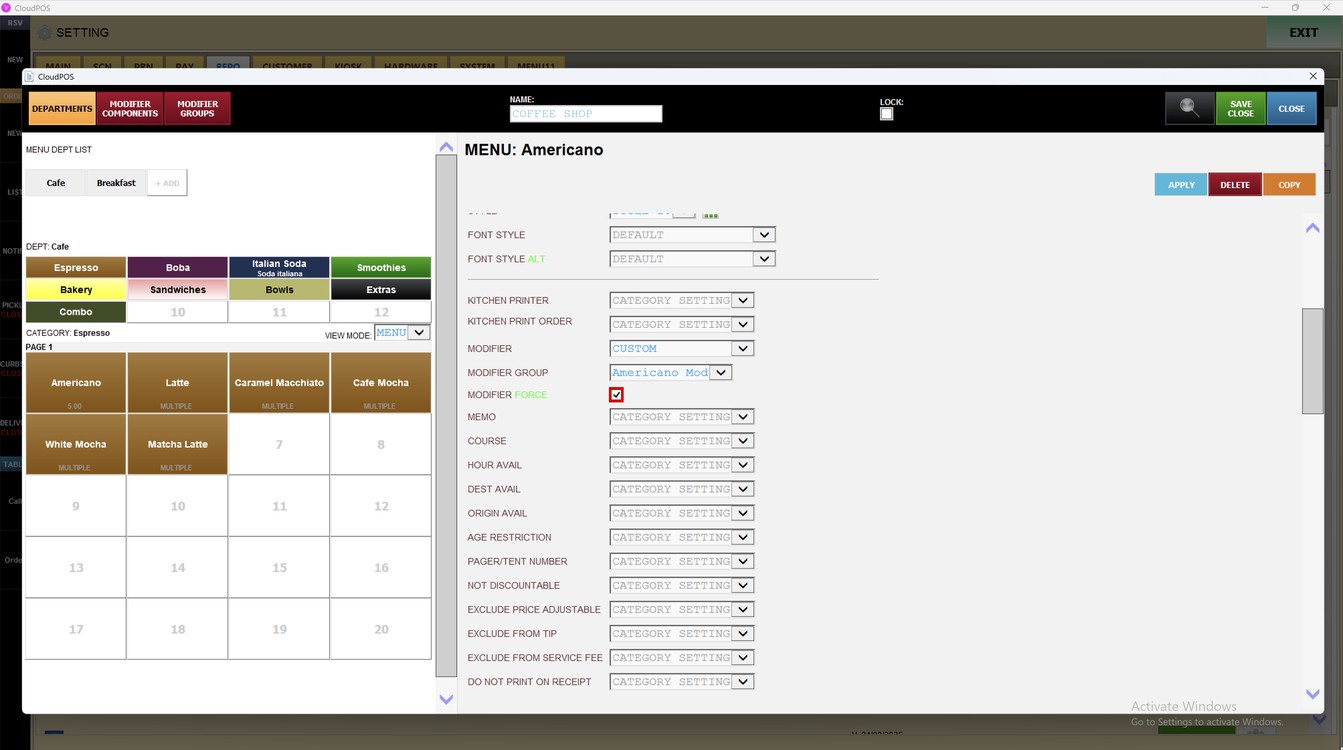
MODIFIER FORCE: check it to open the modifier screen automatically when the item is added to the ticket.
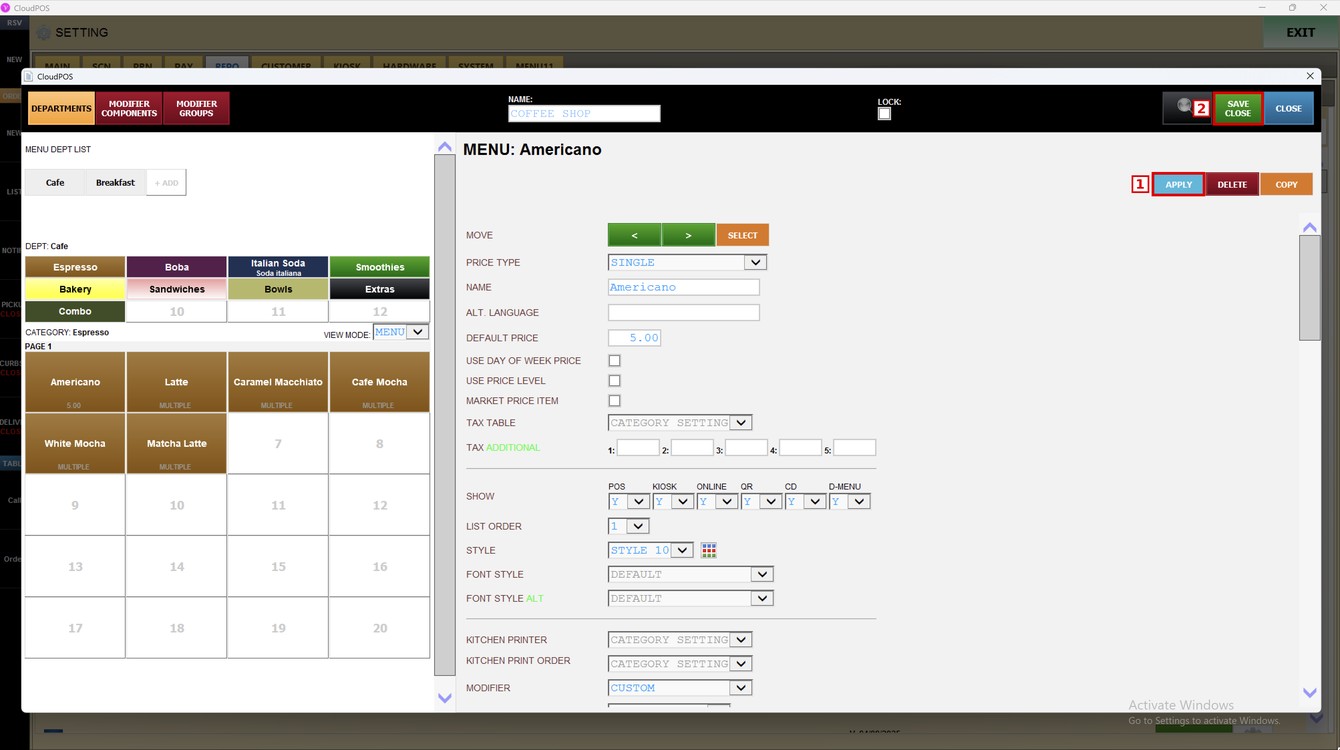
Press APPLY and then SAVE CLOSE to save the changes.
Result:
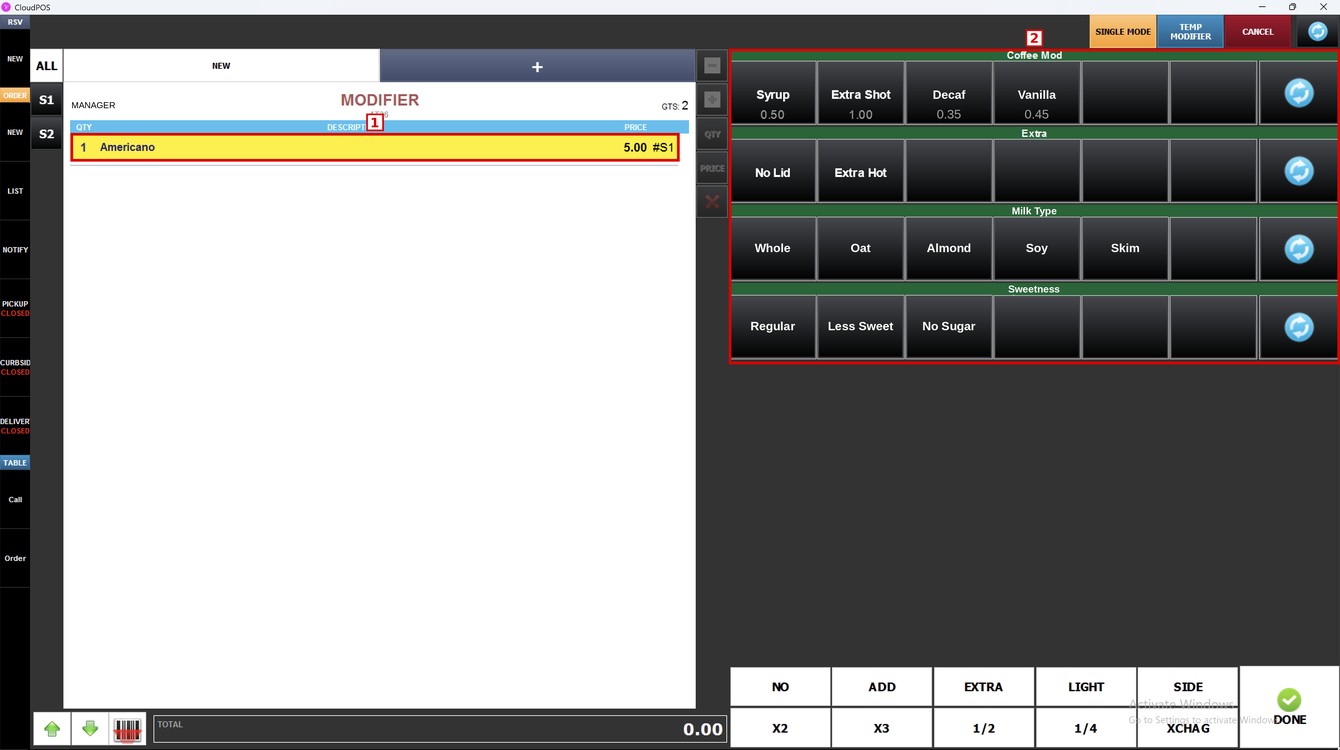
When the item is added to the ticket (1), the modifier screen shows the modifiers assigned to the item (2).
To learn how to set up the modifier groups, please refer to the Modifier Group Guide.