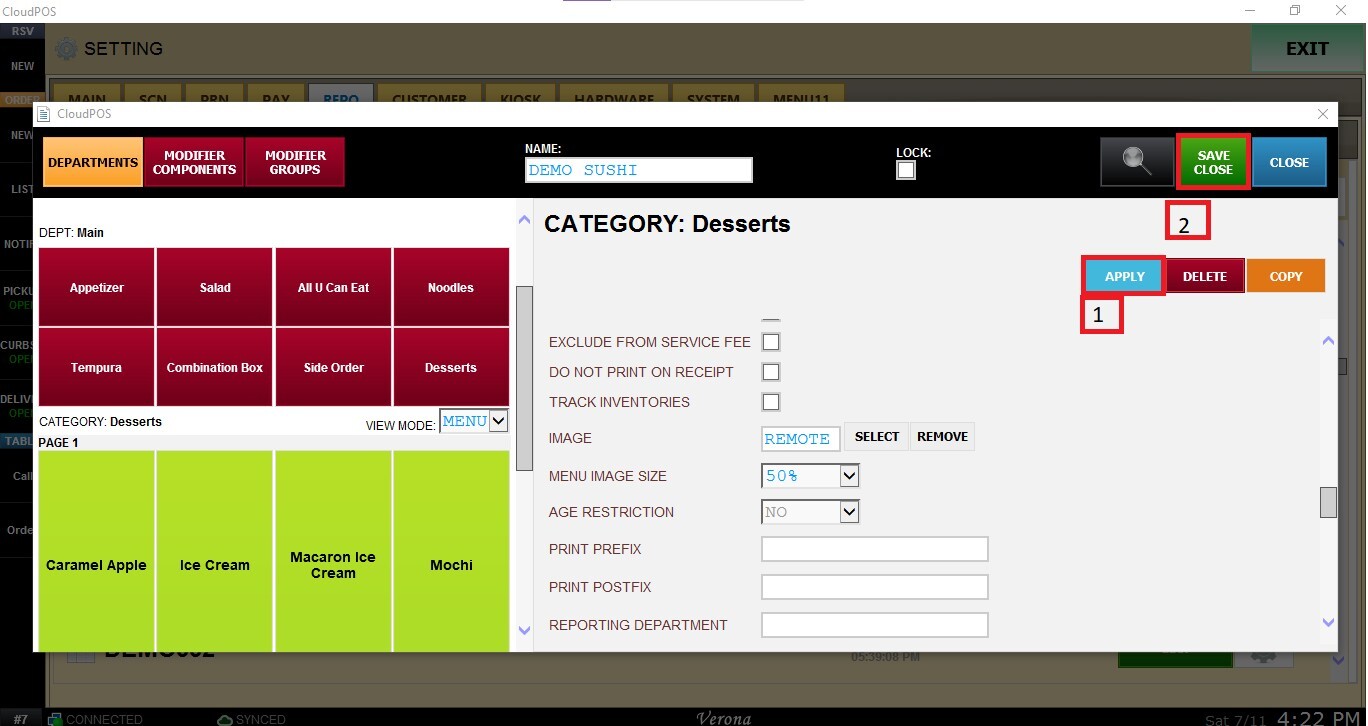
Image and Menu Image Size
The Image and Image Size settings allow you to assign an image to a category and define how it will be displayed throughout supported ordering platforms.
Main Screen>SETTINGS>REPO>MENU>EDIT>Select a Category
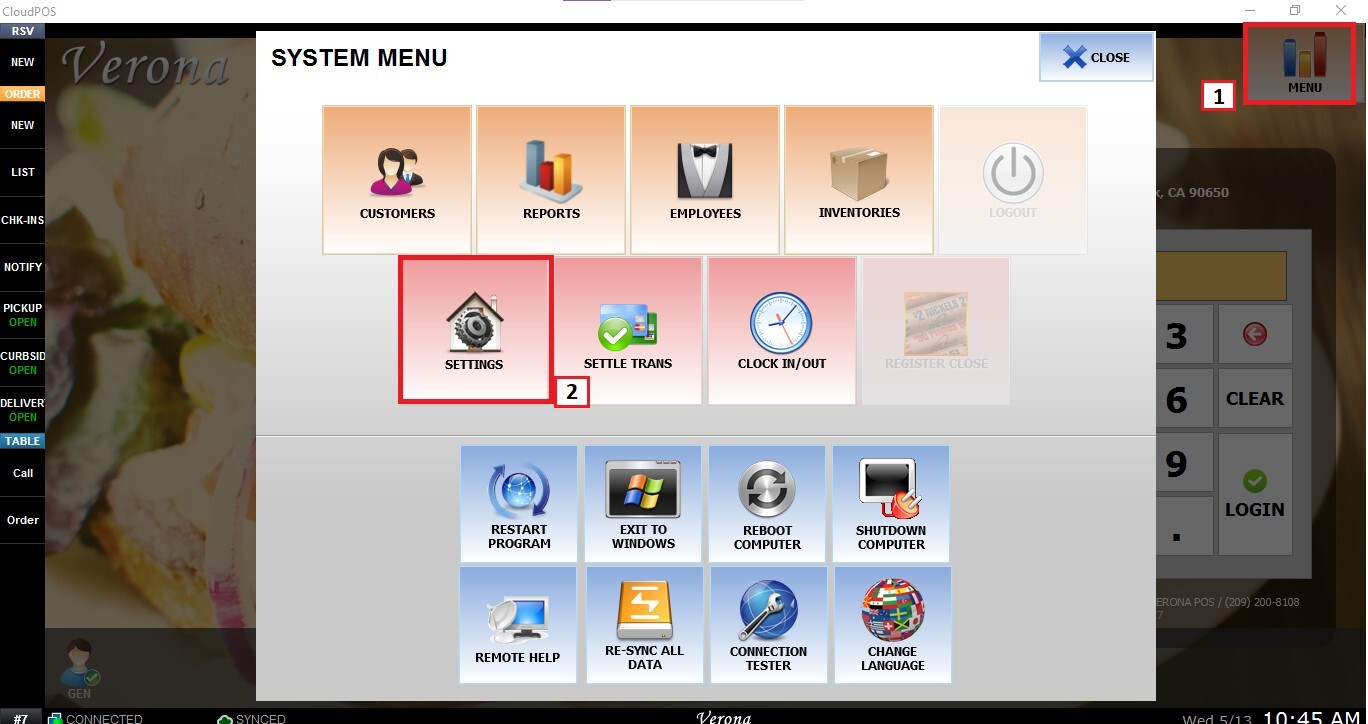
From the Main Screen, go to MENU and then SETTINGS.
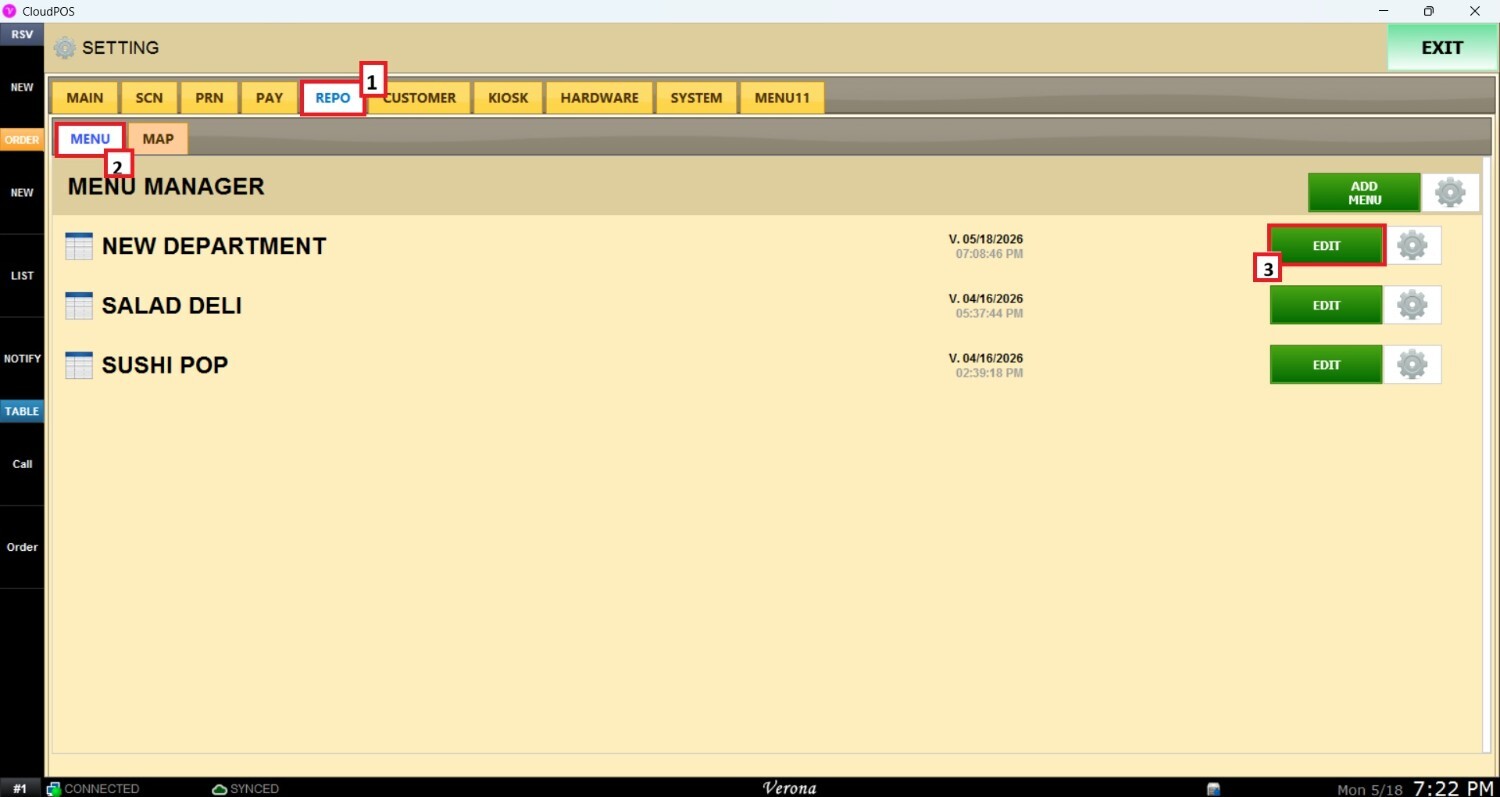
Go to the REPO tab, open MENU, locate the menu you want to modify, and click EDIT.
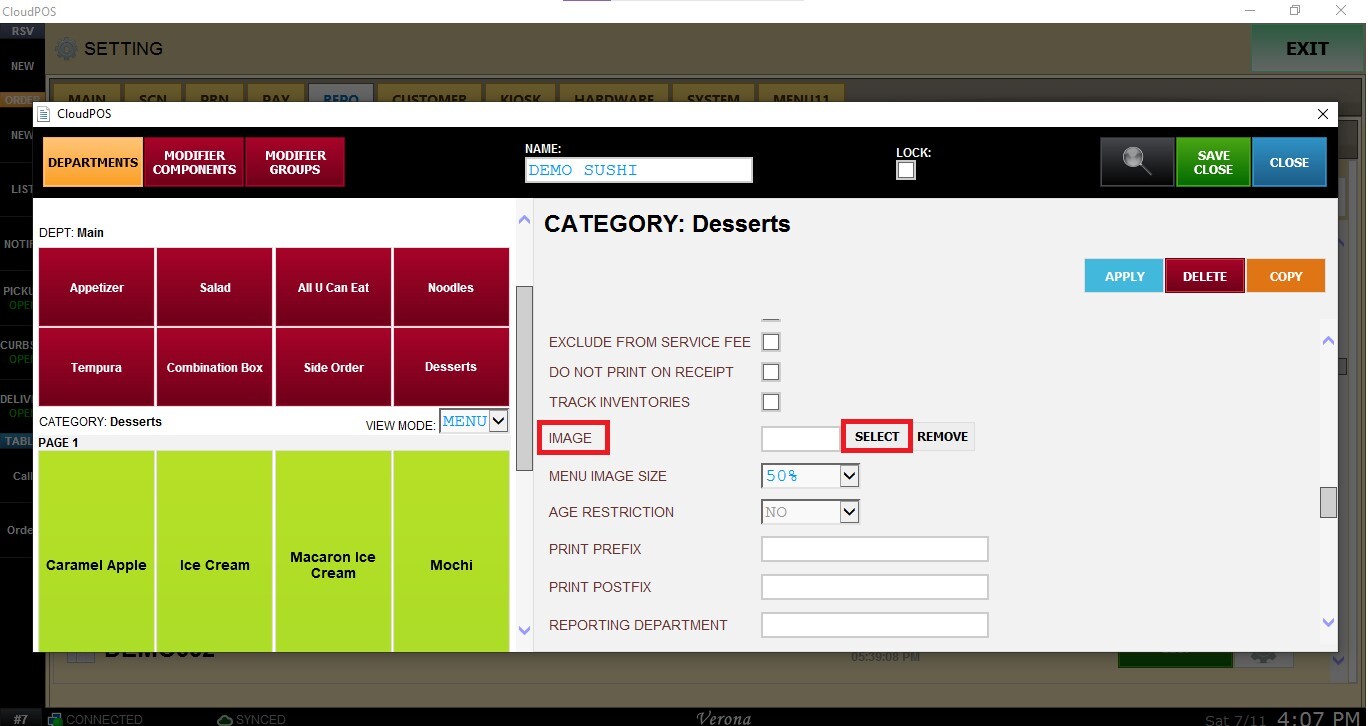
In the Menu Edit Screen, select a category and scroll down until IMAGE and MENU IMAGE SIZE.
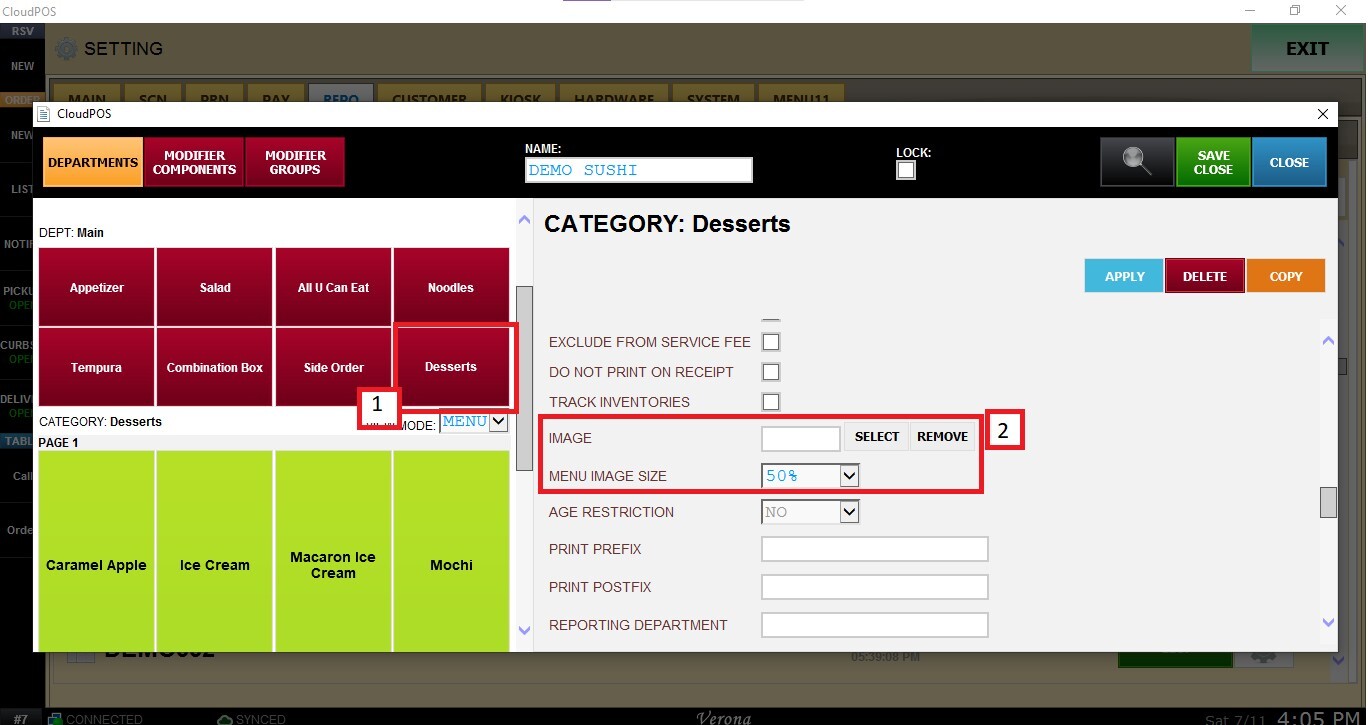
Adding an Image
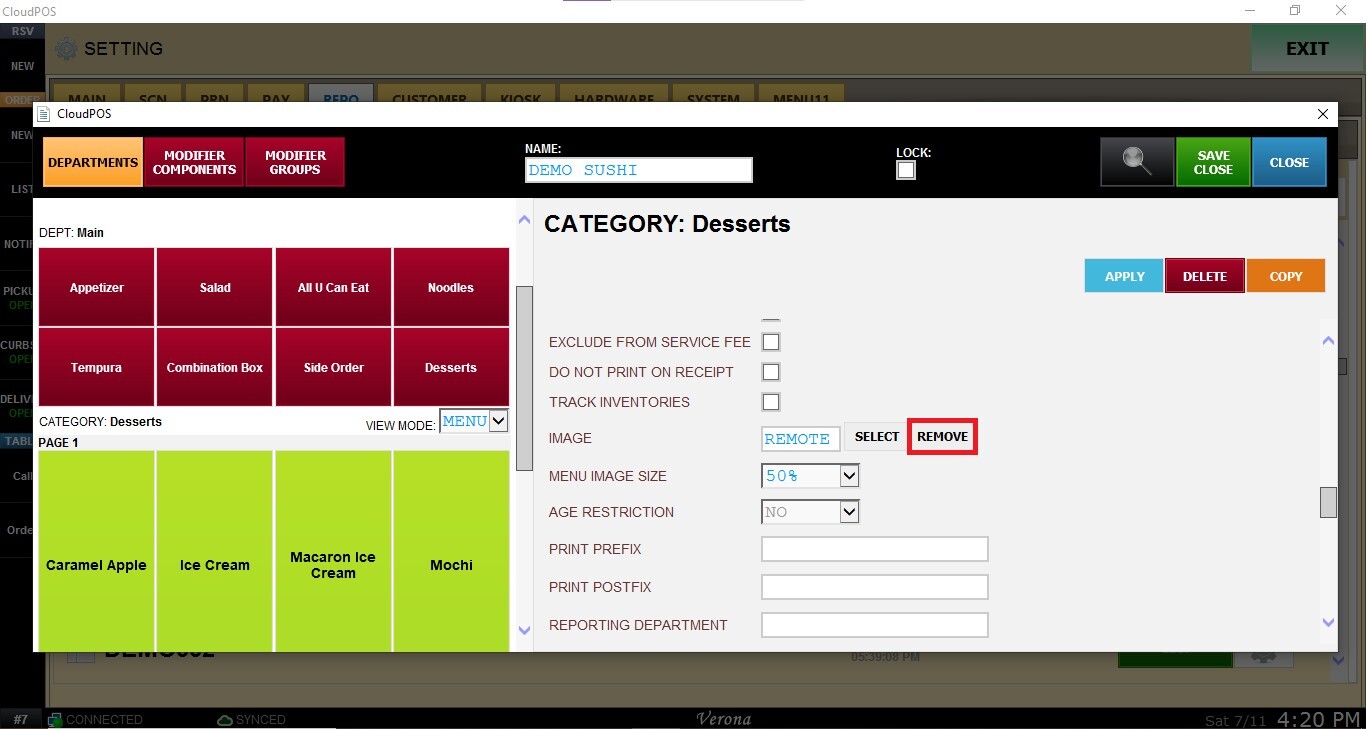
This setting allows you to assign or remove an image for the selected category.
Click SELECT.
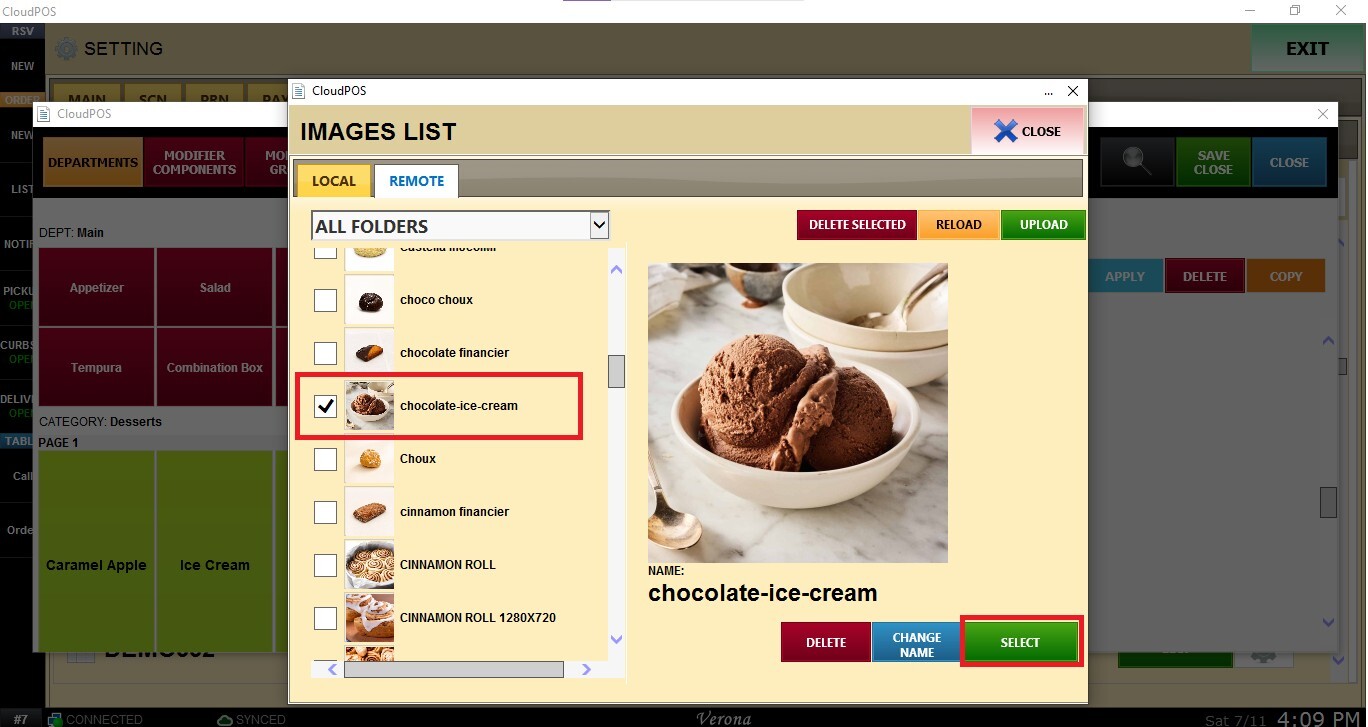
Choose an existing image from the image library, or upload a new image from your computer and click SELECT.
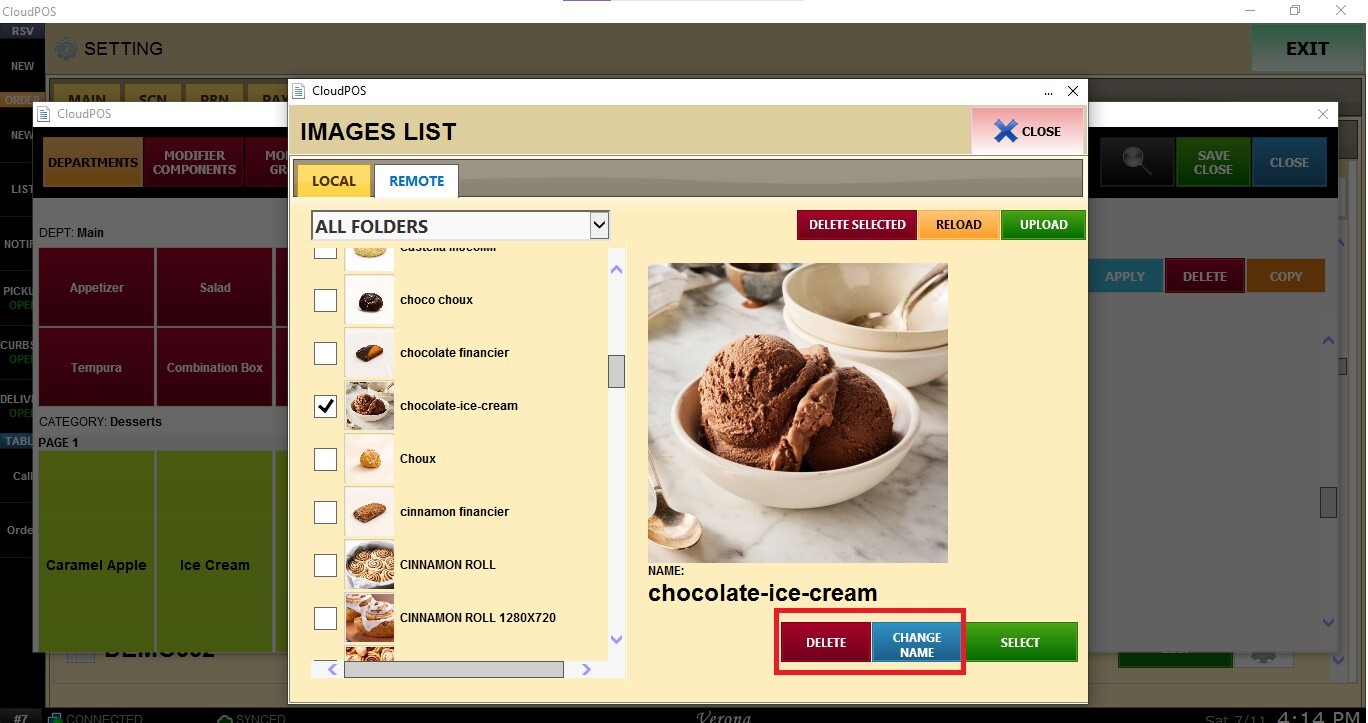
You can remove the selected image from the image library by clicking DELETE, or rename it by clicking CHANGE NAME.
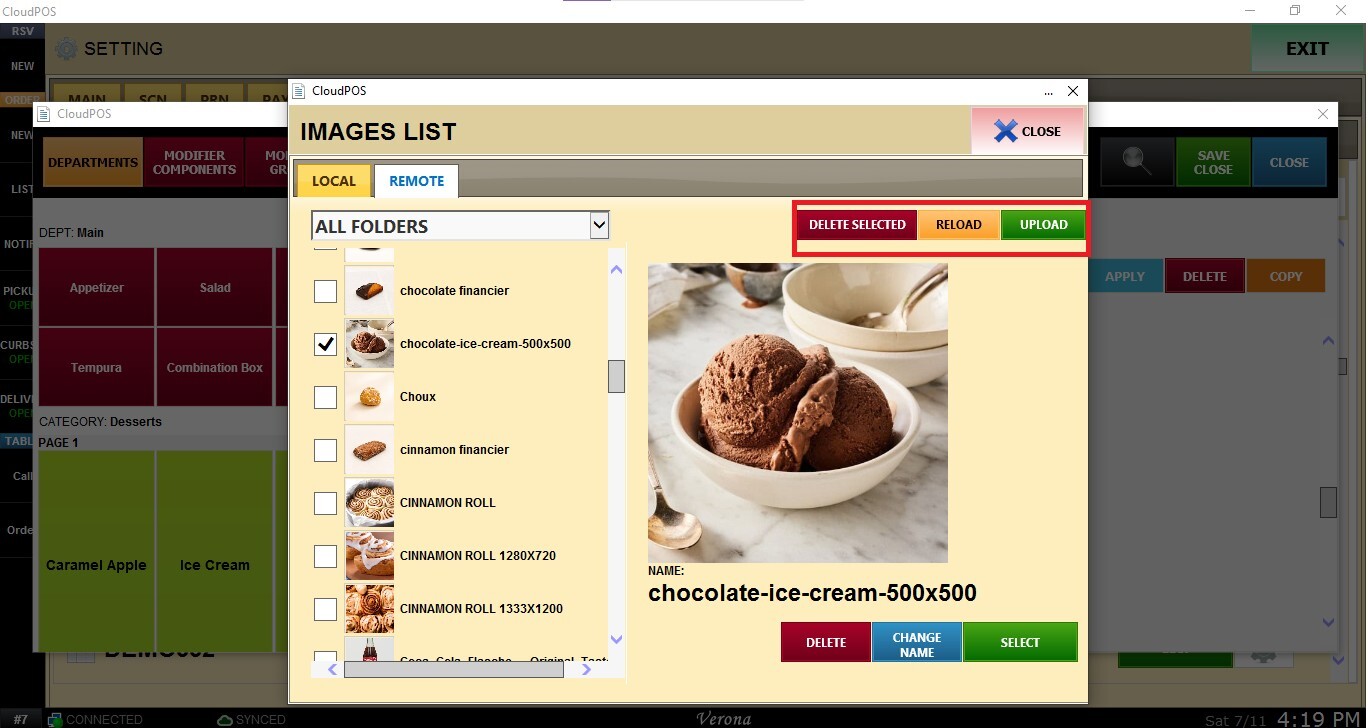
Click UPLOAD to browse and upload a new image from your device, use RELOAD to refresh the image library and display the latest available images, and use DELETE SELECTED to remove the image from the library.
Use the REMOVE button to delete the selection if necessary.
Configuring Image Size
Open the MENU IMAGE SIZE drop-down menu and select the desired size.
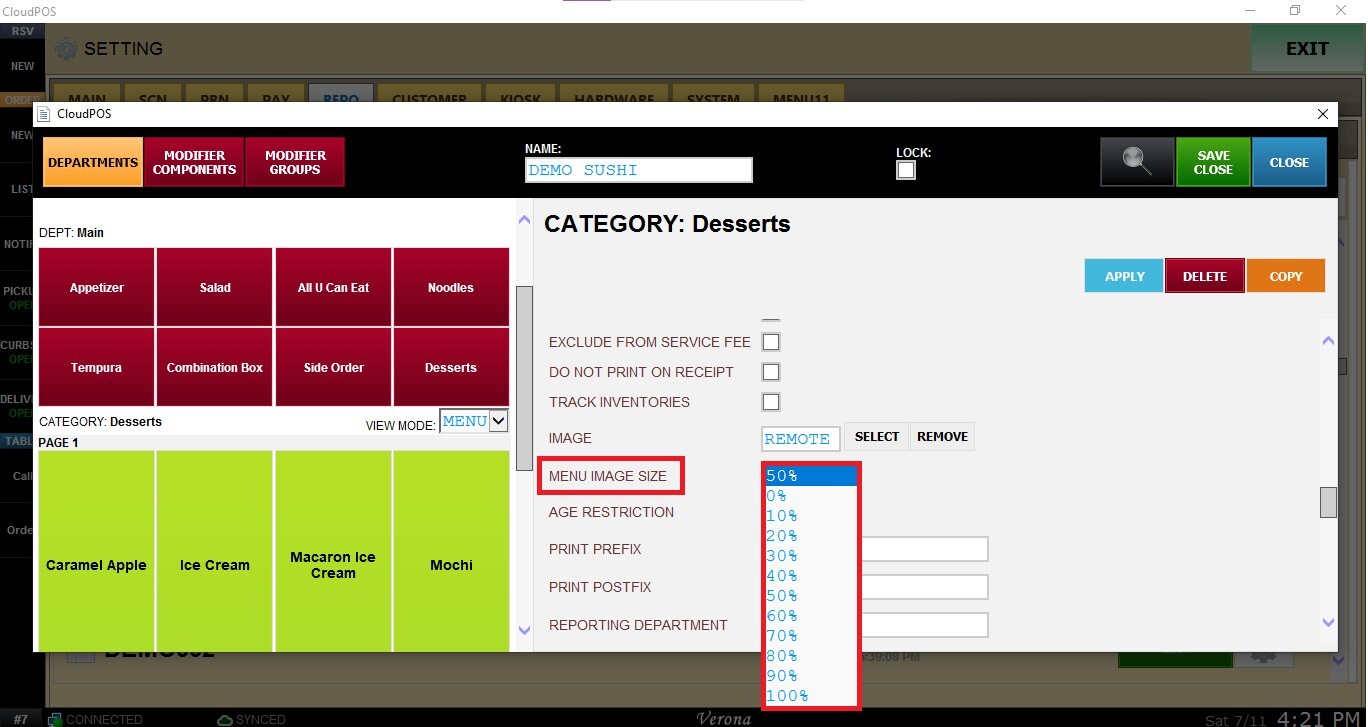
Click APPLY and SAVE CLOSE to save the menu configuration.