Time Clock
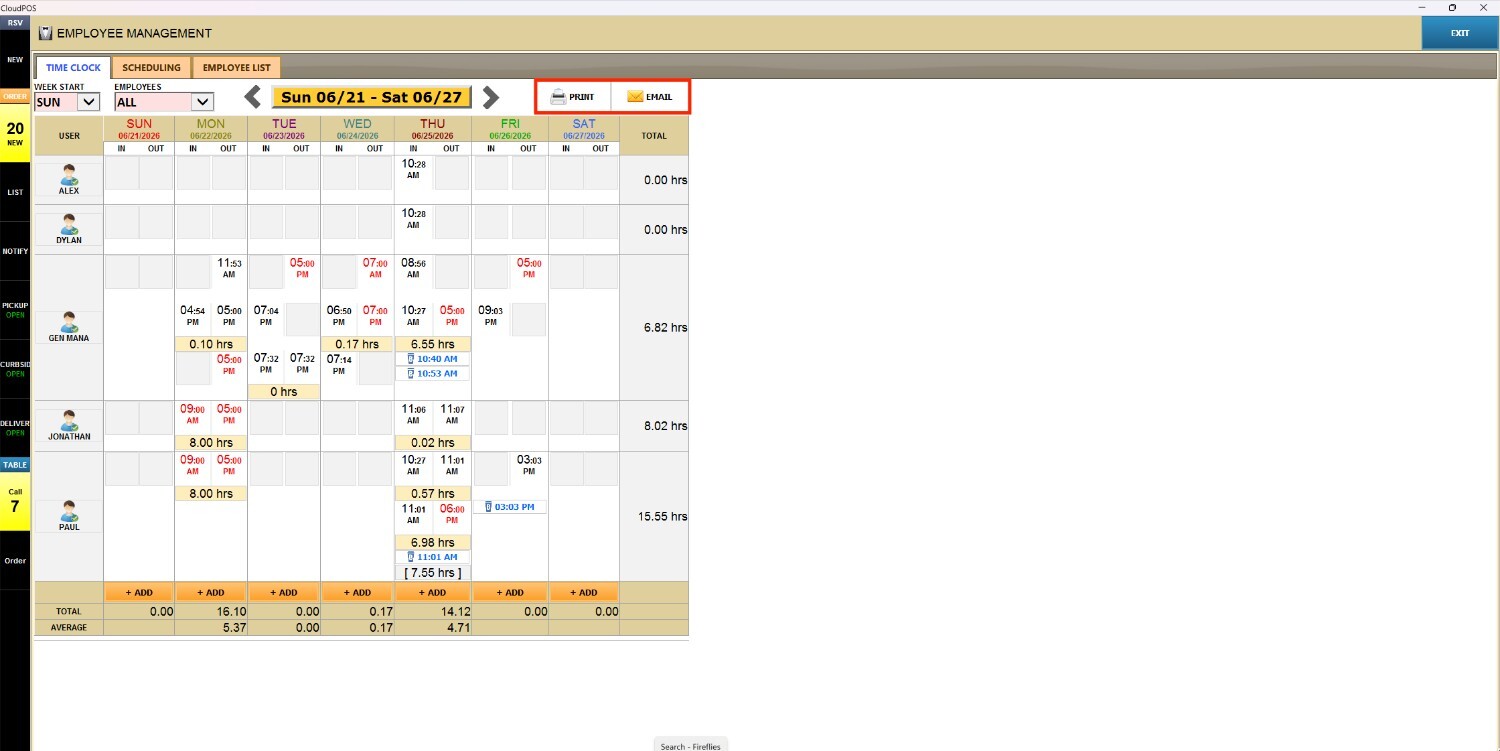
From the Time Clock tab, monitor, edit, and manage employee attendance records. From this section, you can view the clock-in/out times, the shift durations, the break periods, and the total hours worked for each employee.
Main Screen> MENU> EMPLOYEES> TIME CLOCK Tab
Go to MENU and press EMPLOYEES
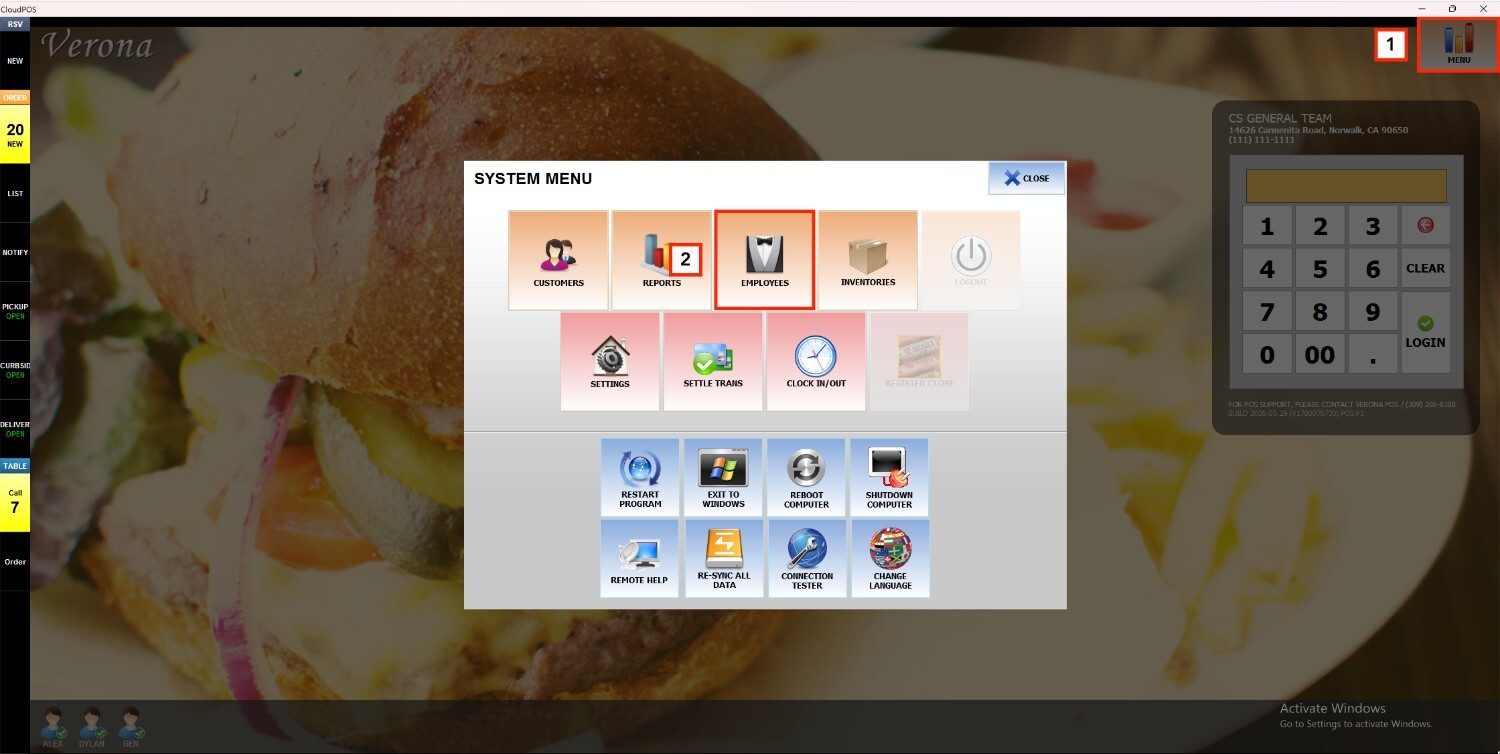
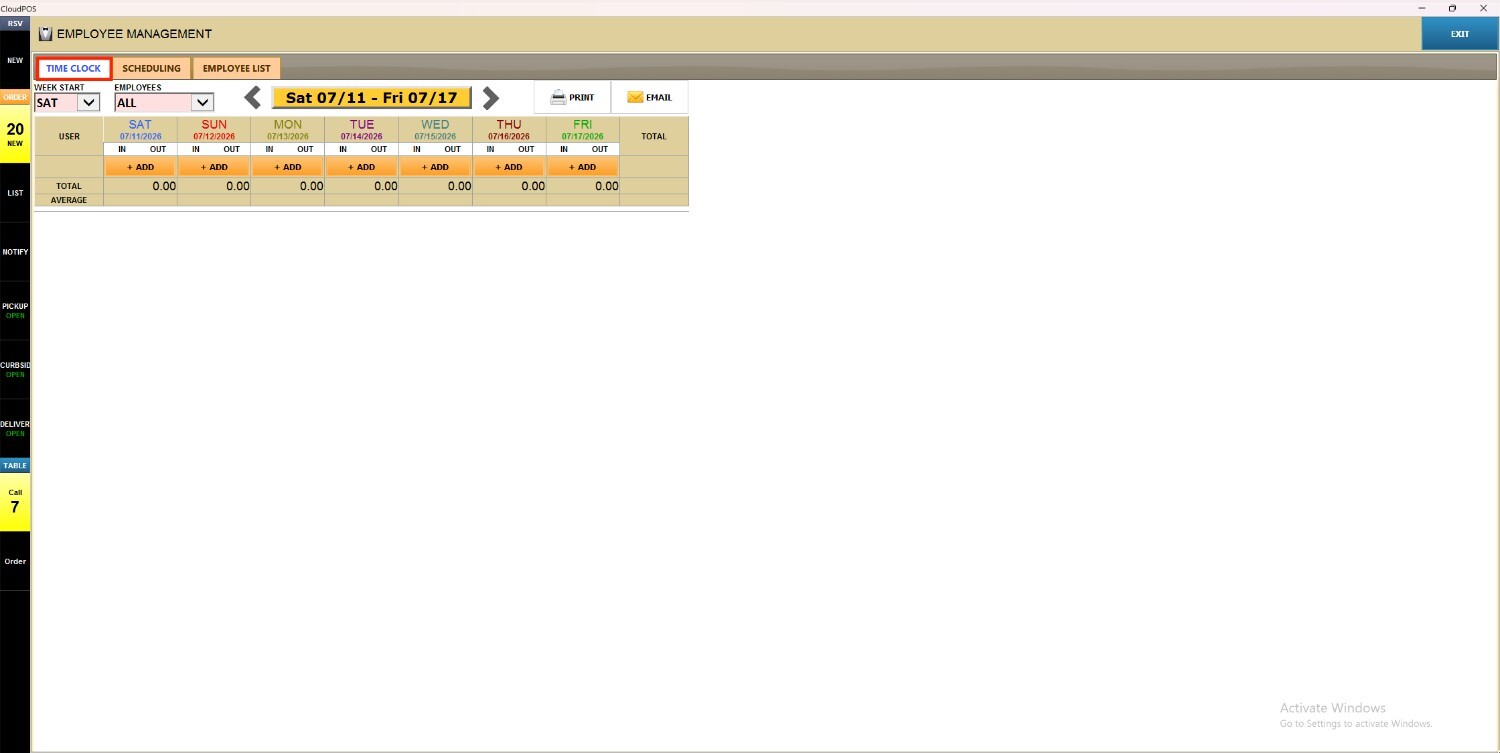
Open the TIME CLOCK tab.
Filters
To view different time periods in the Time Clock tab, use the available navigation filters:
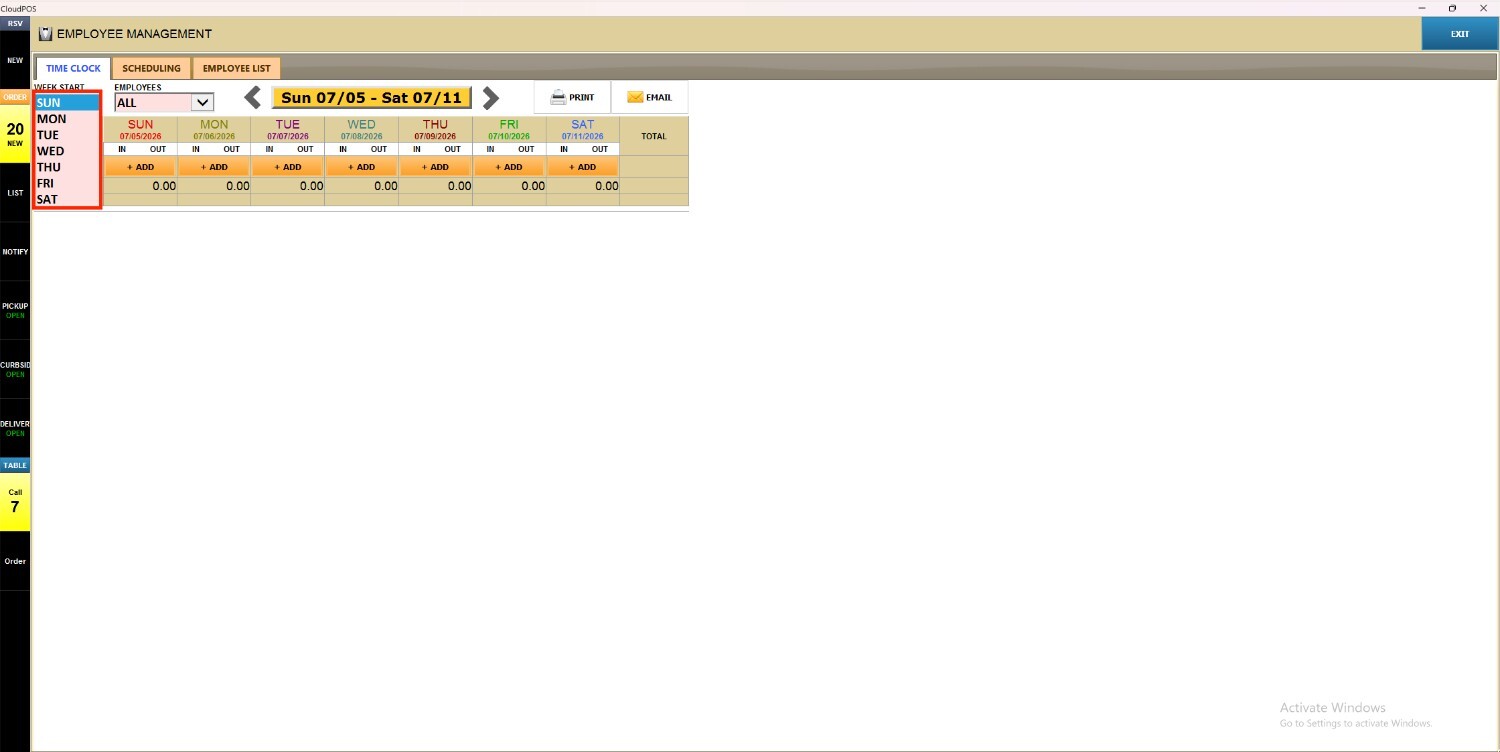
Week Start Dropdown:
Jump to a specific week by selecting a start date from the dropdown menu.
Note: Use the employees dropdown menu to filter the time clock sheet by individual employees.
Open the dropdown menu and select an employee from the user list.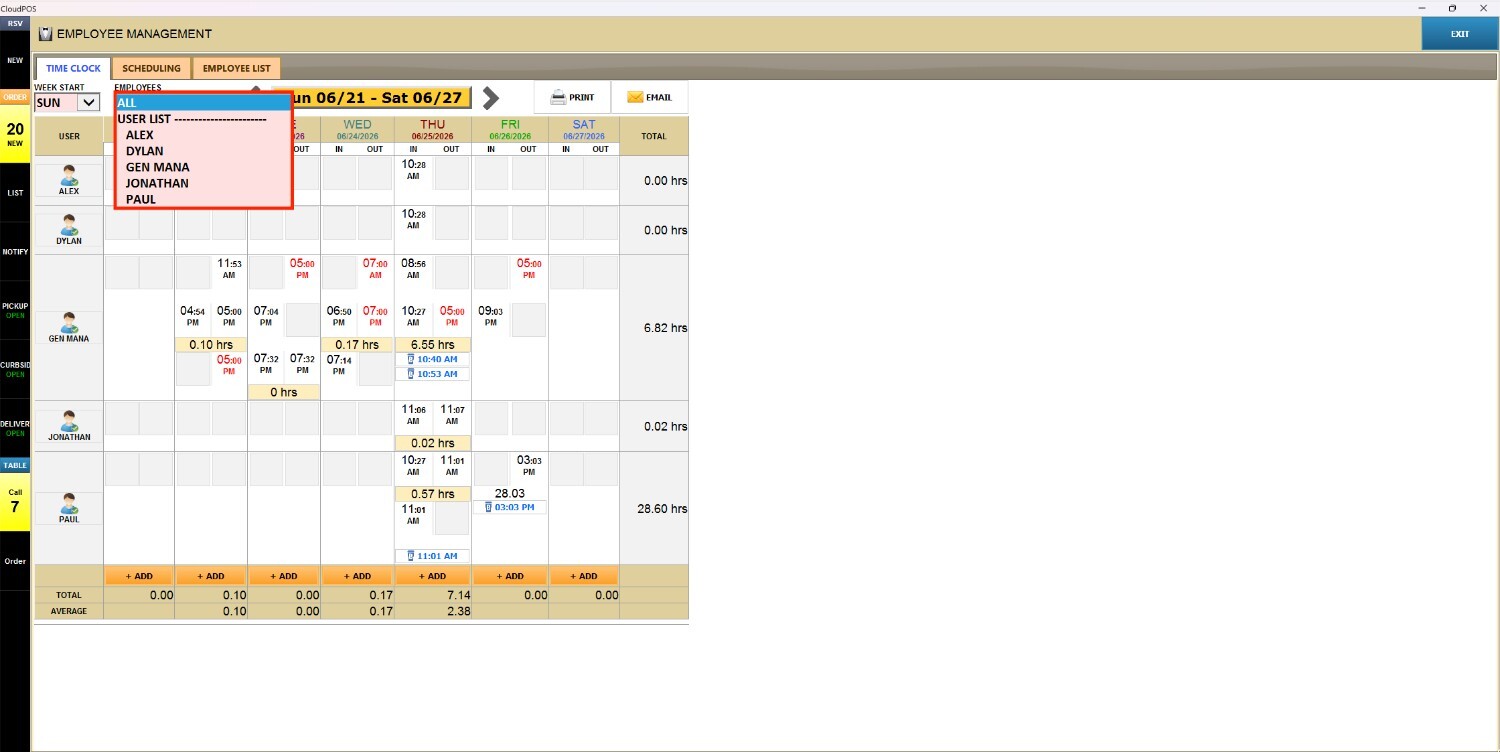
Result:
Employees profile under the USER column, and the IN/OUT times are displayed under each day of the week.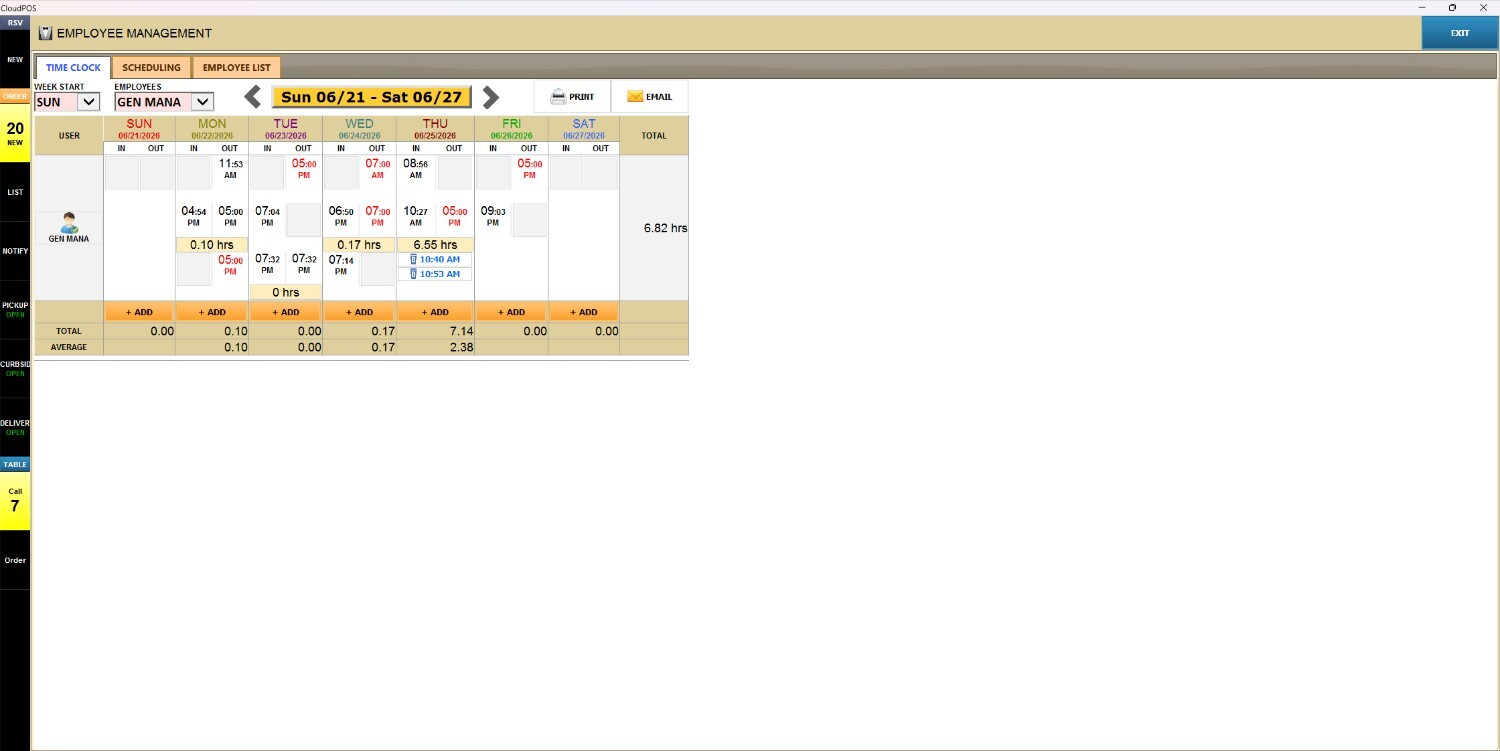
Arrow Buttons:
Use the left/right arrows next to the yellow date bar to move forward or backward one week at a time.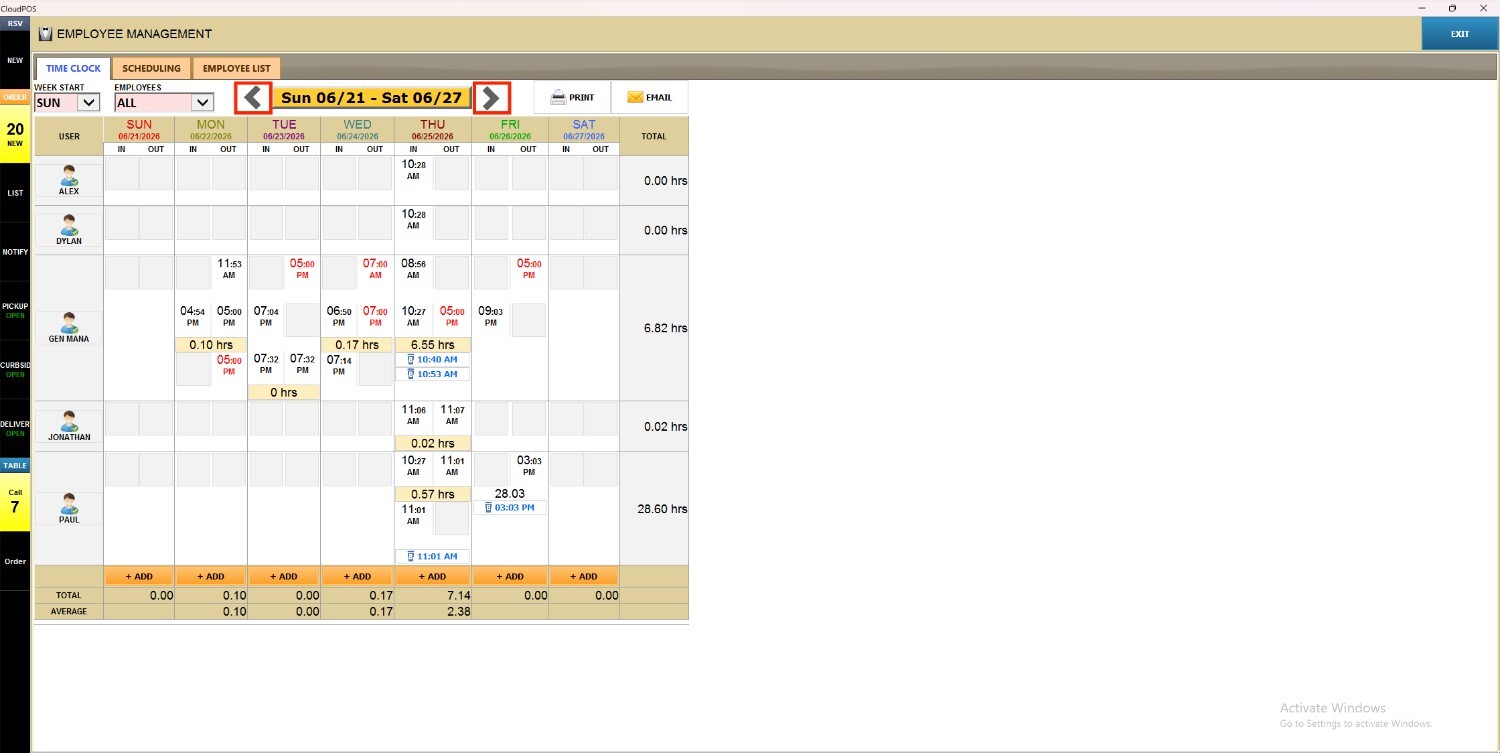
Time Clock View
Once a week is selected, the Time Clock calendar displays:
A vertical list of employees under the USER box.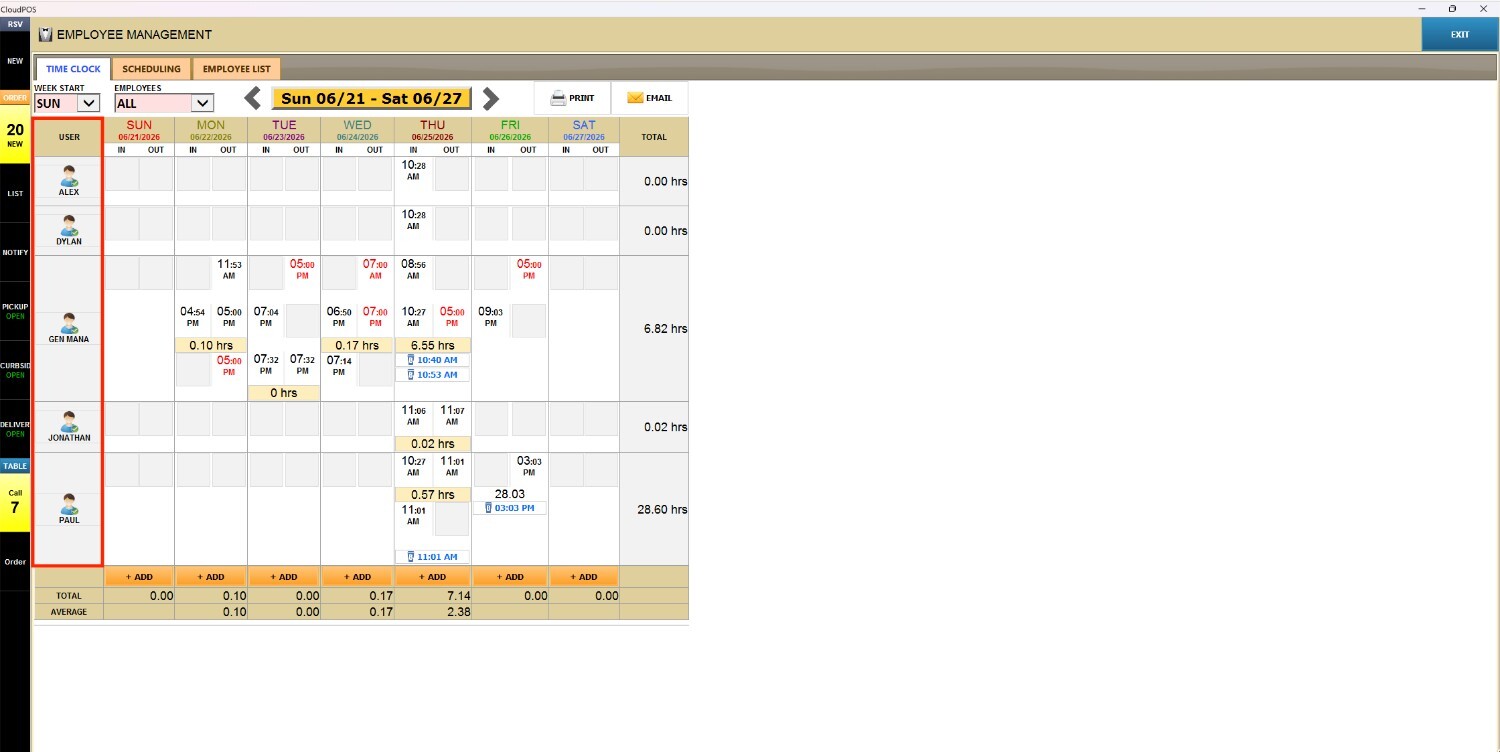
A horizontal row of weekdays, each labeled with its corresponding date.
IN and OUT fields under each day, showing the recorded clock-in and clock-out times.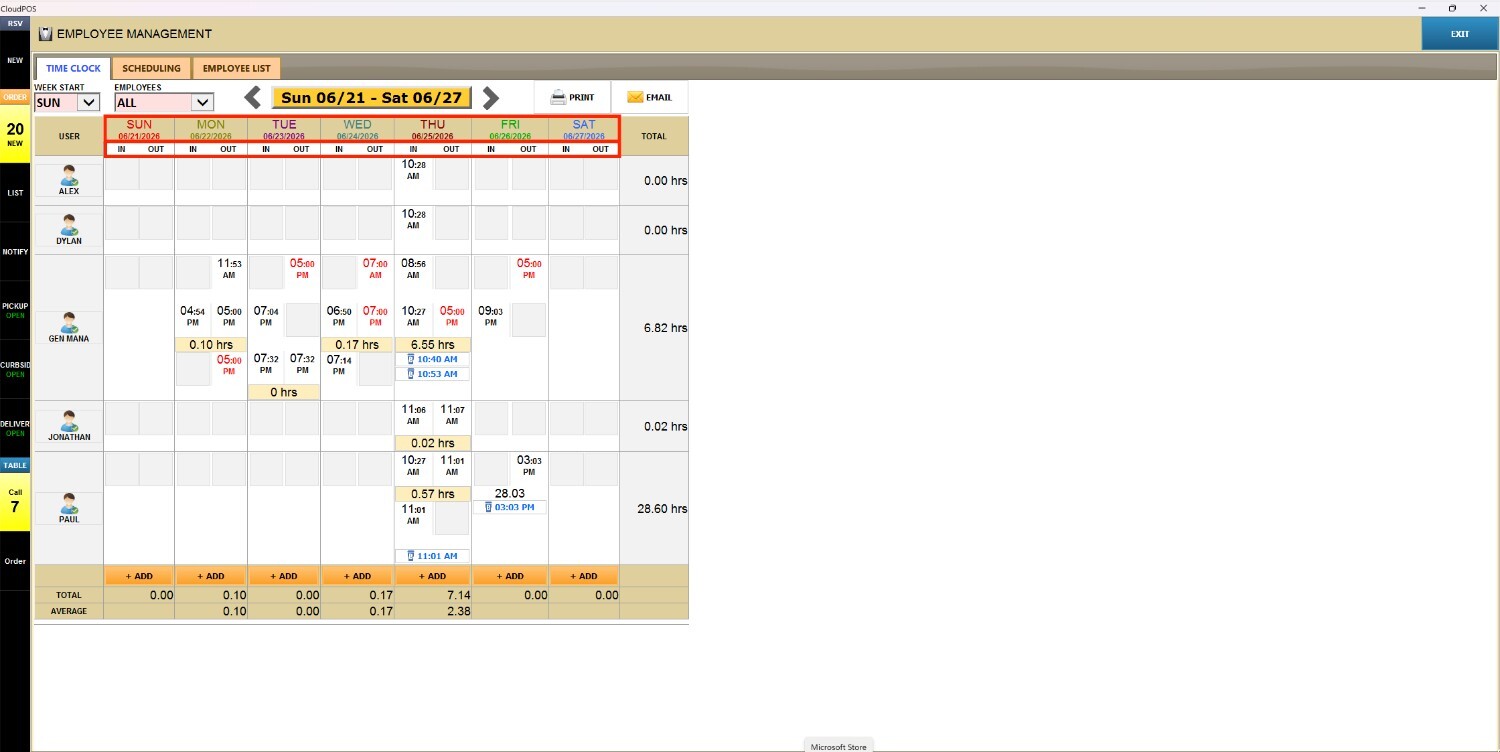
Break times displayed below the IN/OUT entries, indicating when and for how long an employee took a break.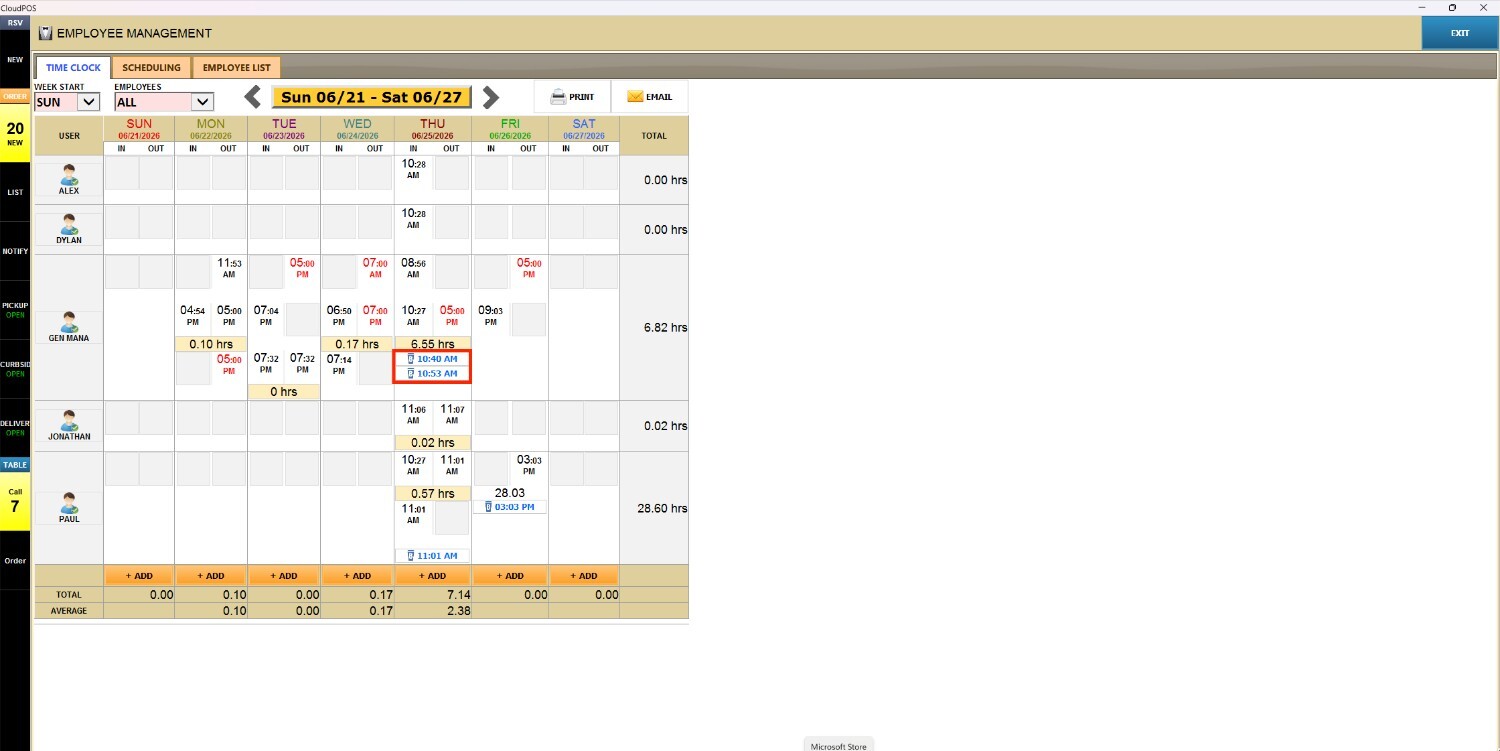
Note: To activate the Break option, consult the Paid Breaks guide
Total hours worked, shown at the end of each employee row and at the bottom of each day column.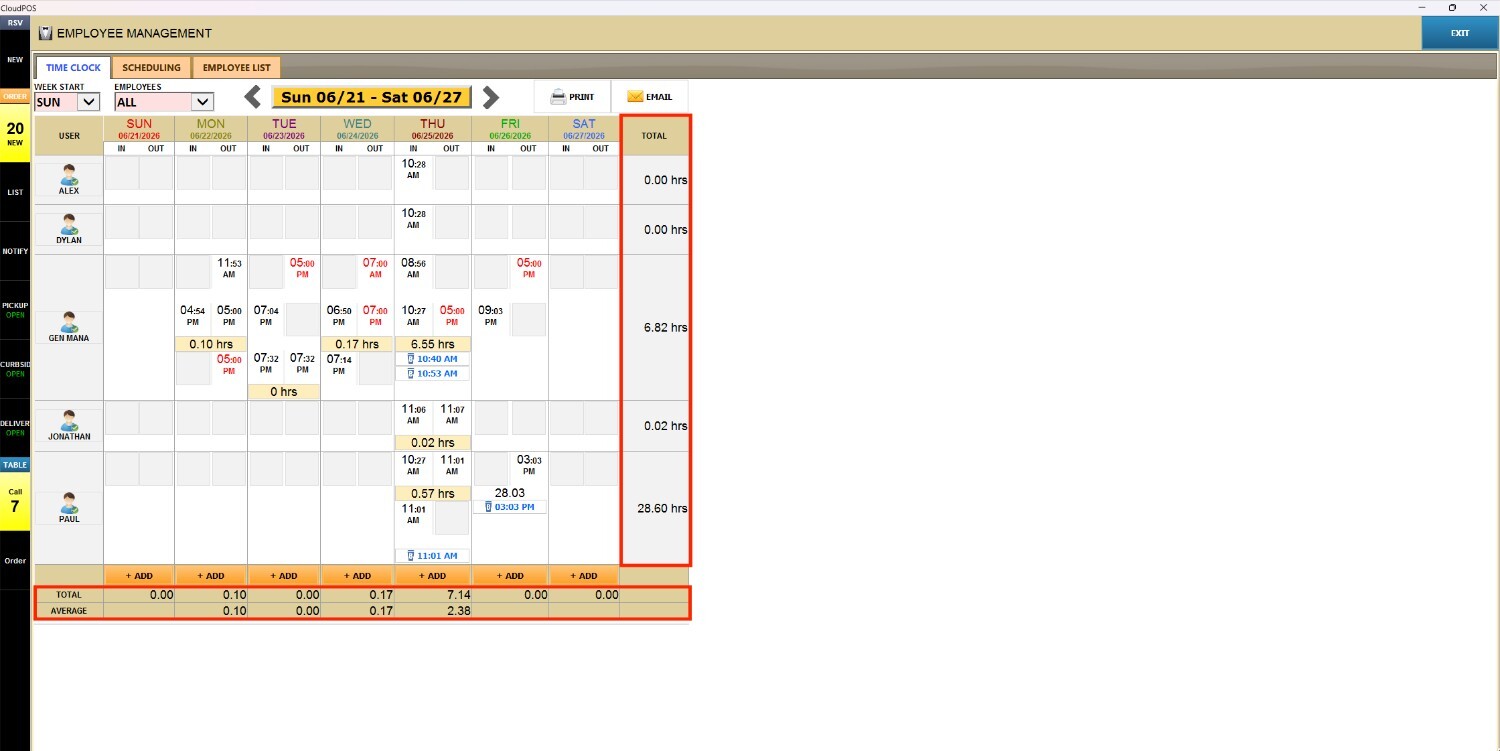
Editing Clock Times
If an employee clocks in or out incorrectly, you can manually adjust the entry.
Click on the time entry you want to edit.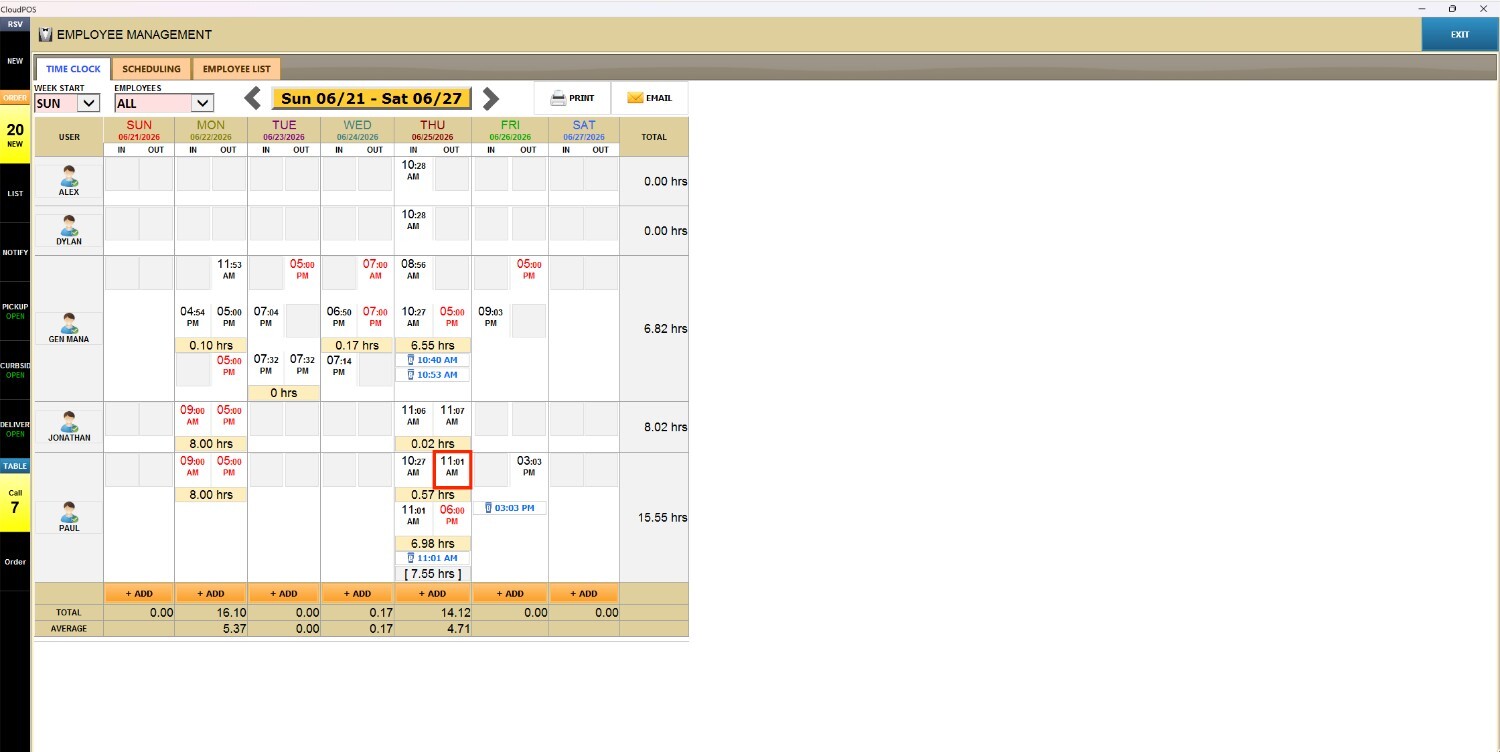
A time editor will open showing the DATE, TIME, ENTRY TYPE, and USER.
Make the necessary changes and tap SAVE.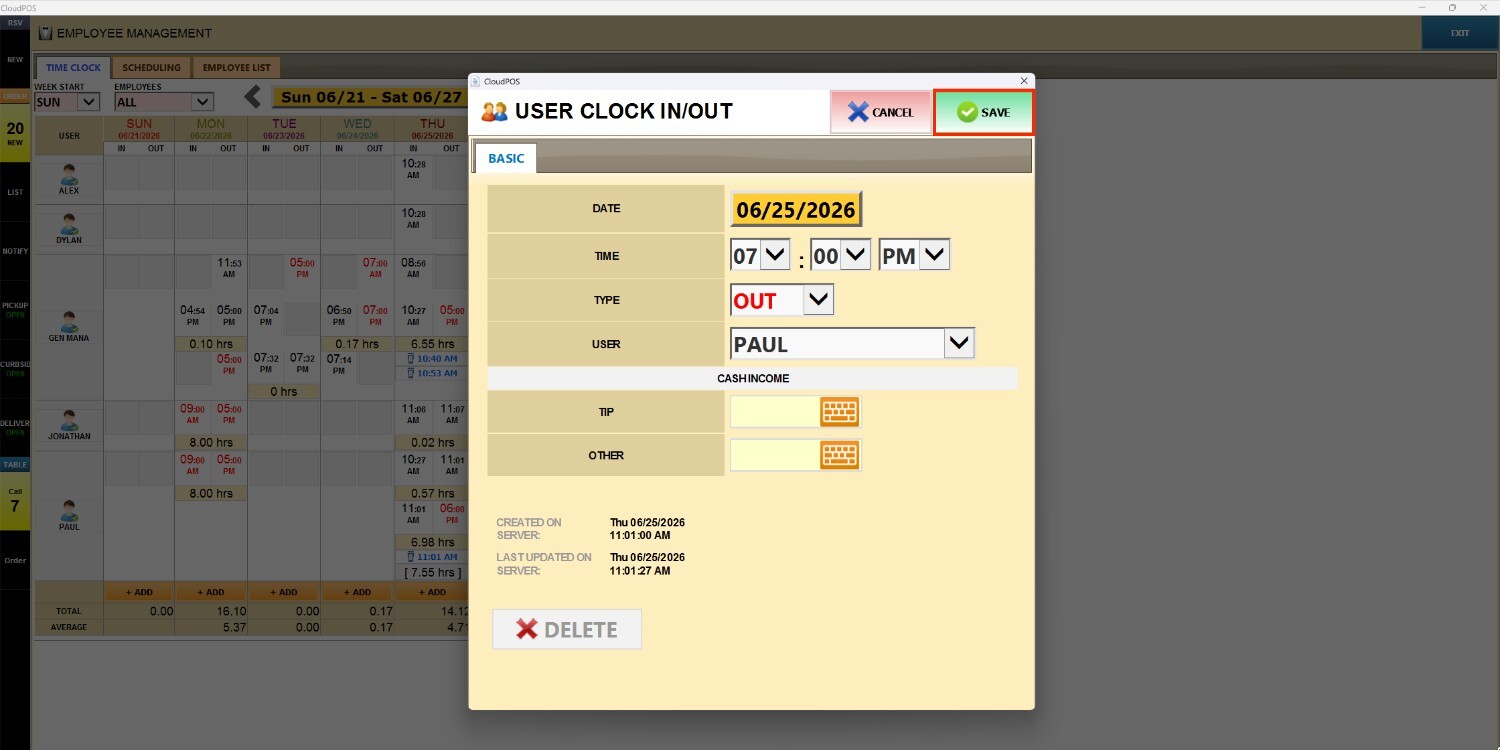
Edited entries will appear in red, indicating they were modified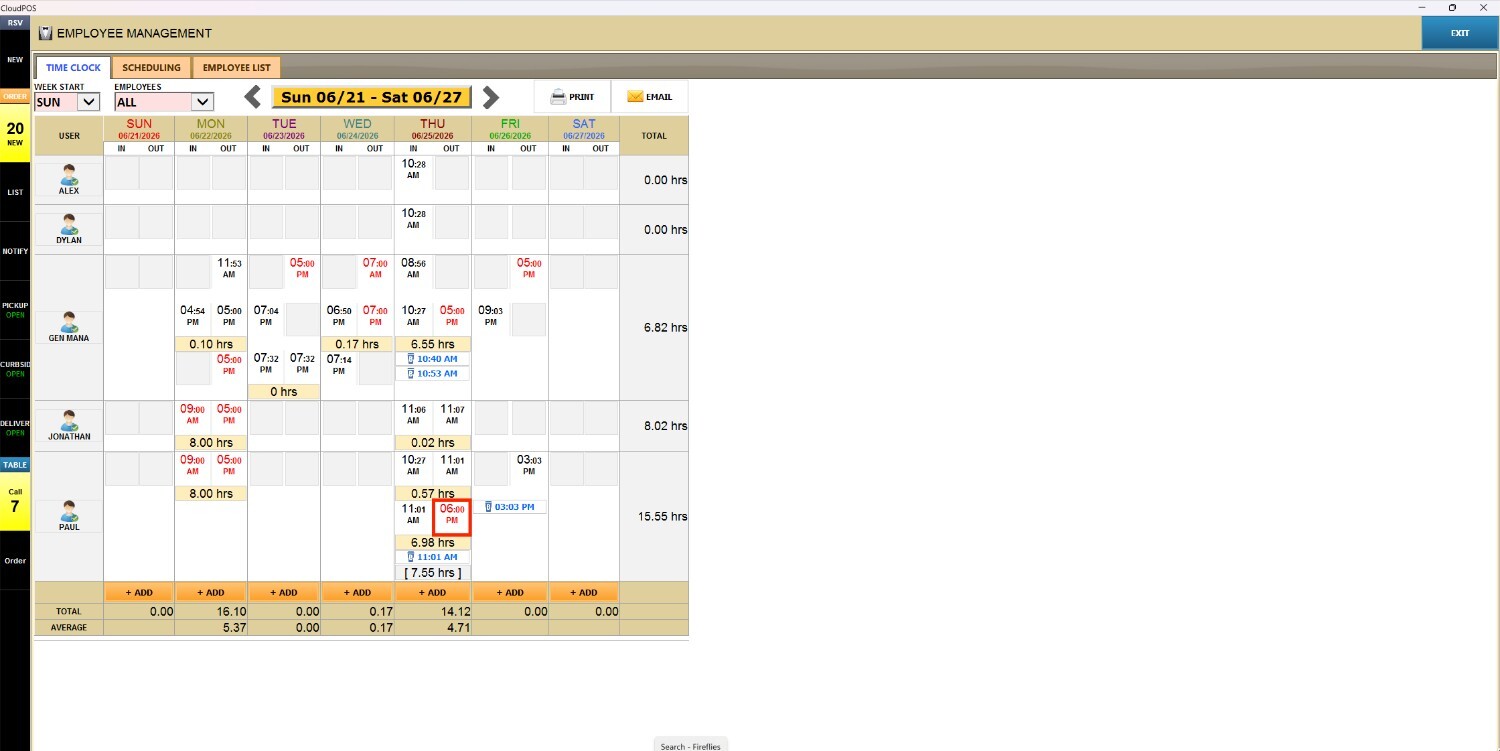
Note: To add a new time entry, press the +ADD button
Select the appropriate DAY, TIME, and entry TYPE (Clock In/Clock Out), and choose the corresponding employee to create the record. If additional information is required, complete the remaining available fields before saving.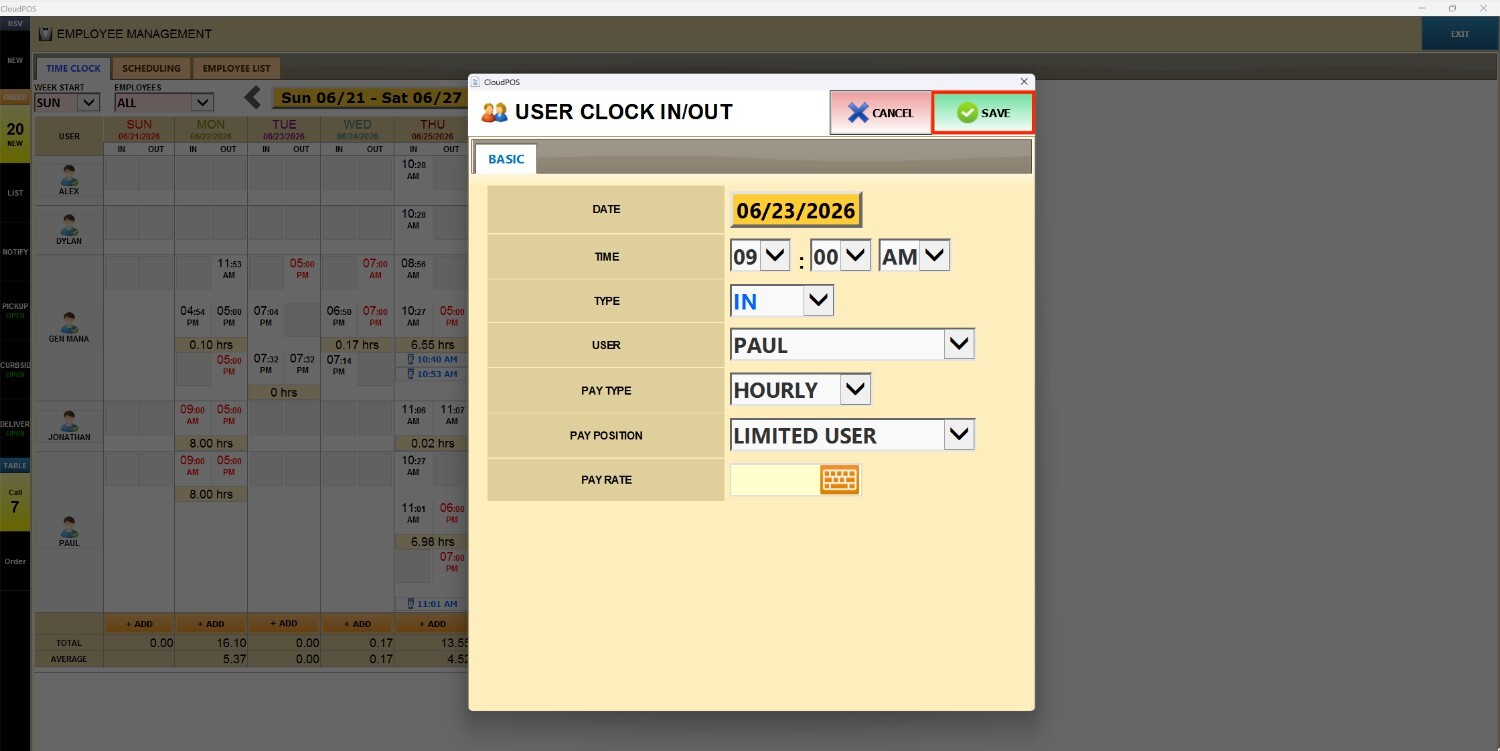
Result:
The new time entry will appear in red under the IN/OUT column and will be displayed in the selected employee's row. 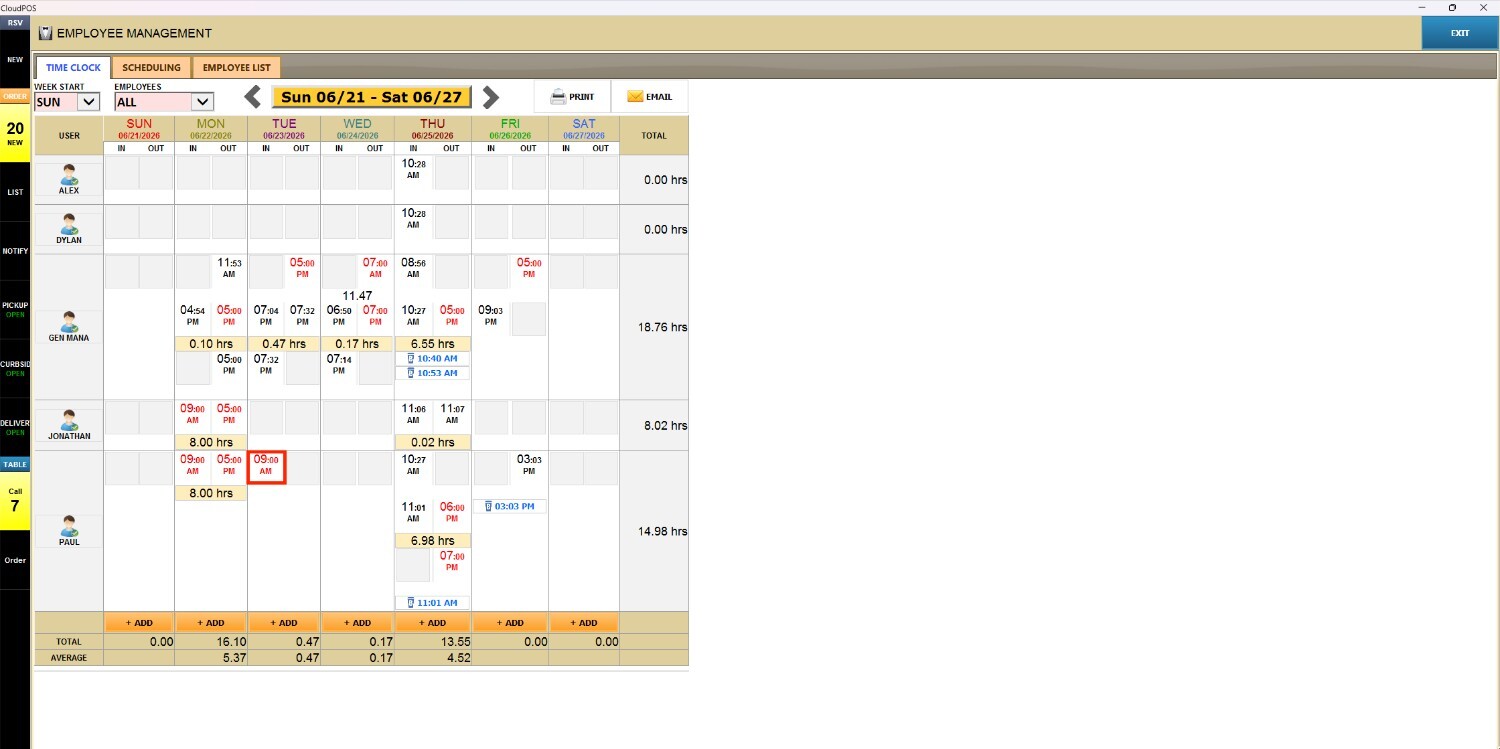
Use the PRINT button to generate a physical copy of the current week’s time clock summary and the EMAIL button to send the records directly from the system to designated recipients via email.