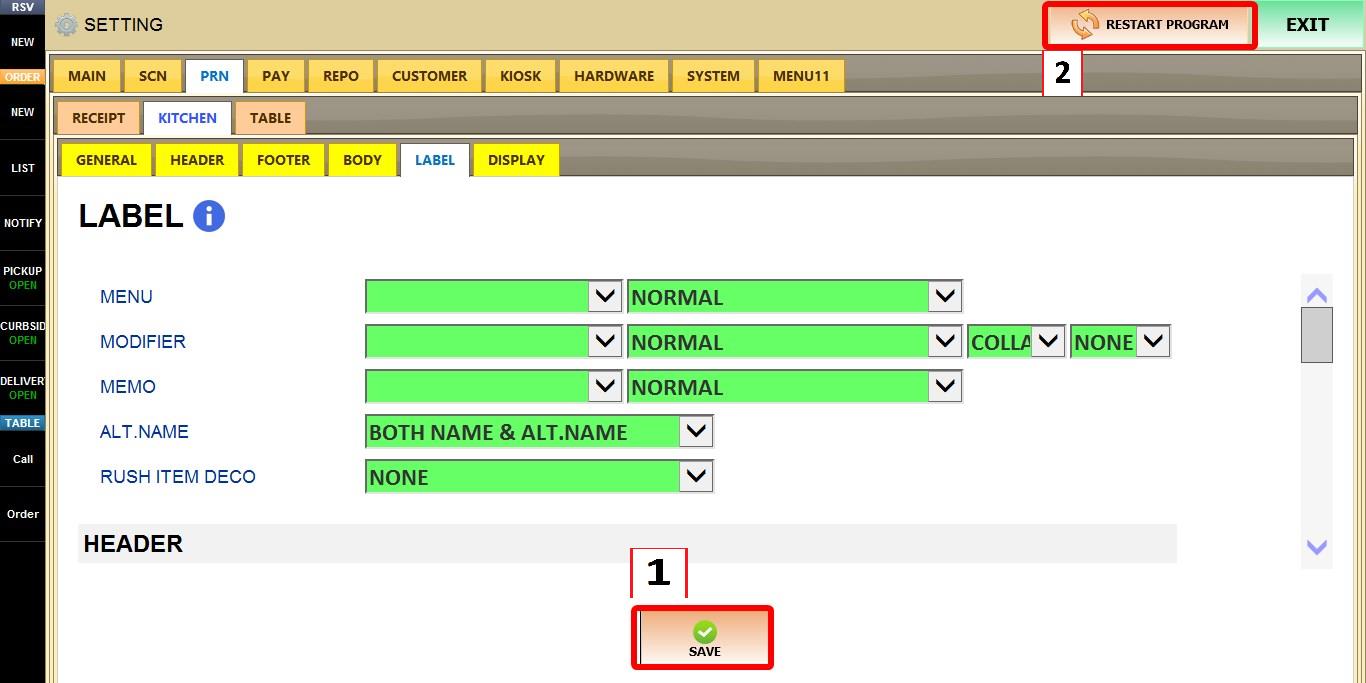
Label
These settings control the layout and formatting of information printed on kitchen labels. You can customize the header, footer, and side sections by choosing what information is displayed, where it appears, and how it is formatted for different order destinations.
MENU > SETTINGS > PRINT > KITCHEN > LABEL
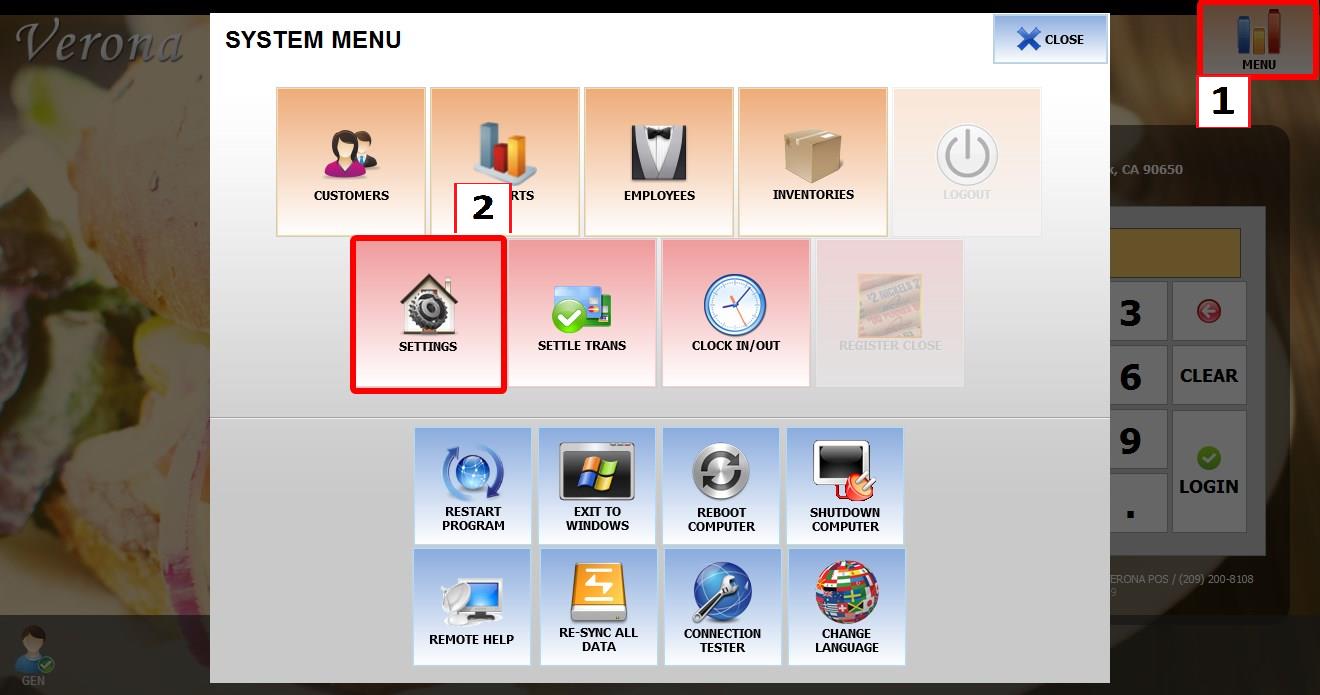
From the MAIN SCREEN, click MENU, then select SETTINGS.
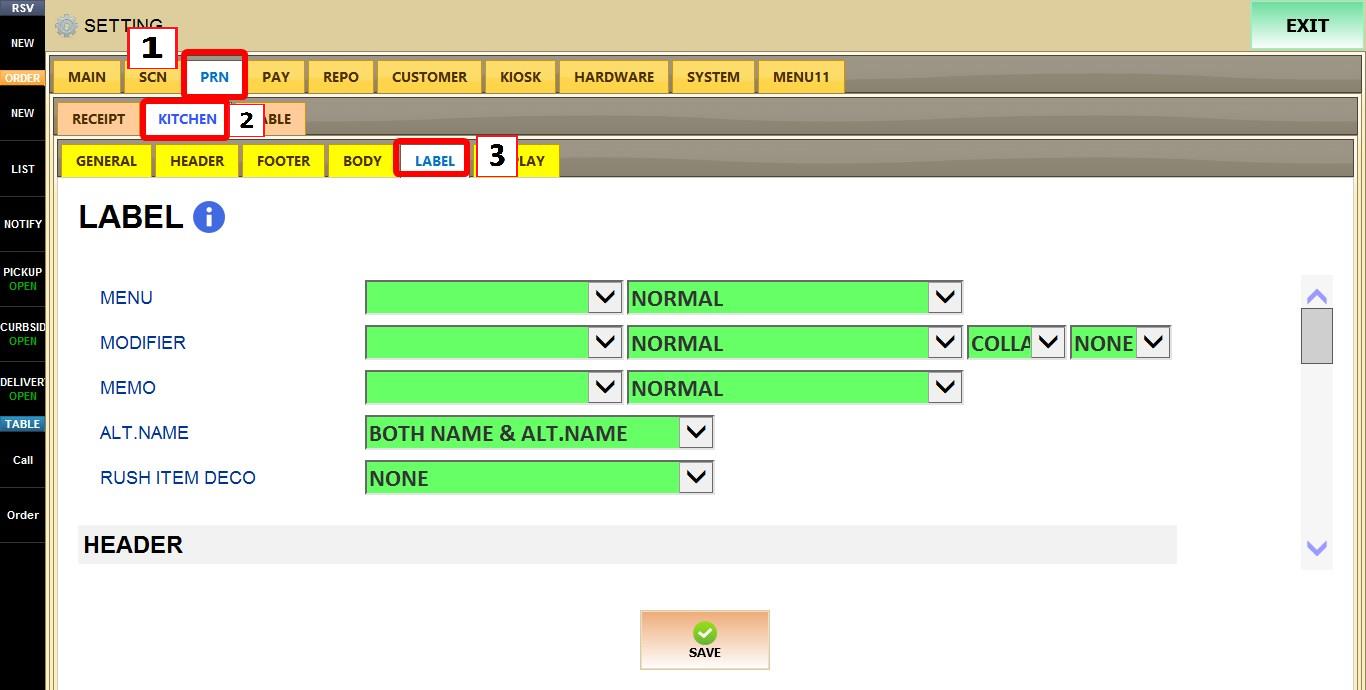
Open the PRINT tab, then KITCHEN, then select LABEL.
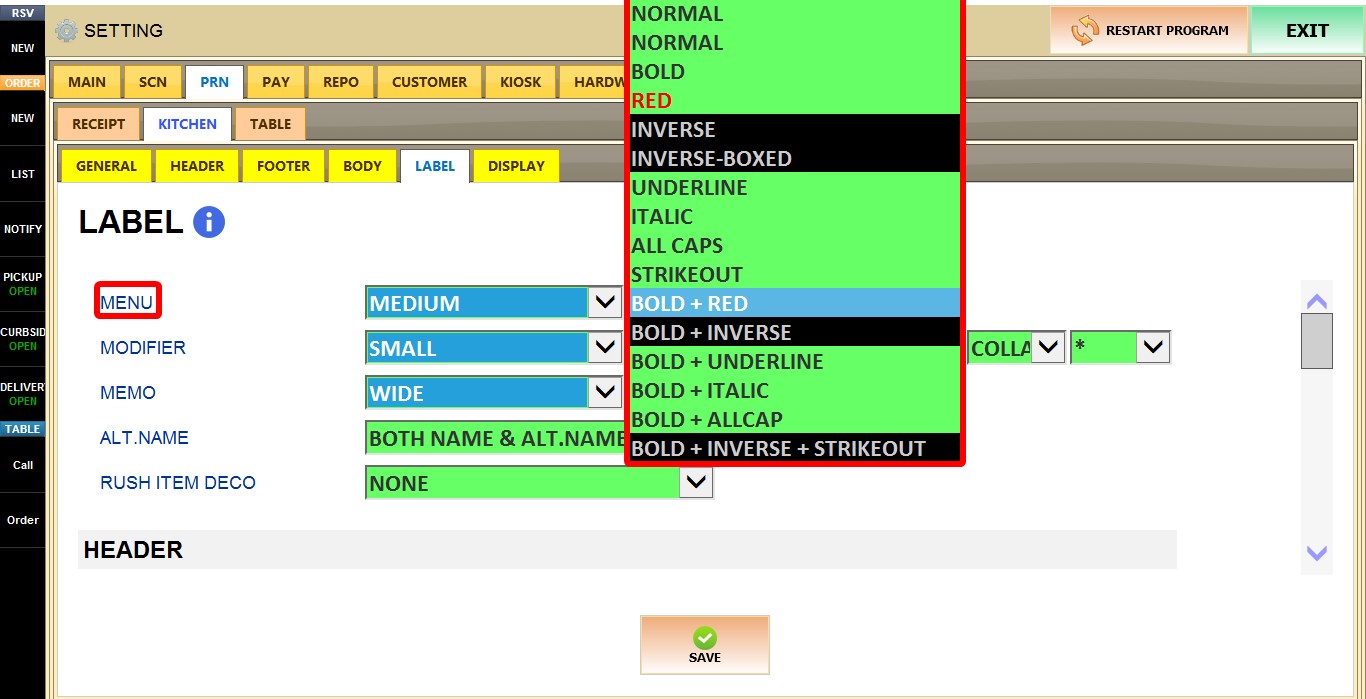
MENU
Determines the font size and text style used when printing menu items.
FONT SIZE (First Dropdwon): Selects the font size used for menu items. If BLANK is selected, Menu items are not printed on the label ticket.
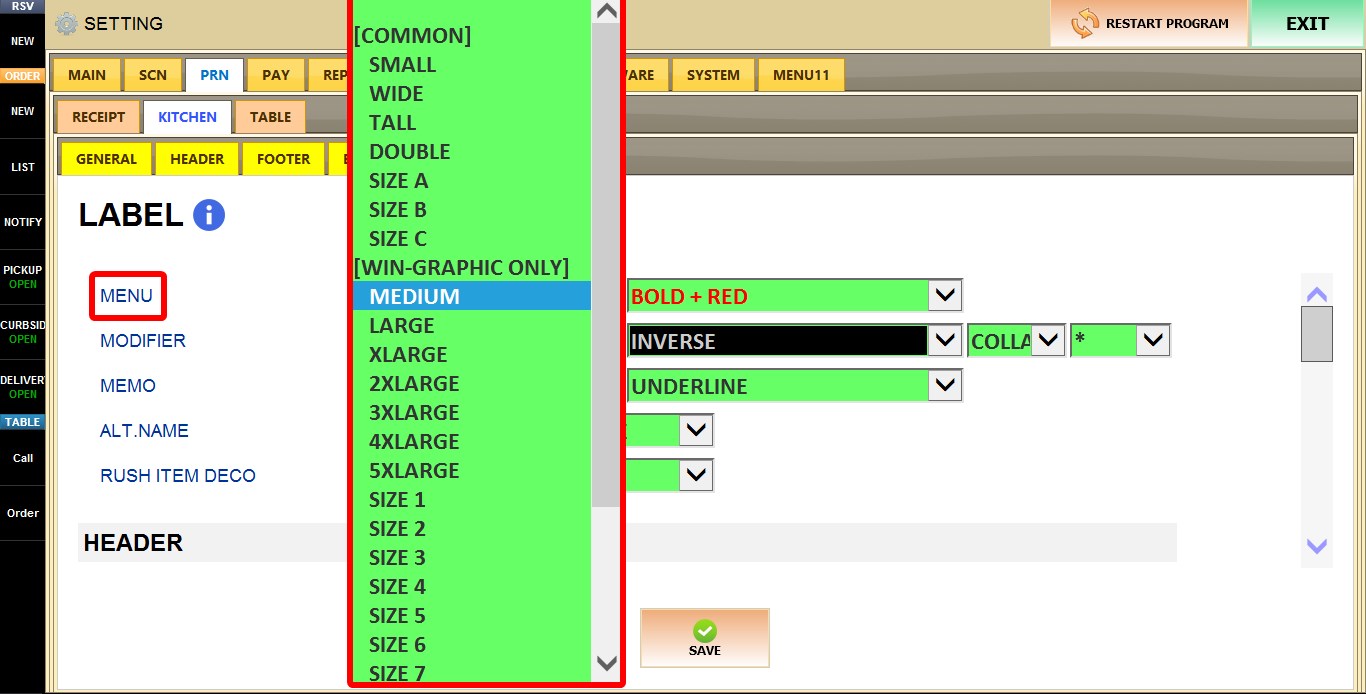
STYLE (Second Dropdwon): Selects the text style, such as BOLD, UNDERLINE, RED, ITALIC, and available combinations.

MODIFIER
Determines how modifiers are printed on the label.
FONT SIZE (First Dropdown): Selects the font size used for modifiers. If BLANK is selected, modifiers are not printed on the label ticket.
STYLE (Second Dropdwon): Selects the text style used for modifiers.
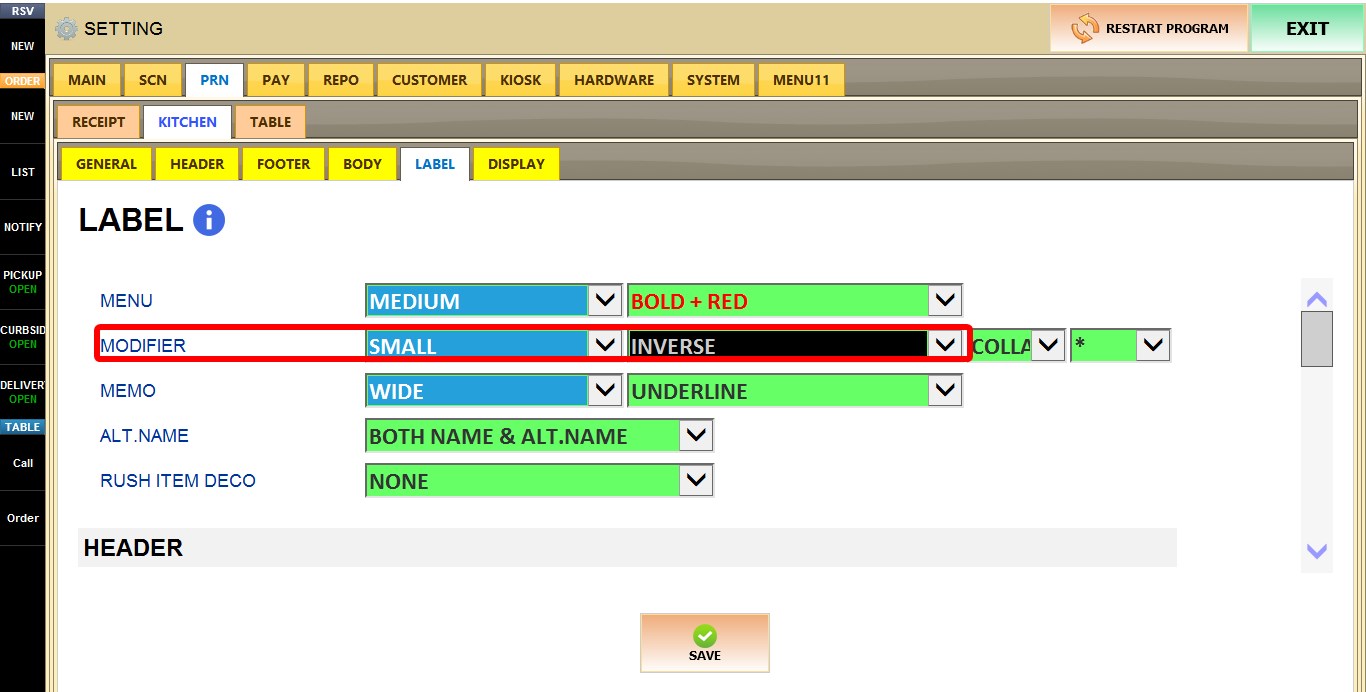
INDICATOR POSIITON (Third Dropdwon): Selects the prefix symbol displayed before each modifier.
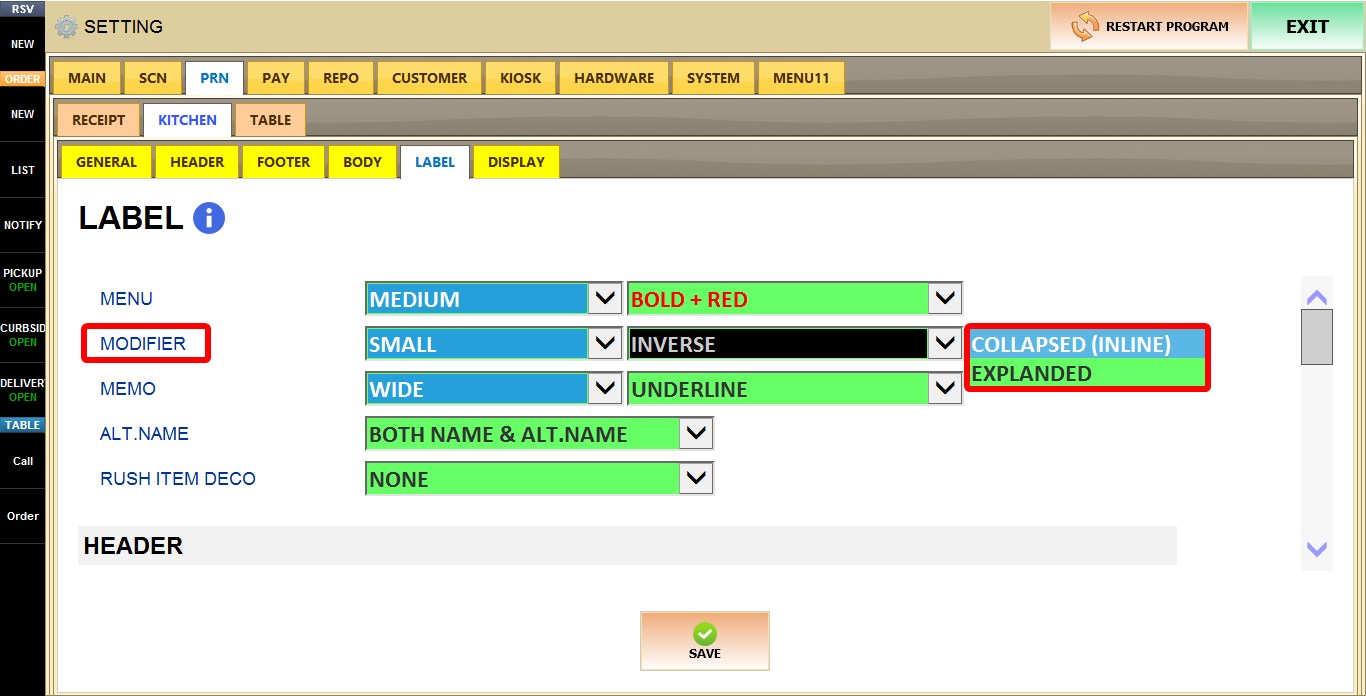
1. EXPANDED: Prints each modifier on a separate line beneath the item.
2. COLLAPSED (INLINE): Prints all modifiers together on a single line beneath the item, reducing the overall ticket length.
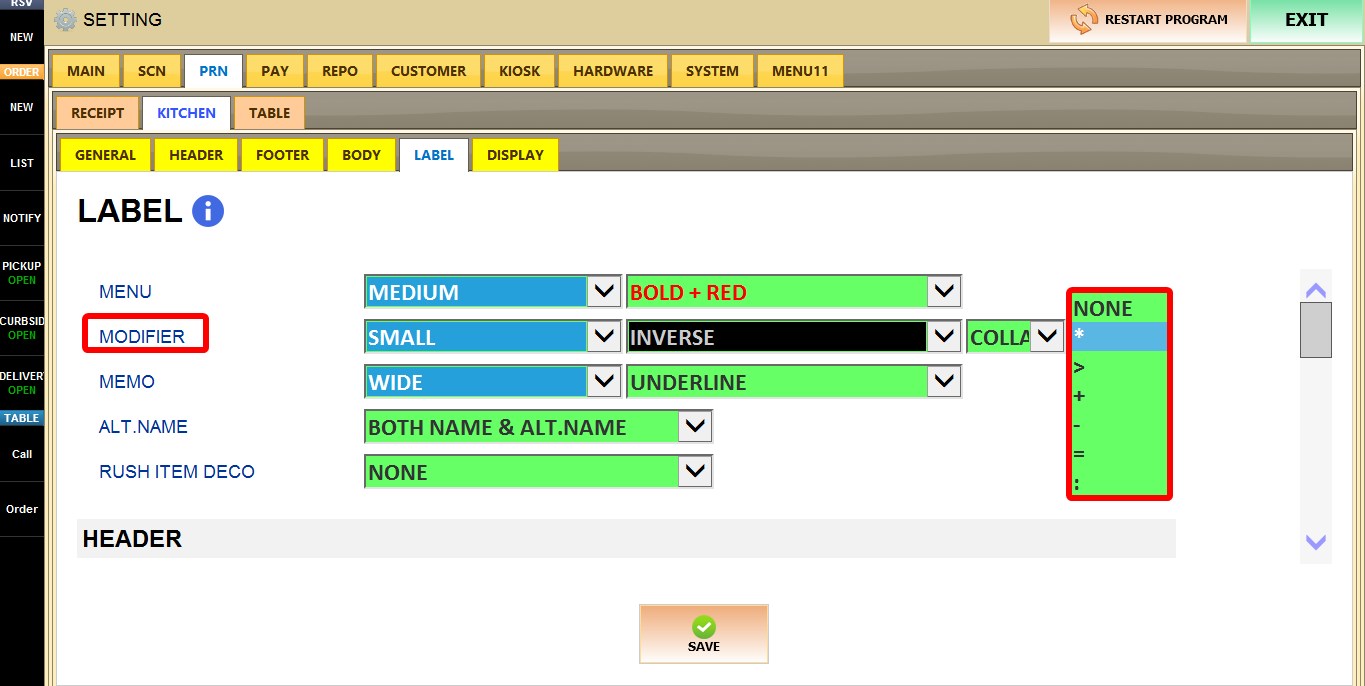
INDICATOR (Fourth Dropdwon): Determines which symbol is printed before each modifier to visually identify it on the label. Select the desired prefix symbol from the dropdown menu.
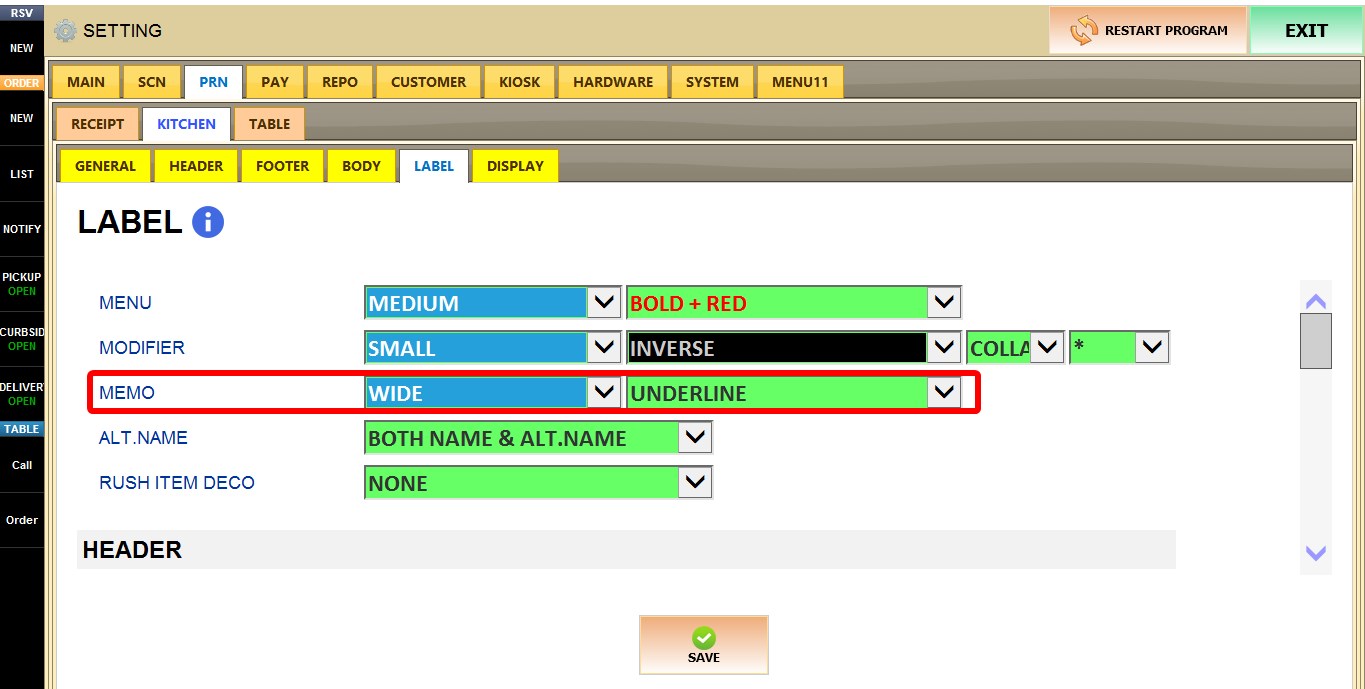
MEMO
Determines how memos are printed on the label.
1. FONT SIZE: Selects the font size used for memos. If BLANK is selected, memos are not printed on the label ticket.
2. STYLE: Selects the text style used for memos.
ALT. NAME
Determines how the item name and alternate item name are printed.
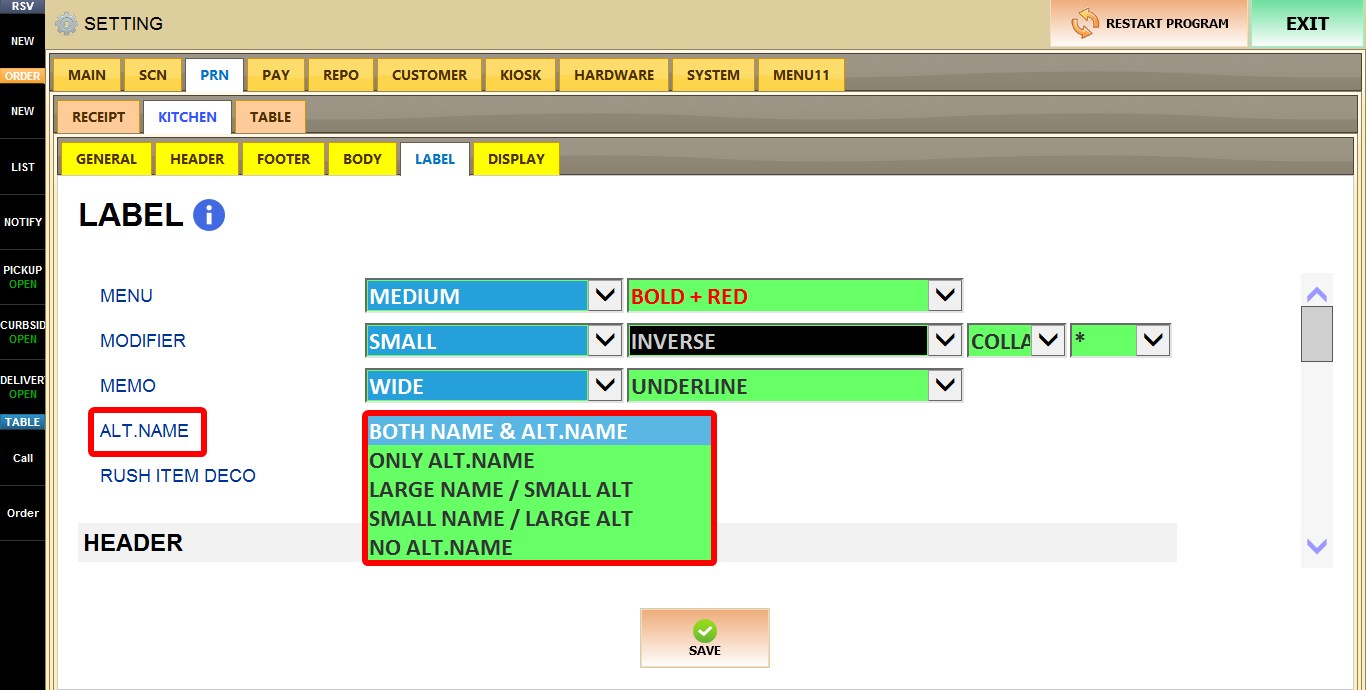
1. BOTH NAME & ALT. NAME: Prints both the item name and alternate name.
2. ONLY ALT. NAME: Prints only the alternate name.
3. LARGE NAME / SMALL ALT: Prints the item name in a larger font and the alternate name in a smaller font.
4. SMALL NAME / LARGE ALT: Prints the item name in a smaller font and the alternate name in a larger font.
5. NO ALT. NAME: Prints only the item name.
RUSH ITEM DECO
Determines how rush items are identified on label tickets.
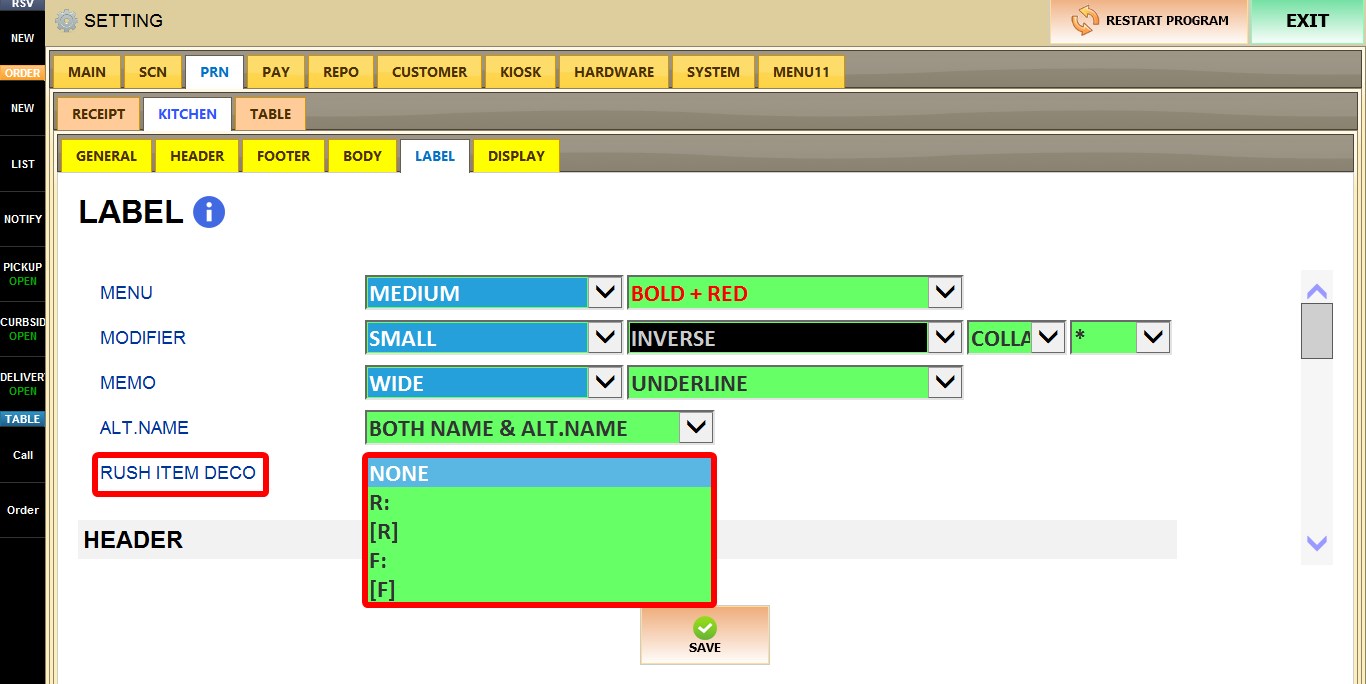
1. NONE: Does not display a rush indicator.
2. R: Displays R: Icon
3. [R]: Displays [R]: Icon
4. F: Displays F: Icon
5. [F]: Displays [F]: Icon
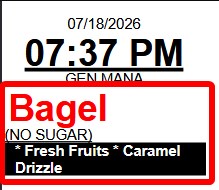
RESULT
The following example demonstrates the combined result of the formatting settings described in this section.
HEADER
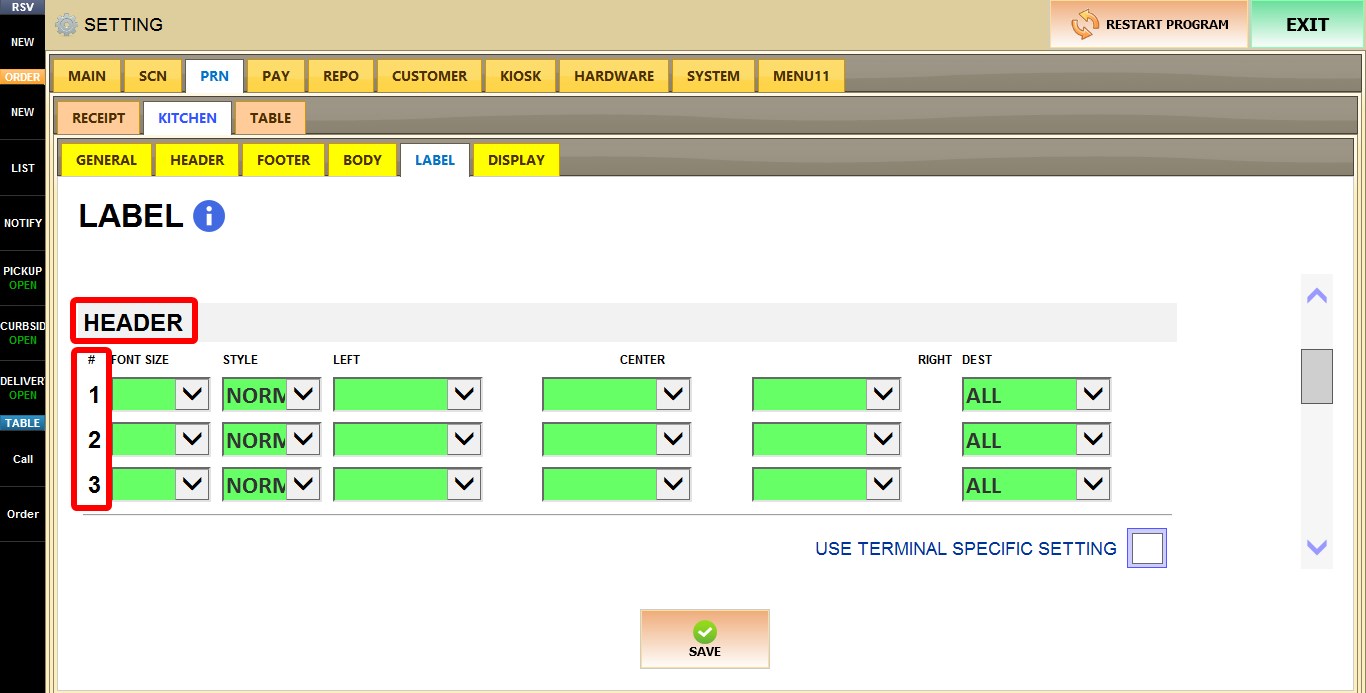
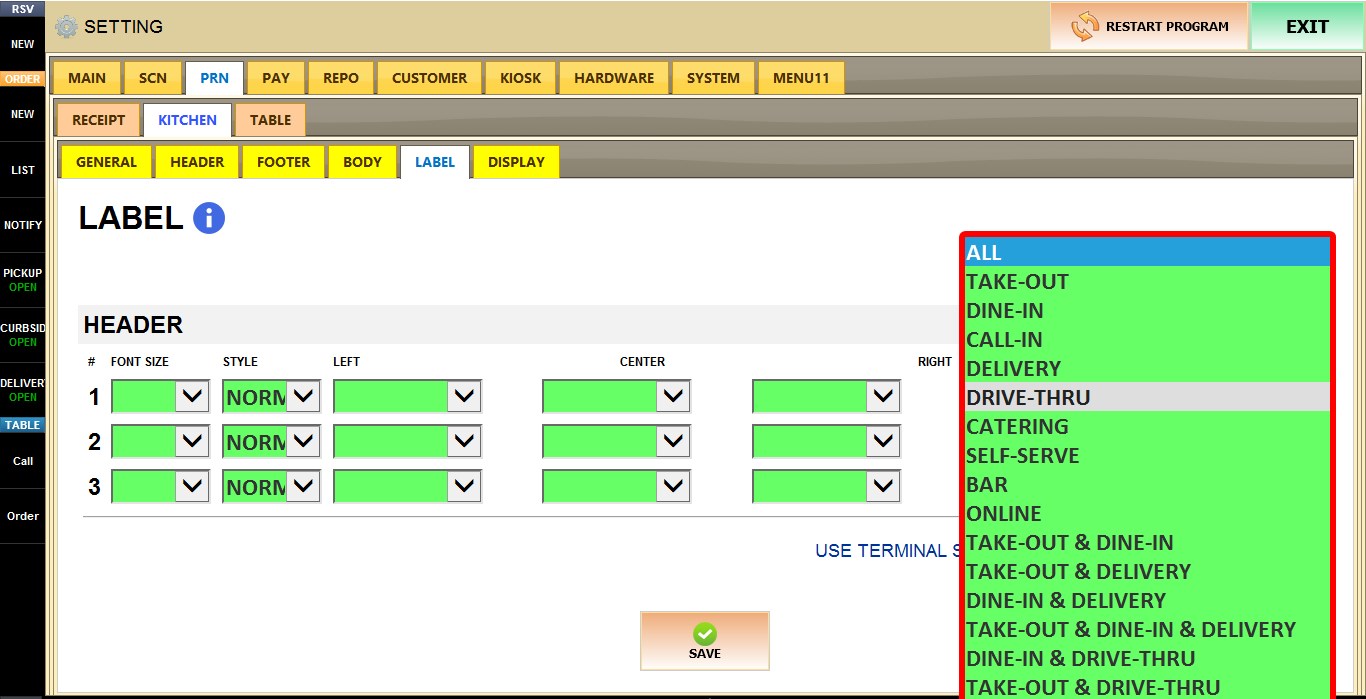
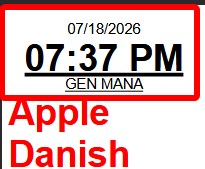
These settings control the custom header printed on kitchen labels. You can choose what information is displayed, where it appears on each line, and how it is formatted.
ROW NUMBER (#)
Each numbered row represents one line that can be configured independently.
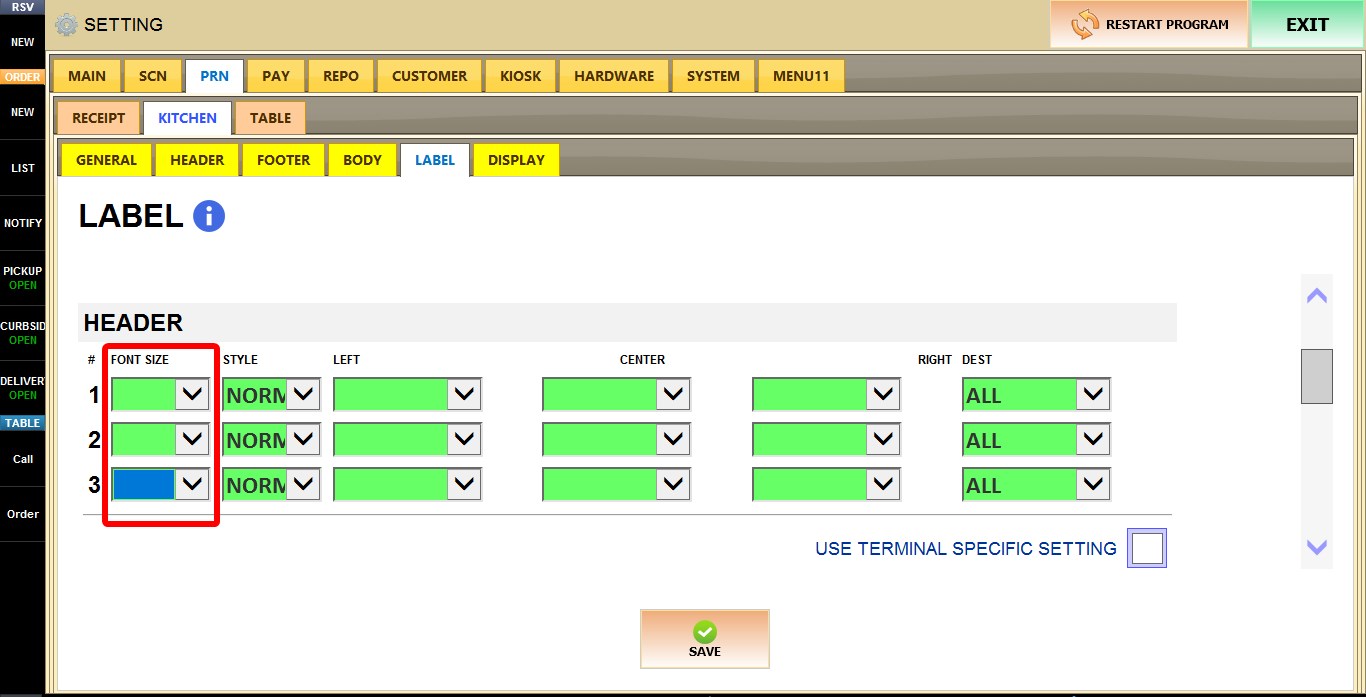
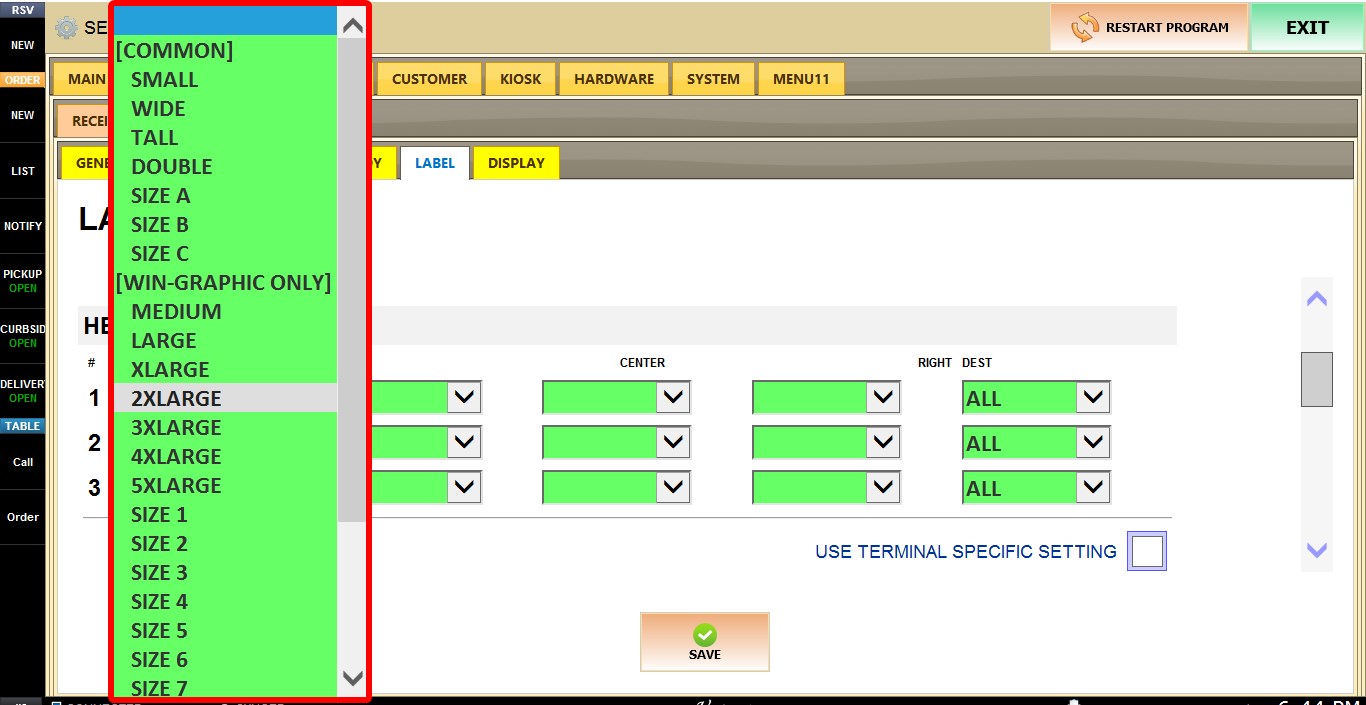
FONT SIZE
Determines the font size used for the selected line. The selected size applies only to that line.
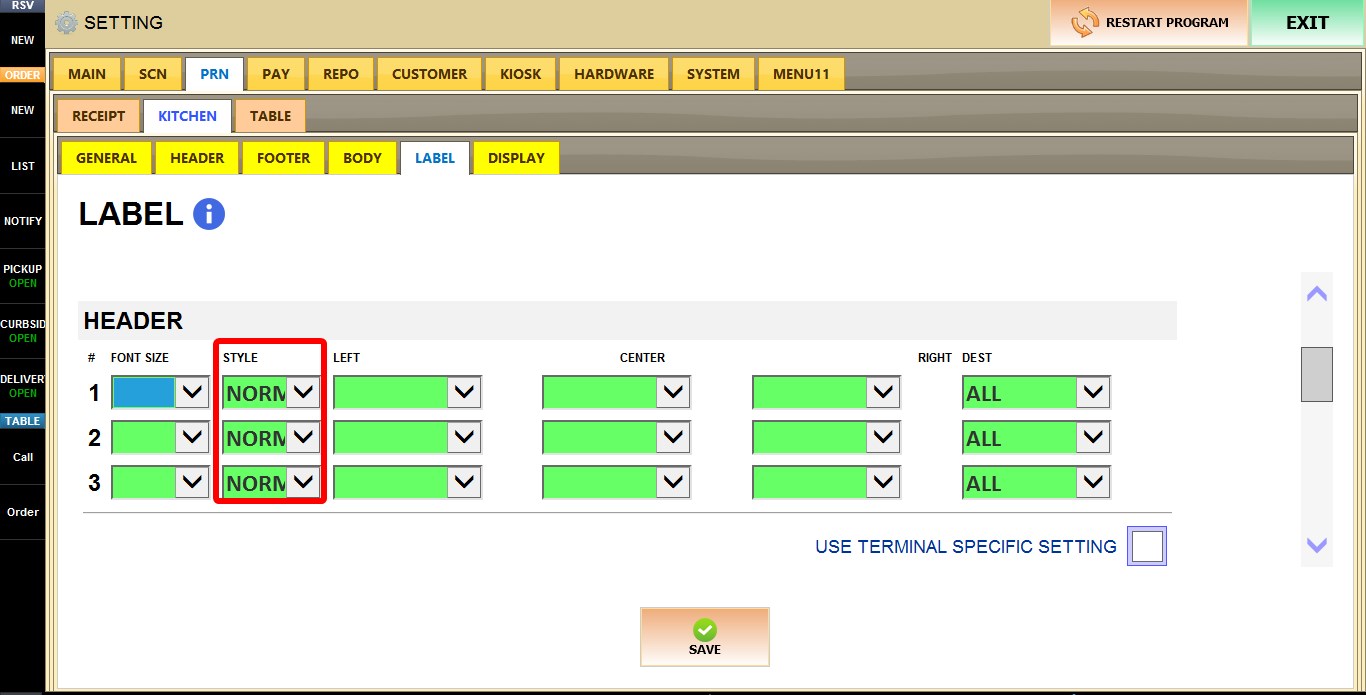
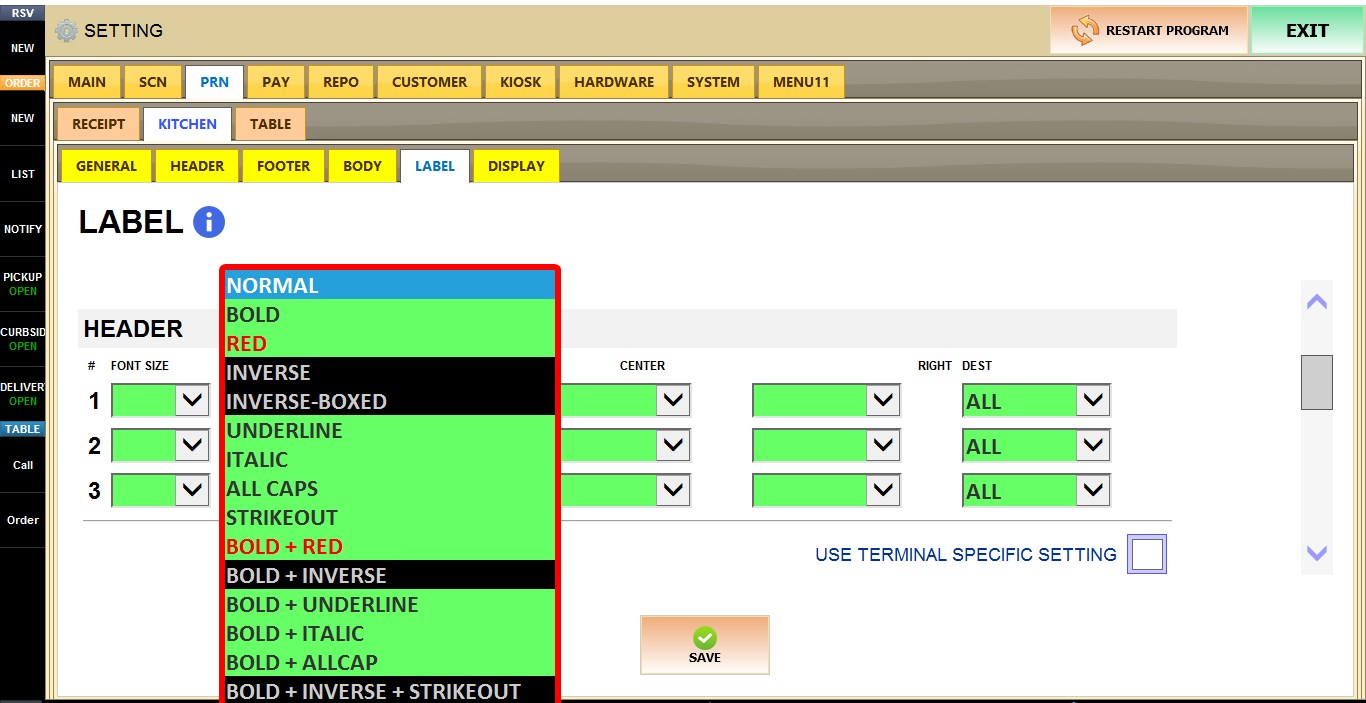
STYLE
Determines the text style used for the selected line. The selected style applies only to that line.
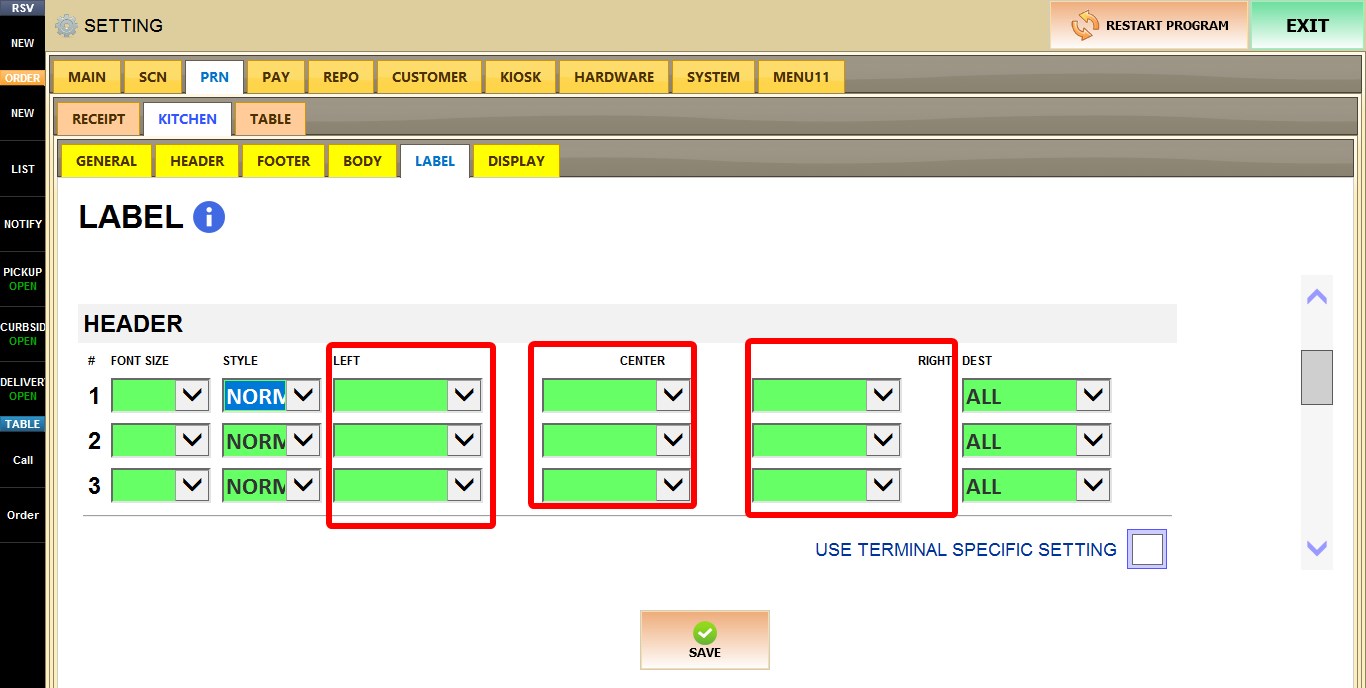
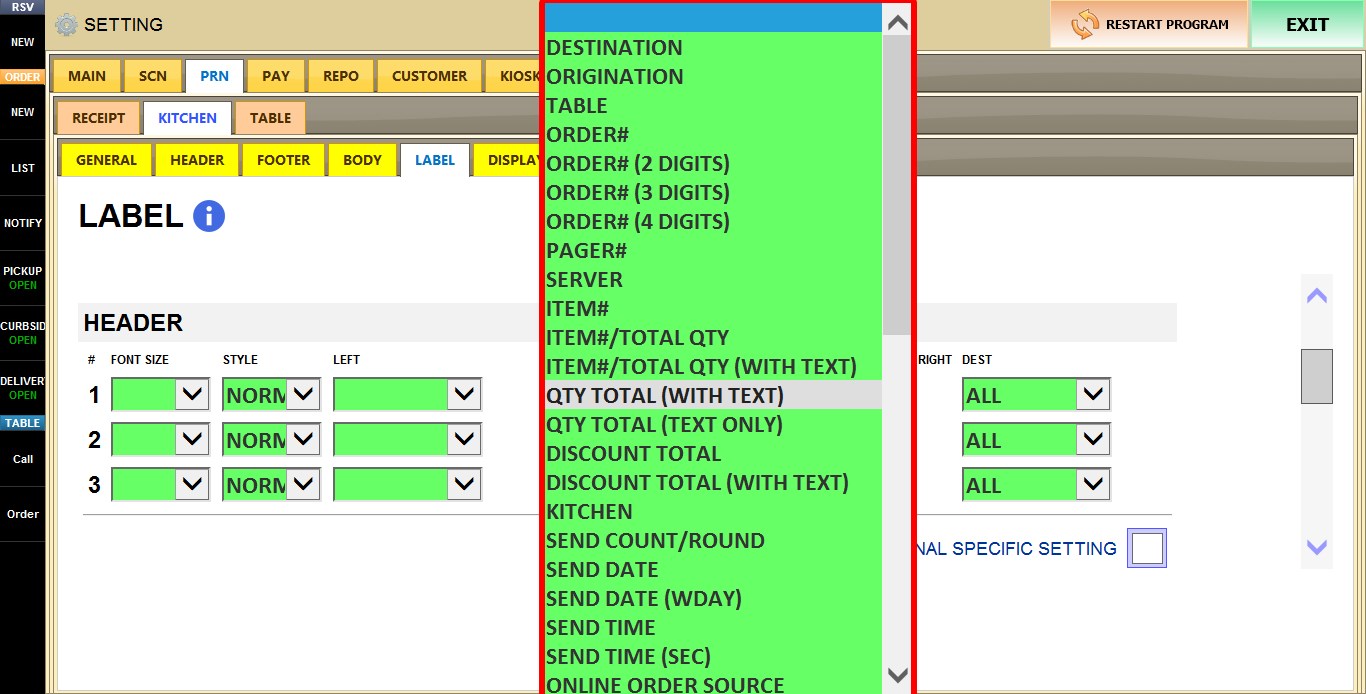
LEFT / CENTER / RIGHT
Selects which information is displayed on the left, center, or right side of the label header.
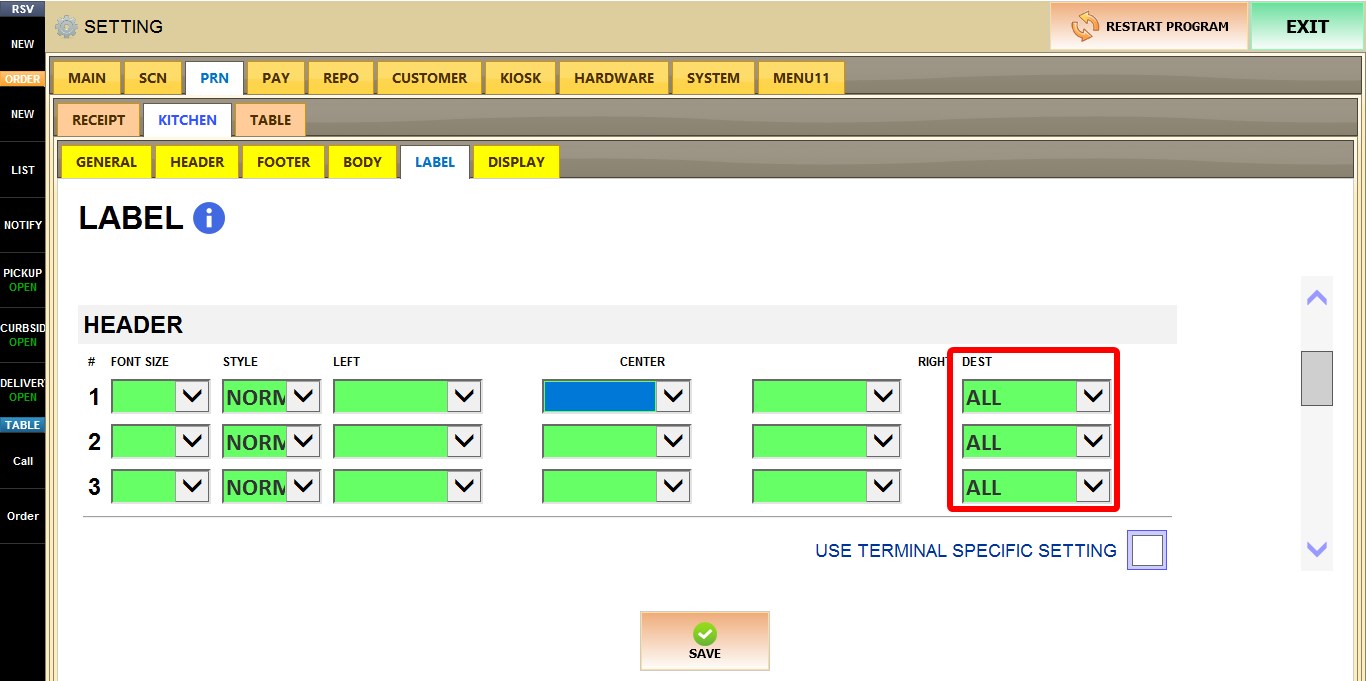
DEST
Determines which order destination this configuration applies to, such as DINE-IN, TAKE-OUT, ONLINE, BAR, and other supported destinations.
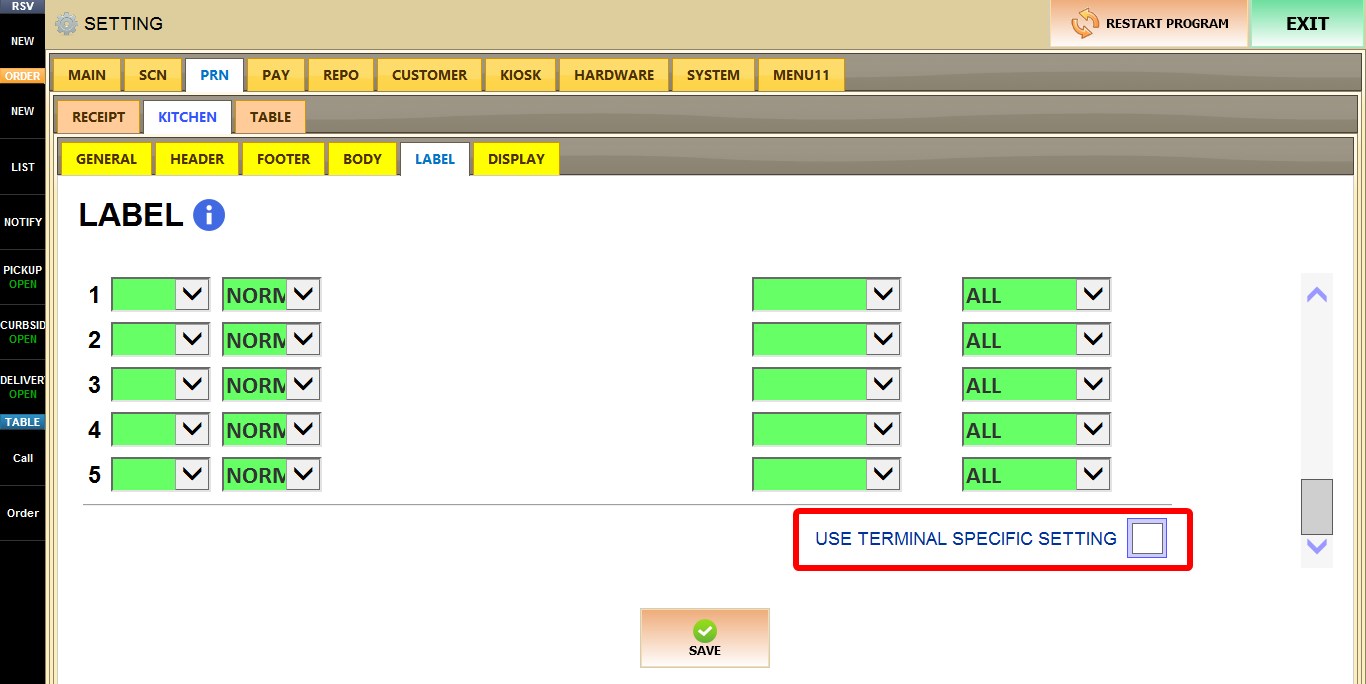
USE TERMINAL SPECIFIC SETTING
When enabled, the current terminal uses its own label header configuration instead of the store-wide settings.
A second configuration table becomes available, allowing you to configure FONT SIZE, STYLE, DEST, LEFT, CENTER, and RIGHT independently for this terminal only.
HEADER RESULTS
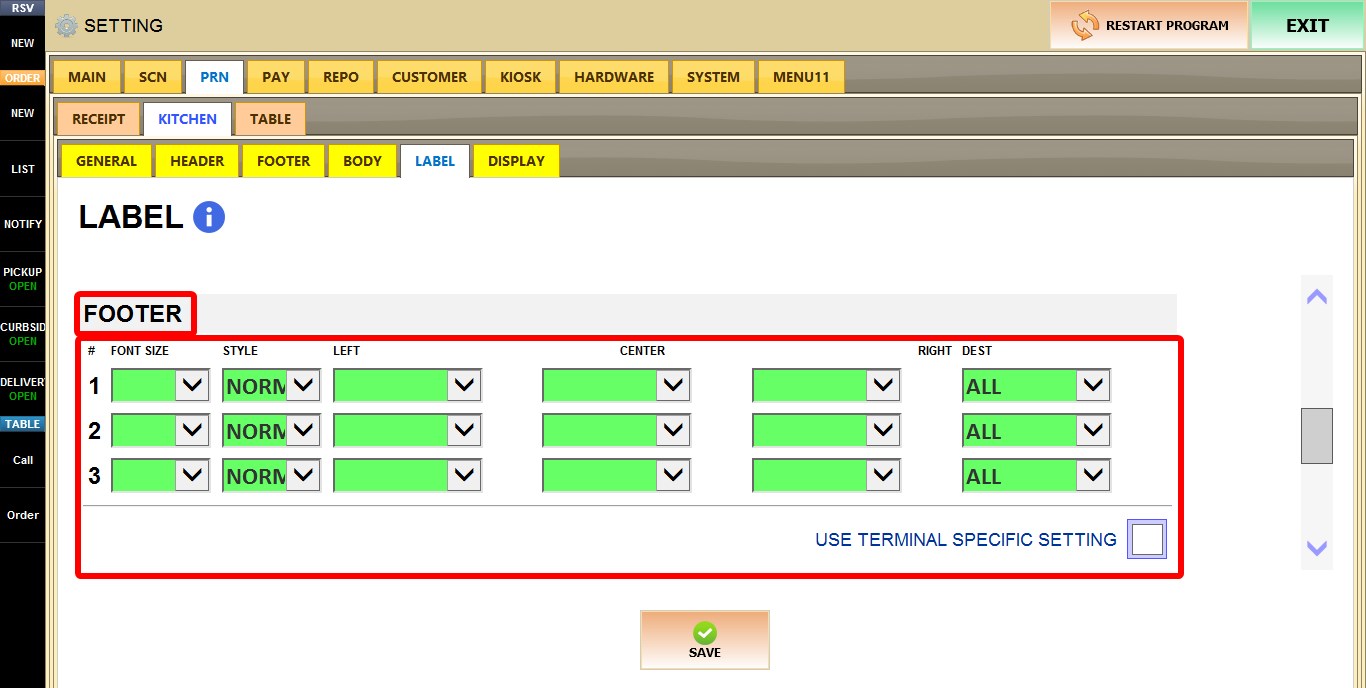
FOOTER
This section functions the same as the HEADER section, but applies to the bottom of kitchen labels.
It supports independent configuration of FONT SIZE, STYLE, DEST, LEFT, CENTER, and RIGHT, including USE TERMINAL SPECIFIC SETTING.

RESULT
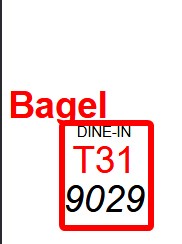
SIDE
This section controls the information printed along the side of kitchen labels.
It functions the same as the HEADER and FOOTER sections, but only provides the TOP RIGHT position for placing elements.
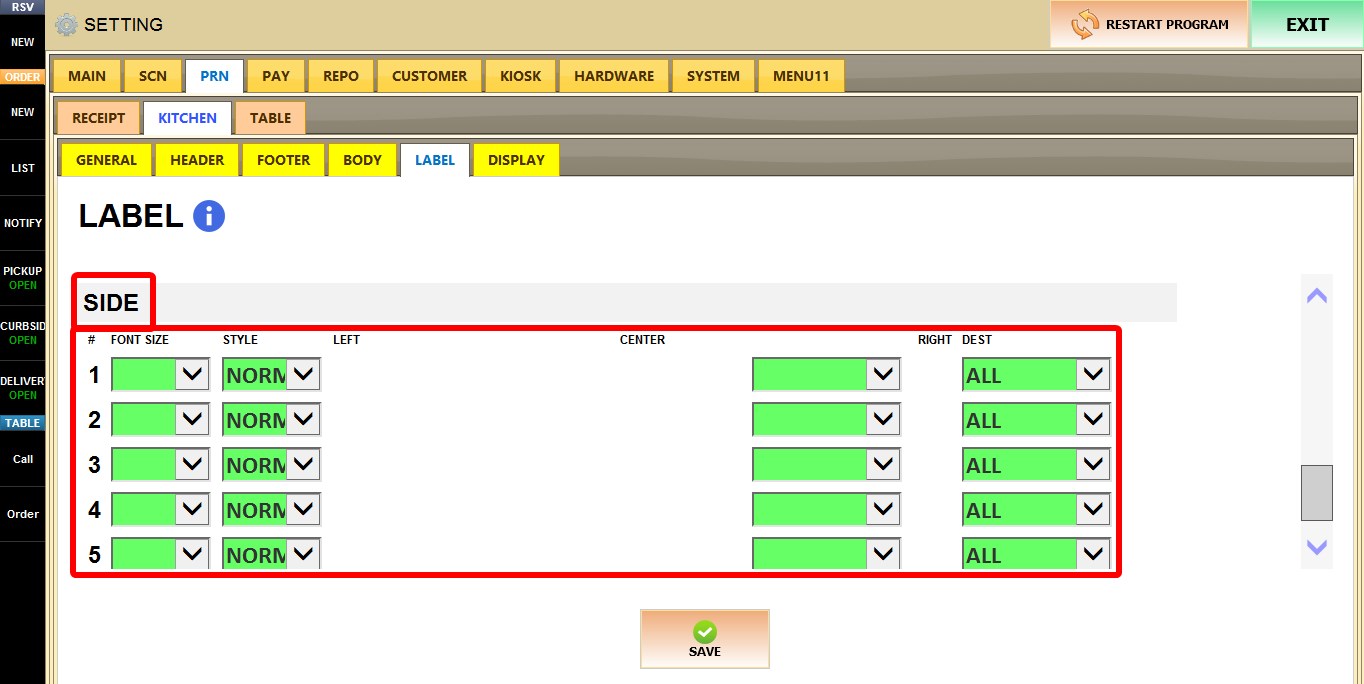
RESULT
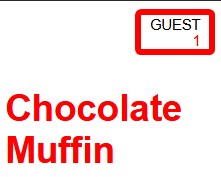
USE TERMINAL SPECIFIC SETTING
When enabled, the current terminal uses its own side configuration instead of the store-wide settings.
After you are done configuring the settings, click SAVE, then RESTART THE PROGRAM for the changes to take effect.