Map
The Map Manager is where the store’s table maps are managed. This guide explains the tools and buttons available in the Map Manager, including how to add and edit maps, recover previous versions, and manage maps remotely using an asset code.
MENU > SETTINGS > REPO > MAP
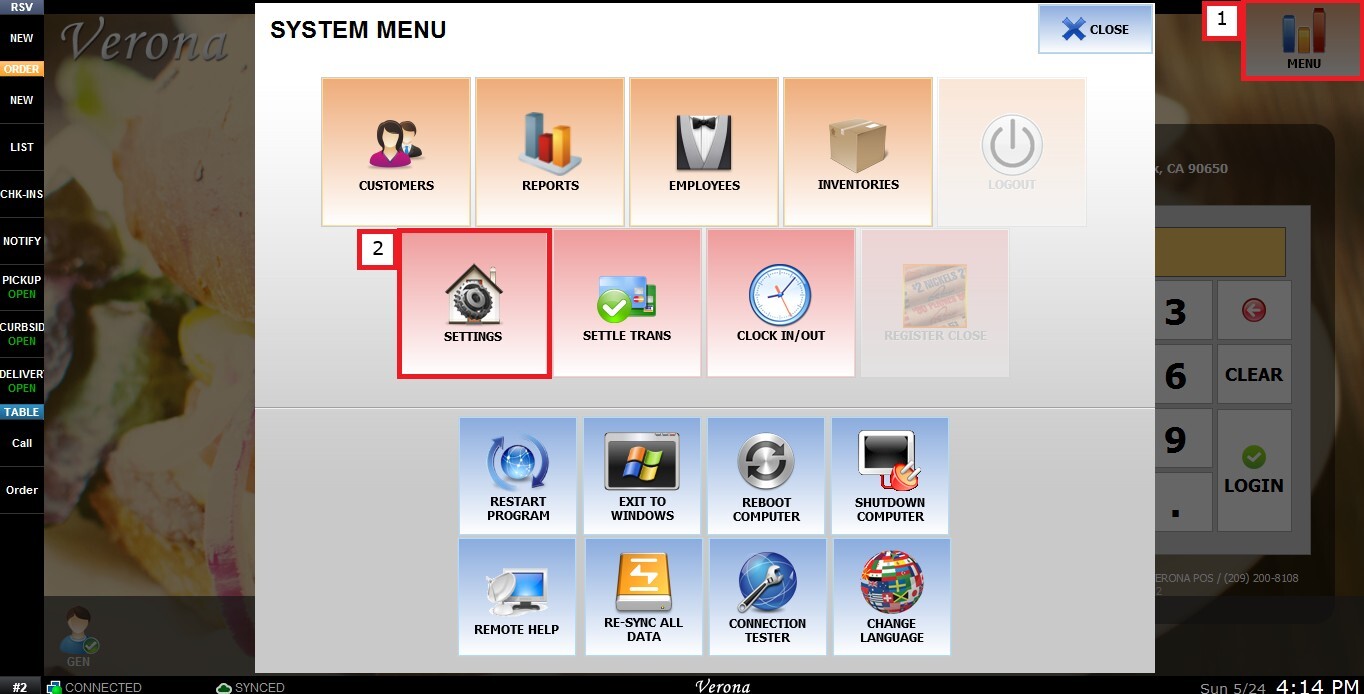
From the Main Screen, click MENU, then select SETTINGS.
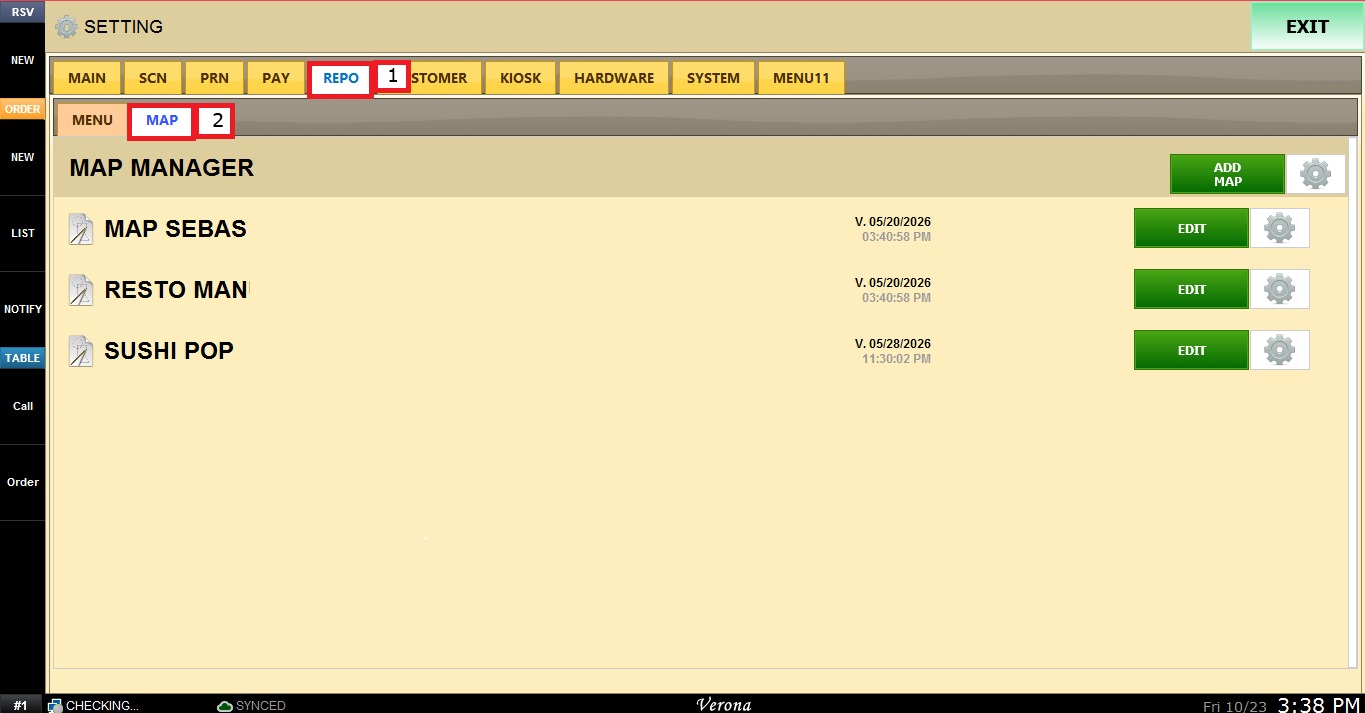
Select REPO, then click the MAP tab to open the MAP MANAGER, it displays the list of maps created for the store. Next to each map name, the system shows the date and time of its last modification.
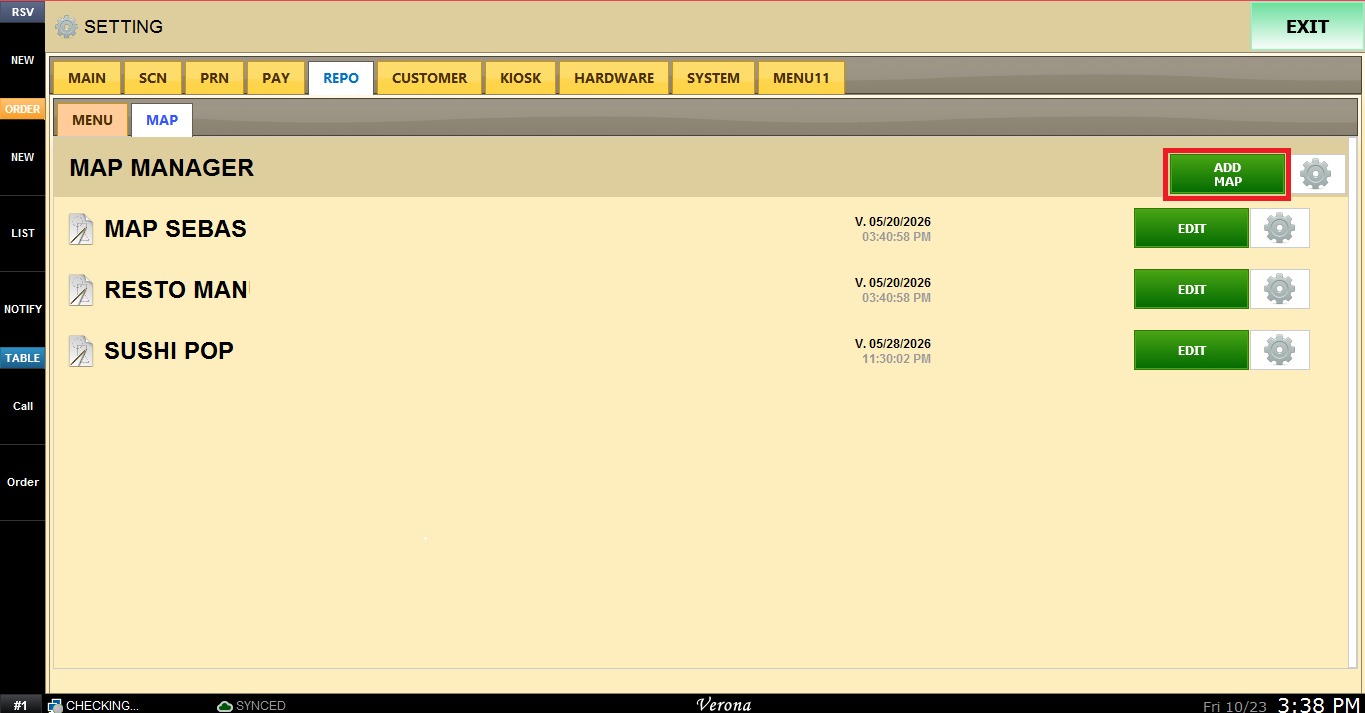
Add Map
Click ADD MAP to create a new map.
To learn how to create a map, please refer to Creating a Map Guide.
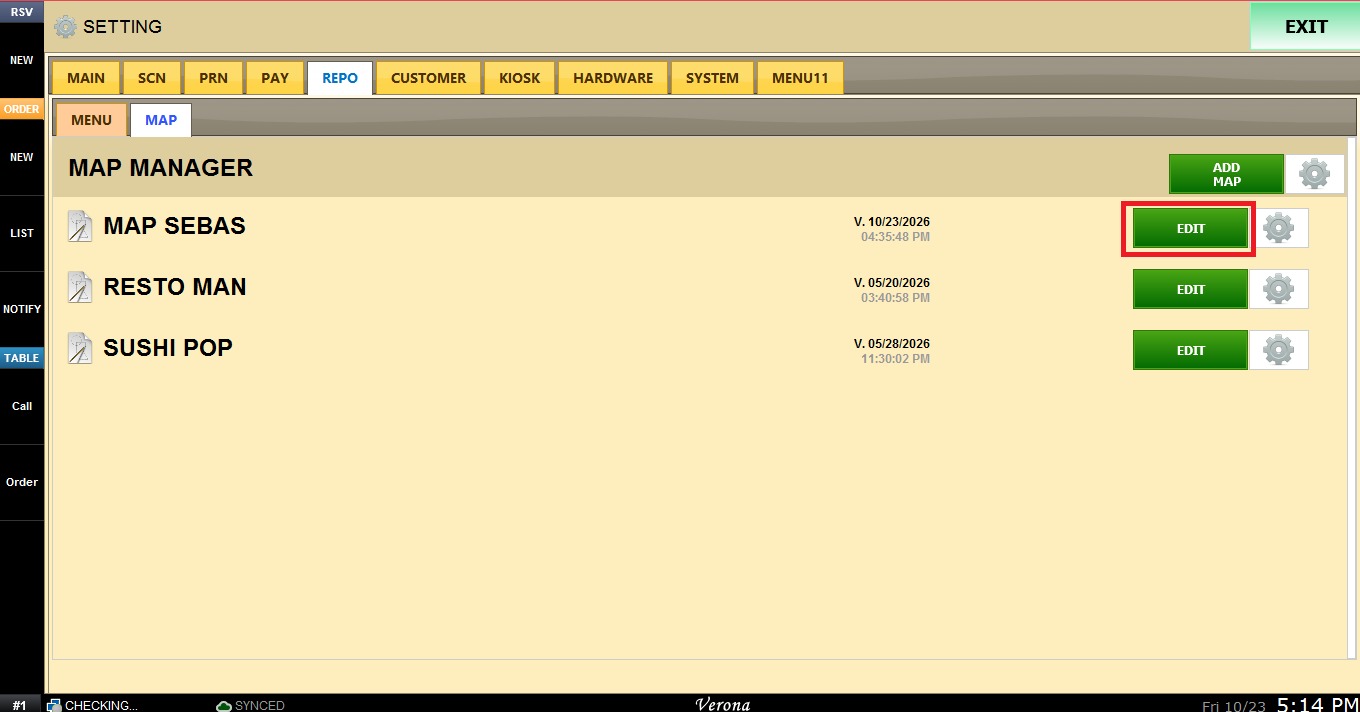
Edit
Click EDIT next to a map to open it and make changes to its layout.
To learn how to copy or delete a map, please refer to the Map Tools Guide.
Map Manager Options
Click the GEAR ICON at the top right, next to ADD MAP, to open the SELECT YOUR CHOICE window.
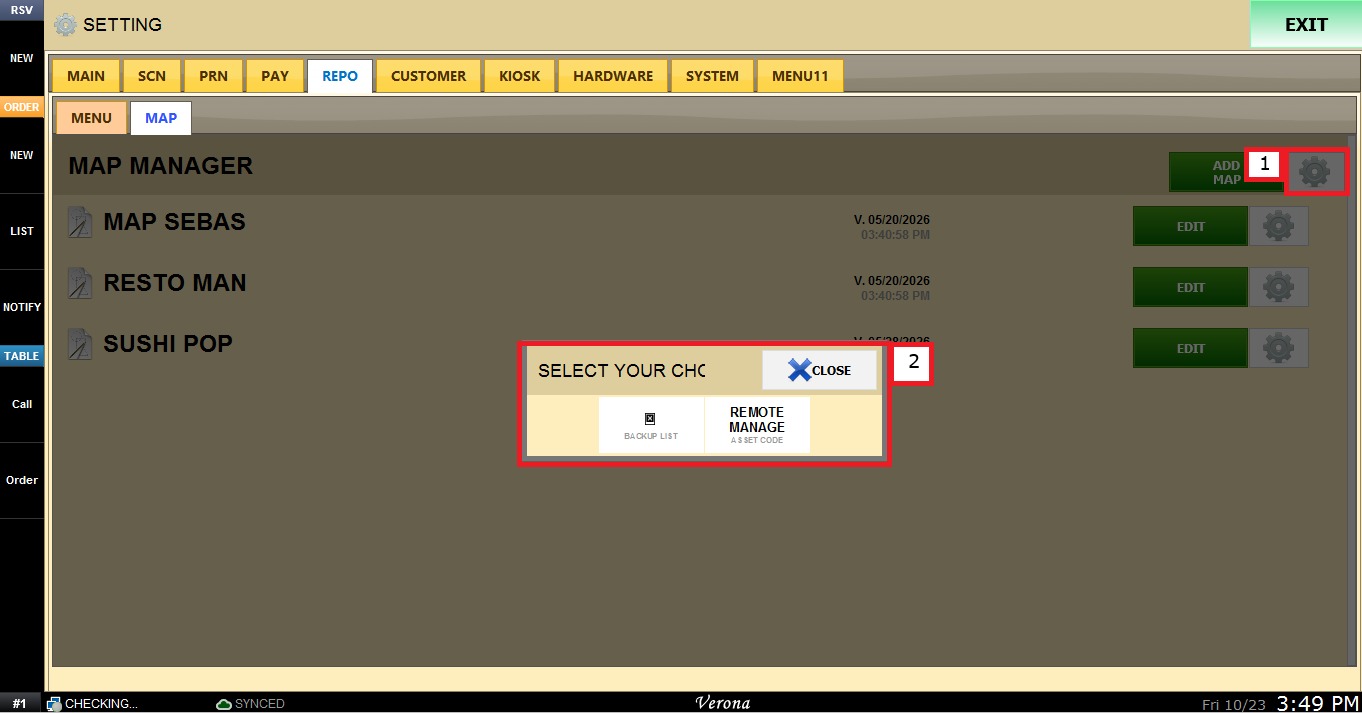
1. BACKUP LIST: Opens a list of the previous versions of the maps, so a map can be recovered if needed.
2. REMOTE MANAGE: Opens the remote management options, described below.
Remote Manage
The Remote Manage options work with an asset code, which dealers can find in their portal. With the asset code, a dealer can manage a map that is not on the system they are currently using.
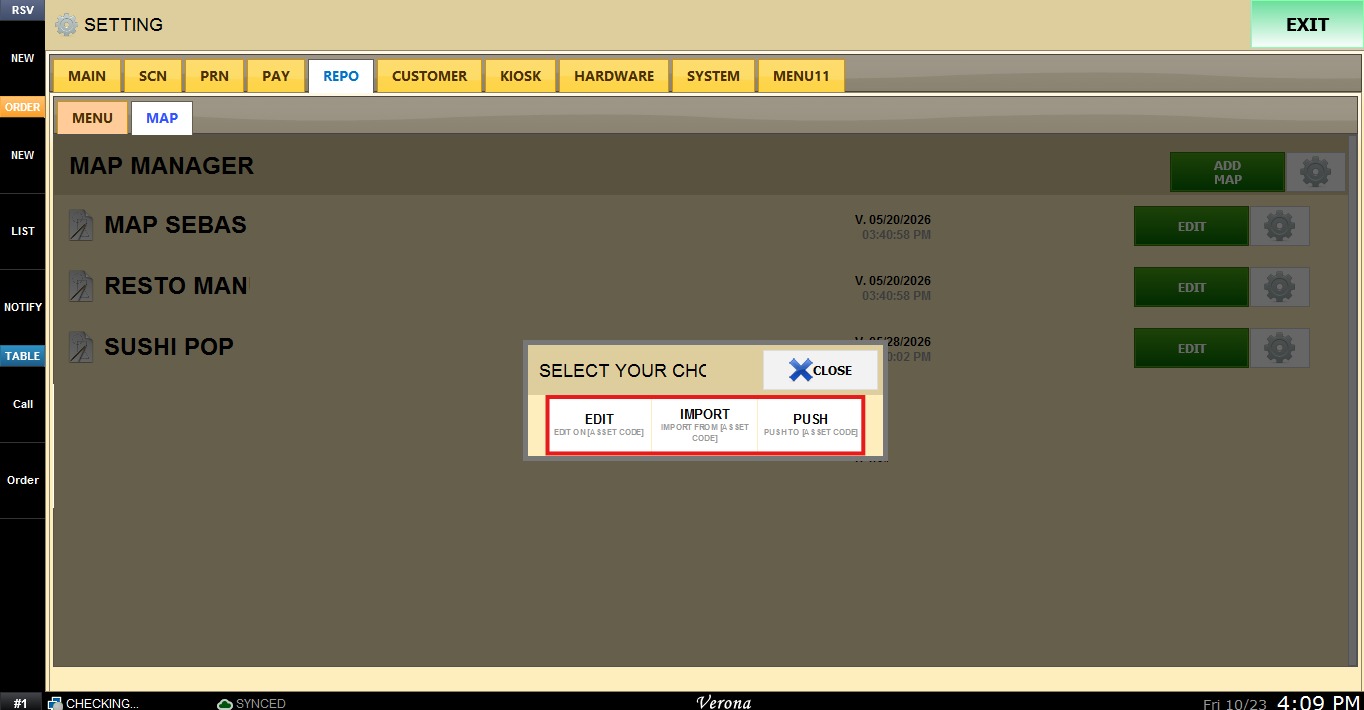
1. EDIT: Allows the dealer to edit a map that is not on their system, using its asset code.
2. IMPORT: Imports a complete map from the asset code into the POS.
3. PUSH: Pushes a map from the POS to the asset code.