Sales Report
The Sales Report settings control what information is printed on the sales report when a shift or the register is closed. Use them to show or hide the store information, the payment details, the products sold, and additional sections of the report.
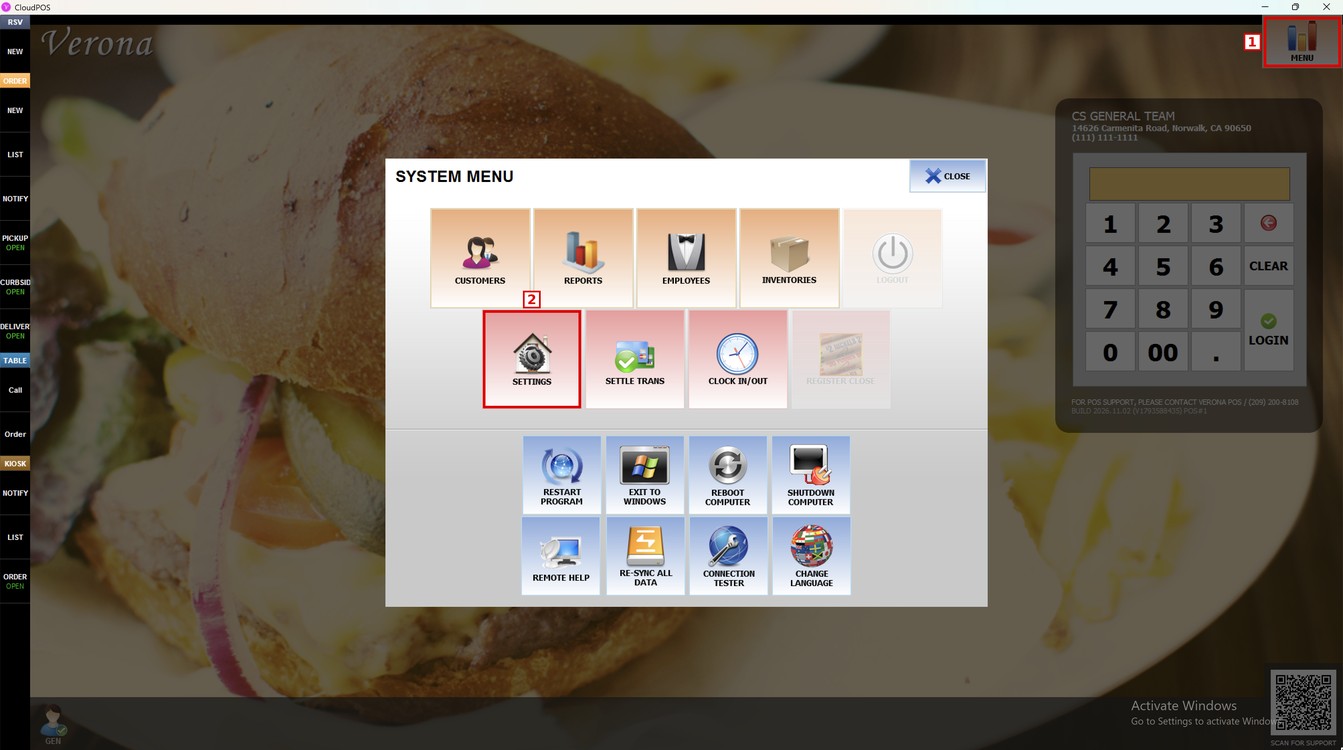
Main Screen> MENU> SETTINGS> MAIN> REPORT> SALES REPORT
Go to MENU and press SETTINGS.
Open the MAIN tab and press REPORT. The SALES REPORT section is at the top of the screen.
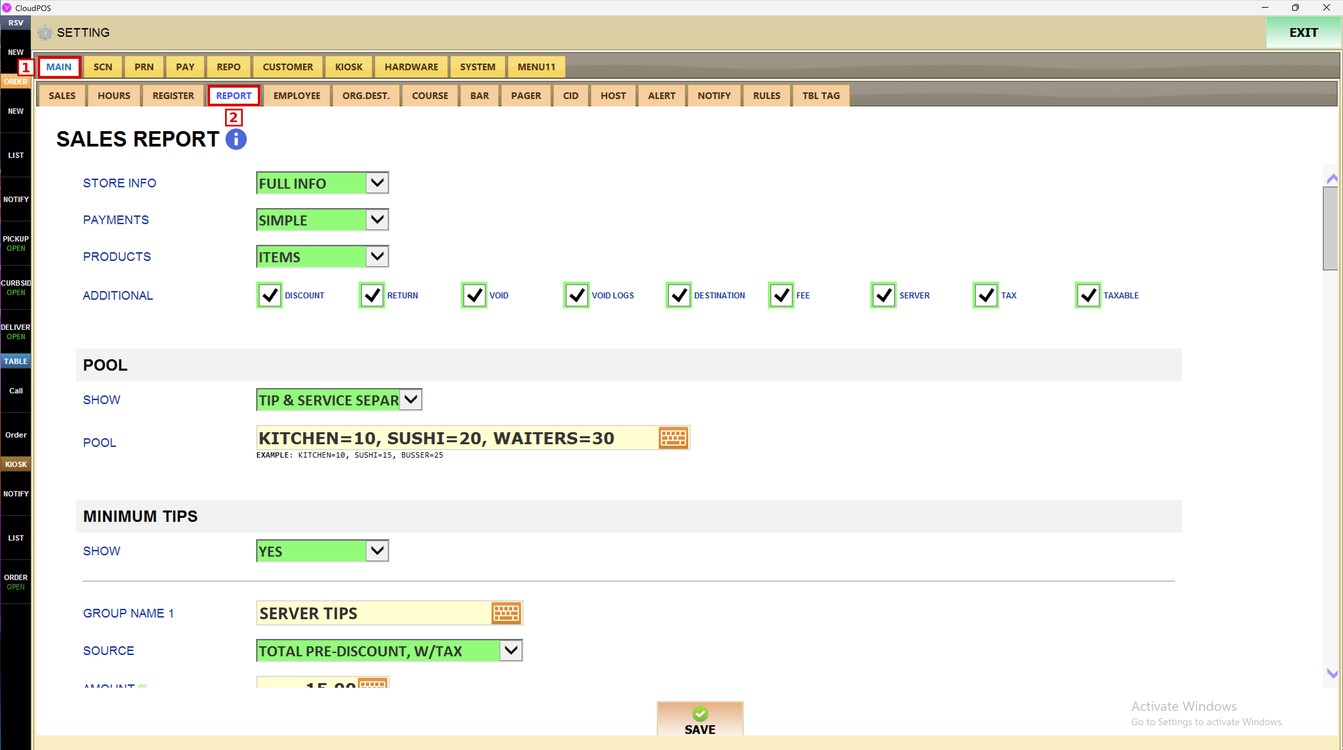
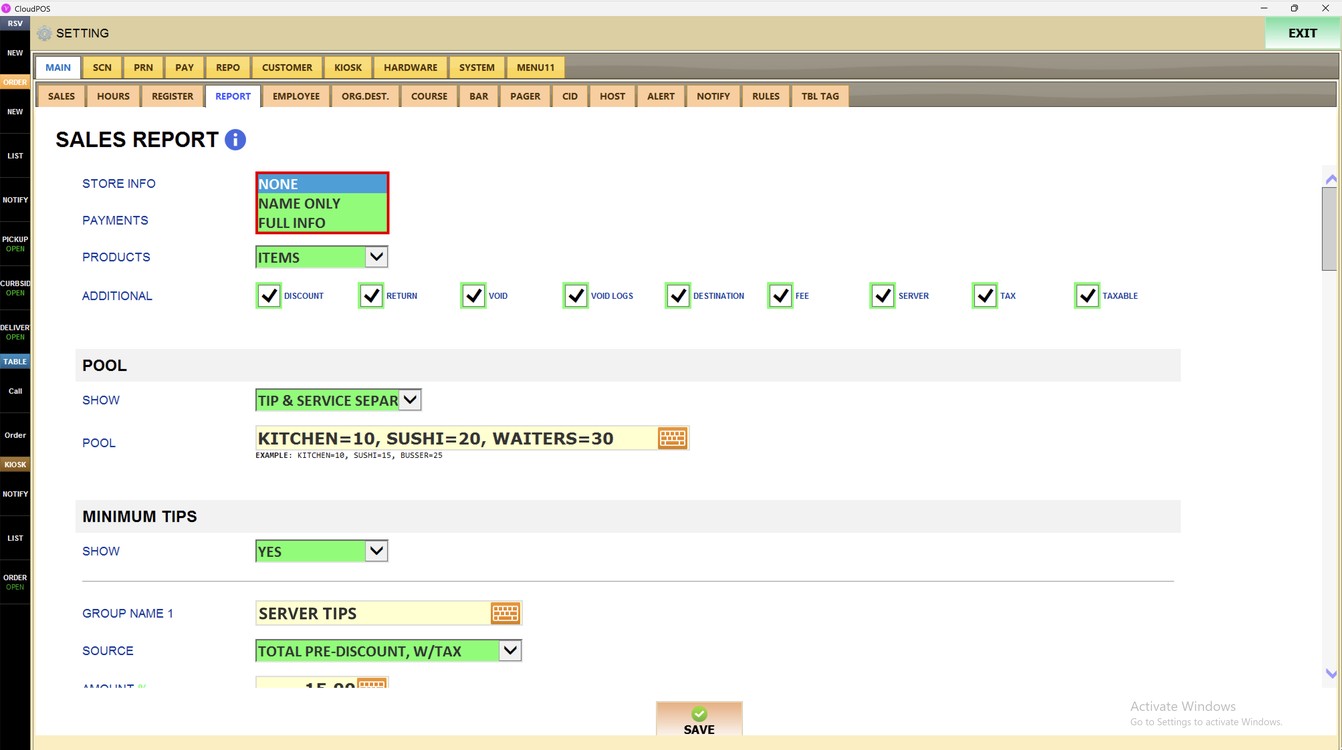
Store Info:
Sets how much of the store information is printed at the top of the report.
1. NONE: no store information is printed.
2. NAME ONLY: prints only the store name.
3. FULL INFO: prints the store name, address and phone number.
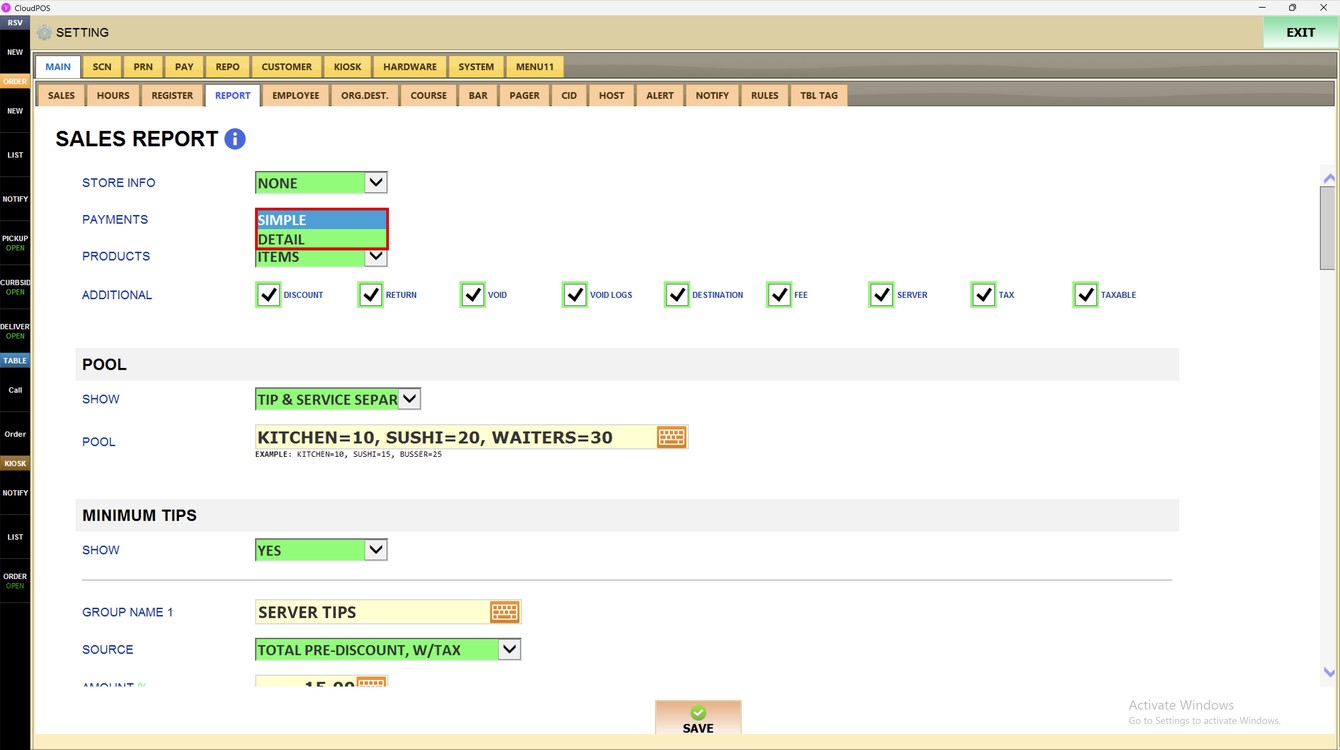
Payments:
Sets how the payments section of the report is shown.
1. SIMPLE: shows the totals of each payment type.
2. DETAIL: shows the payments with more detail for each payment type.
Products:
Sets whether the products sold are listed on the report.
1. NONE: products are not listed.
2. DEPARTMENTS: lists the sales by department.
3. ITEMS: lists the sales by item.
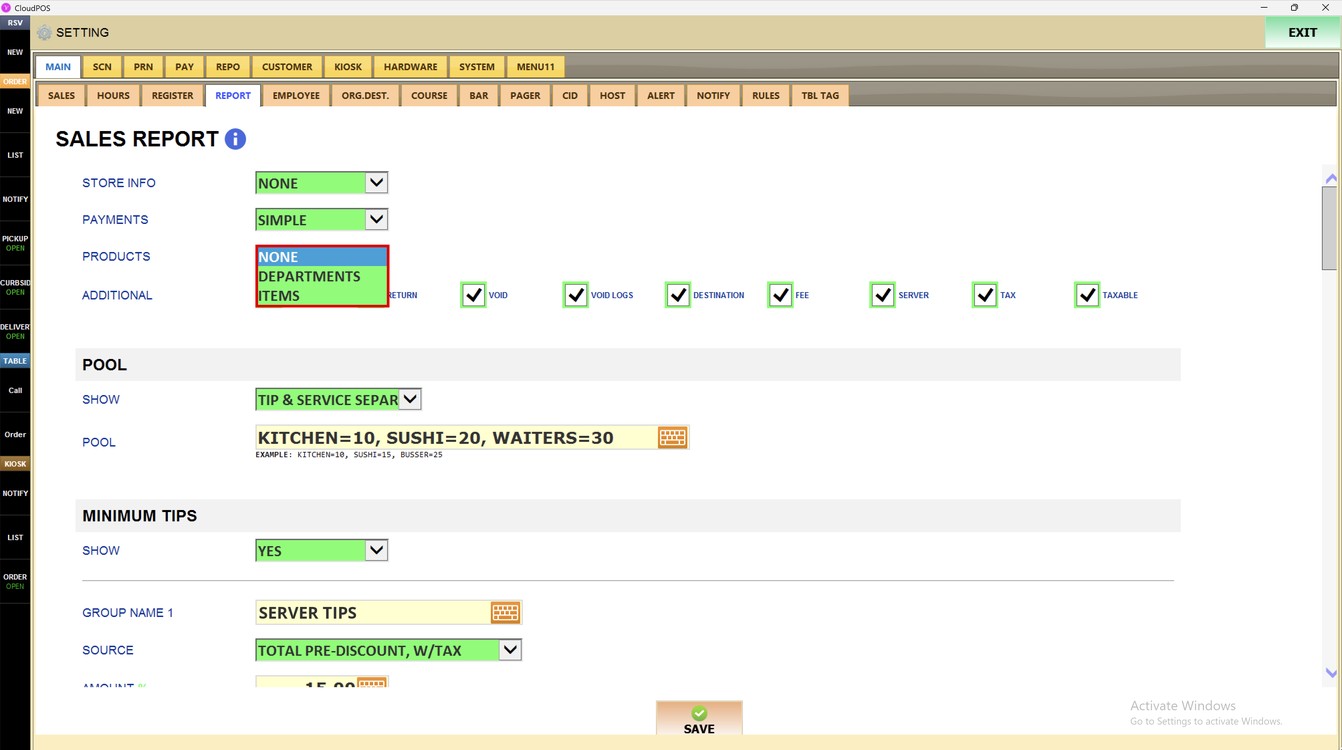
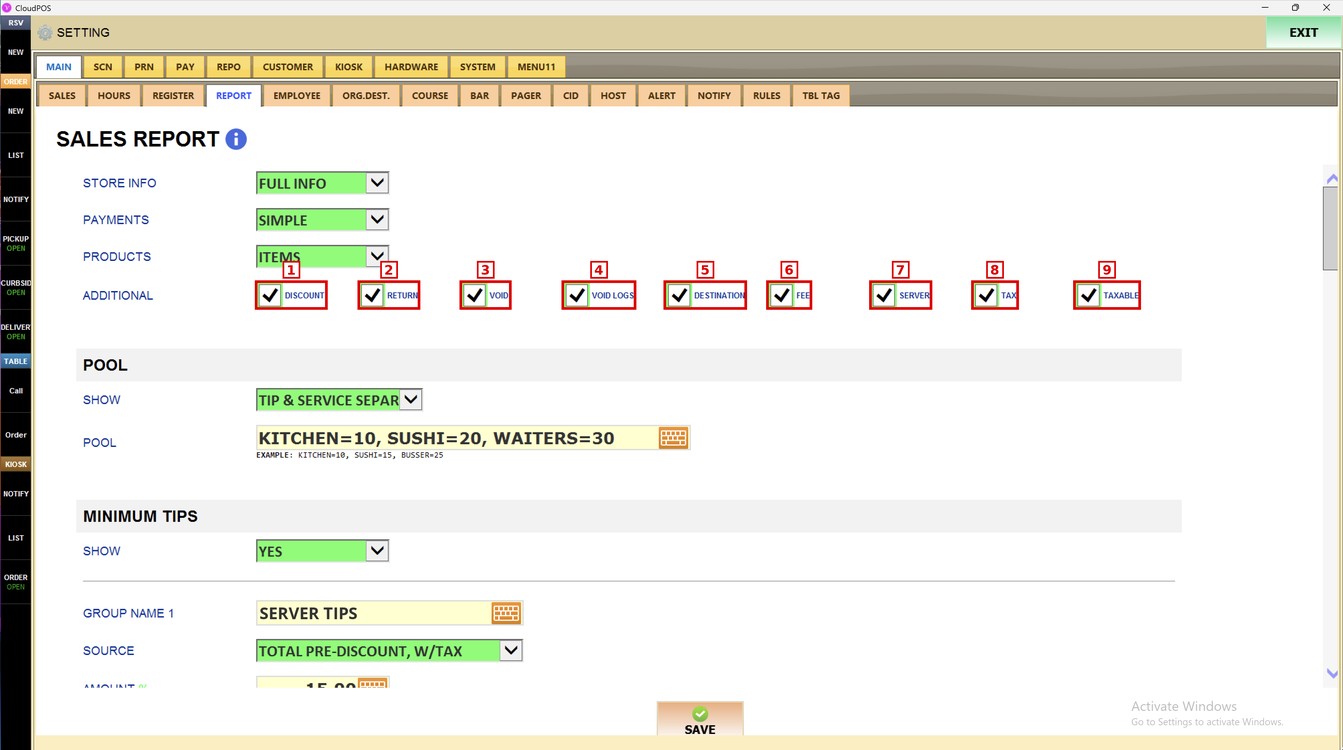
Additional:
Check each box to add that section to the report. Uncheck it to hide the section.
1. DISCOUNT: discounts applied.
2. RETURN: returned items.
3. VOID: voided items.
4. VOID LOGS: detail of each void.
5. DESTINATION: sales by destination, such as dine-in or to go.
6. FEE: fees charged.
7. SERVER: sales by server.
8. TAX: taxes collected.
9. TAXABLE: taxable and non-taxable sales.
Press SAVE and then RESTART PROGRAM to apply the changes.
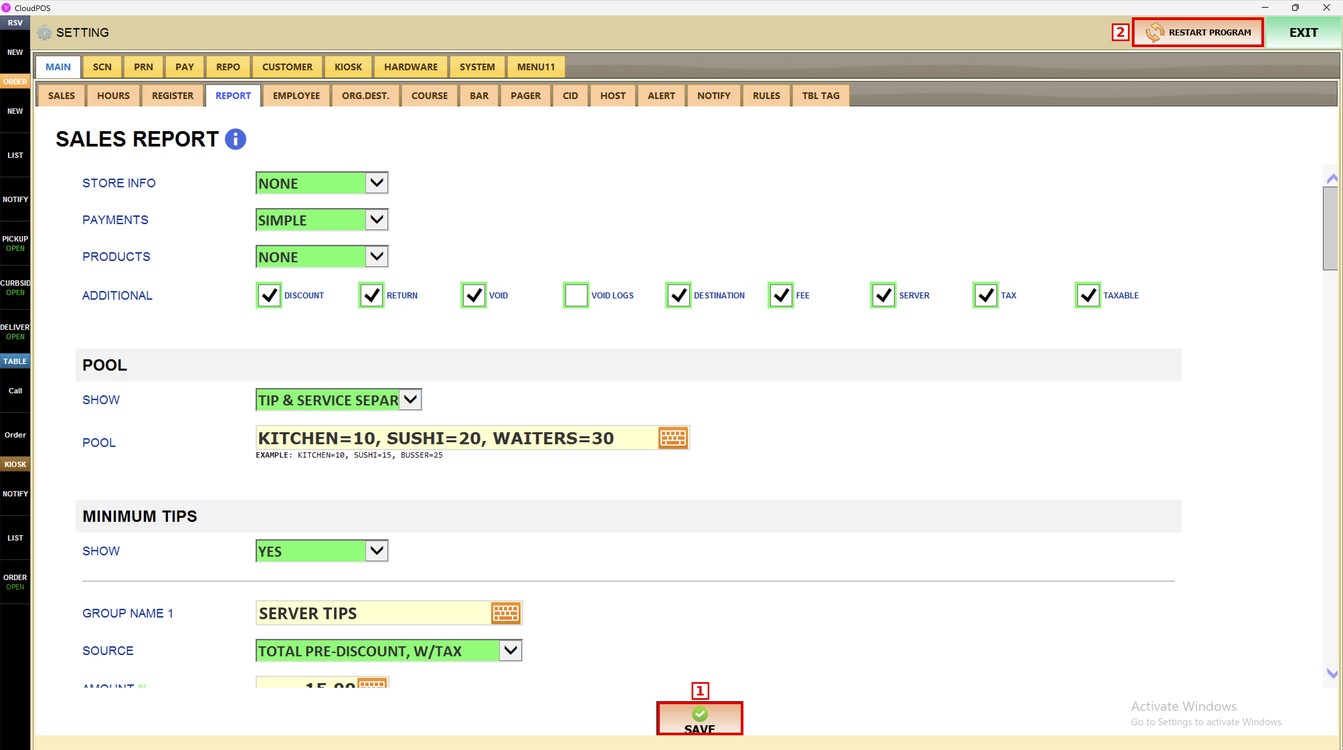
Note: The changes apply to the next sales report that is printed.
To learn how to see the close reports of each shift, please refer to the Shift Guide.