Modifier Visibility and Style
The modifier group template controls how the modifier buttons look on the sales screen: the font size and style, the number of rows and columns, the button width and height, the text alignment, the background, the layout and the mode. Use it to make the modifiers of each group easy to read and quick to select.
MENU> SETTINGS> REPO> MENU> EDIT> MODIFIER GROUPS
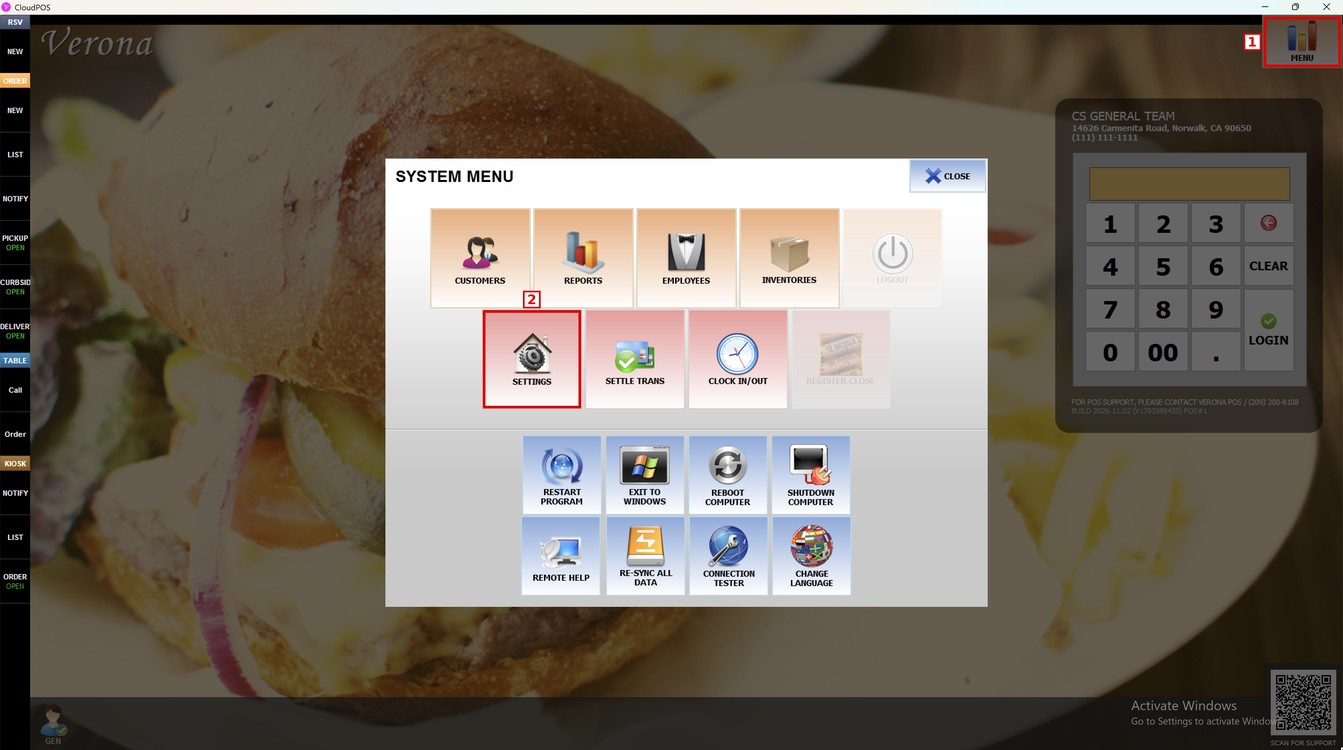
Go to MENU and press SETTINGS.
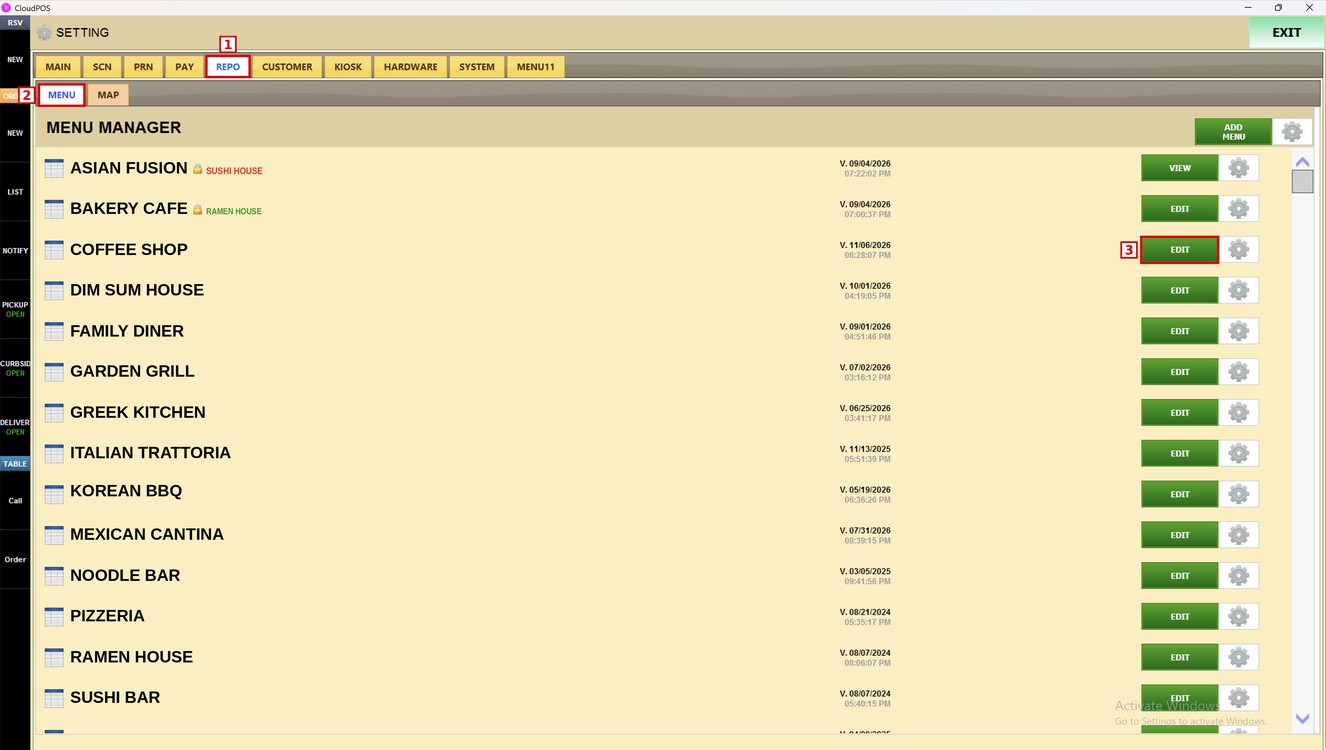
Press the REPO tab and then the MENU subtab. In the MENU MANAGER, press EDIT next to the menu you want to change.
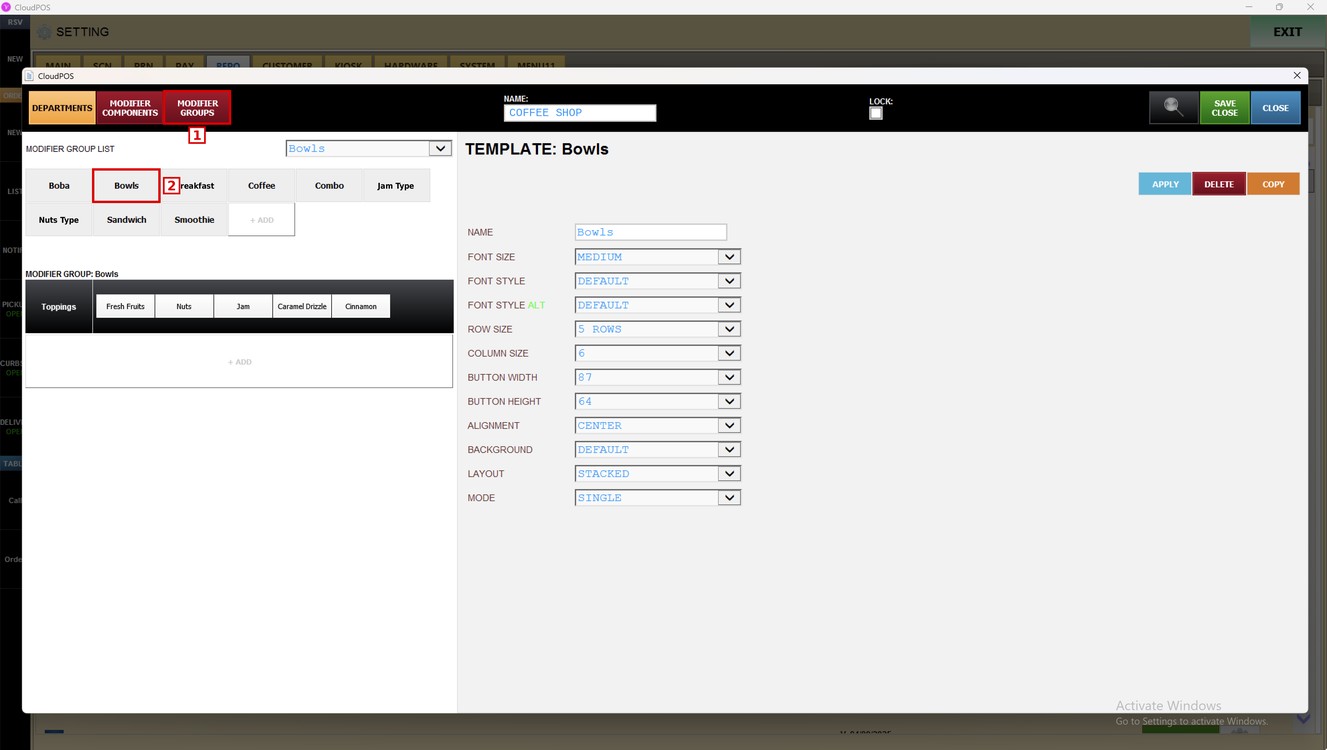
Press MODIFIER GROUPS and select the modifier group in the MODIFIER GROUP LIST. The TEMPLATE of the group opens on the right.
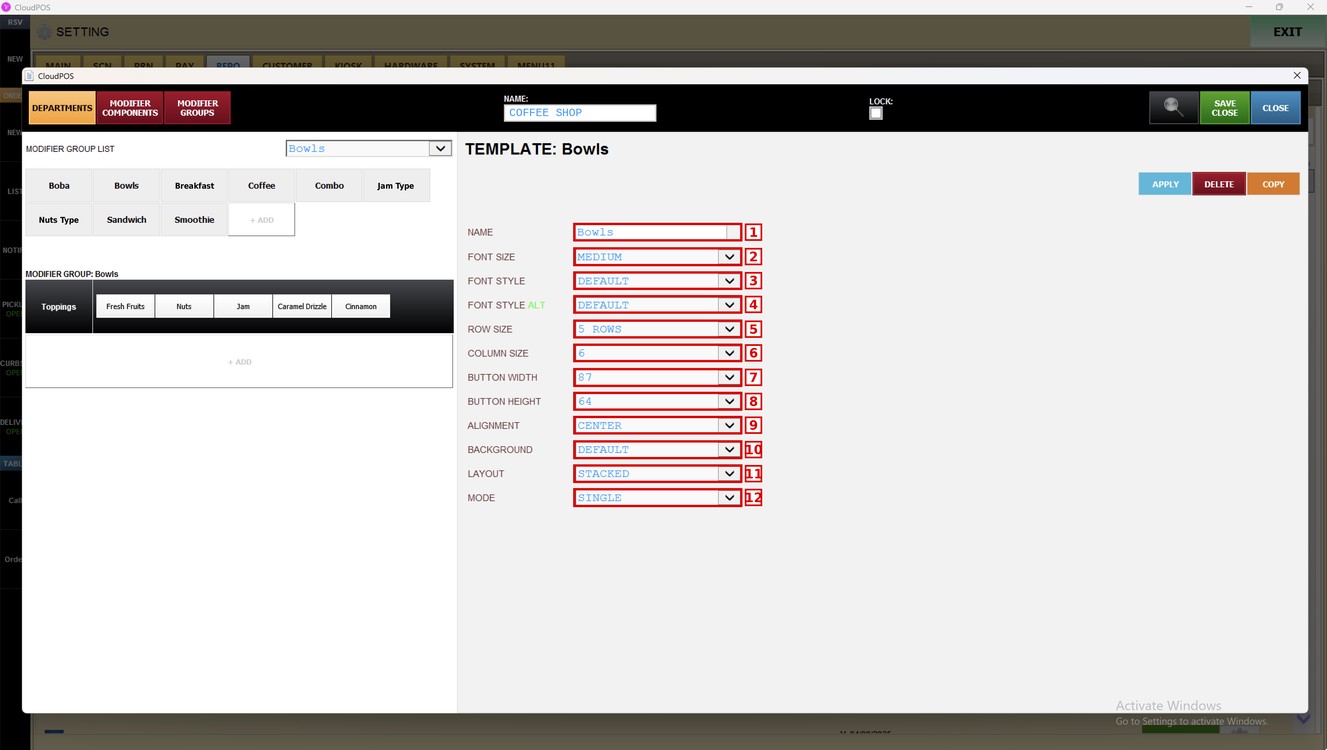
These are the settings of the template:
1. NAME: The name of the modifier group.
2. FONT SIZE: The size of the text on the modifier buttons.
3. FONT STYLE: The font of the modifier names.
4. FONT STYLE ALT: The font of the alternative name of the modifiers.
5. ROW SIZE: The number of rows of modifier buttons.
6. COLUMN SIZE: The number of modifier buttons in each row.
7. BUTTON WIDTH: The width of each modifier button.
8. BUTTON HEIGHT: The height of each modifier button.
9. ALIGNMENT: The position of the text inside the button.
10. BACKGROUND: The background color of the modifier buttons.
11. LAYOUT: How the name and the price are placed in the button.
12. MODE: How many modifiers can be selected at a time.
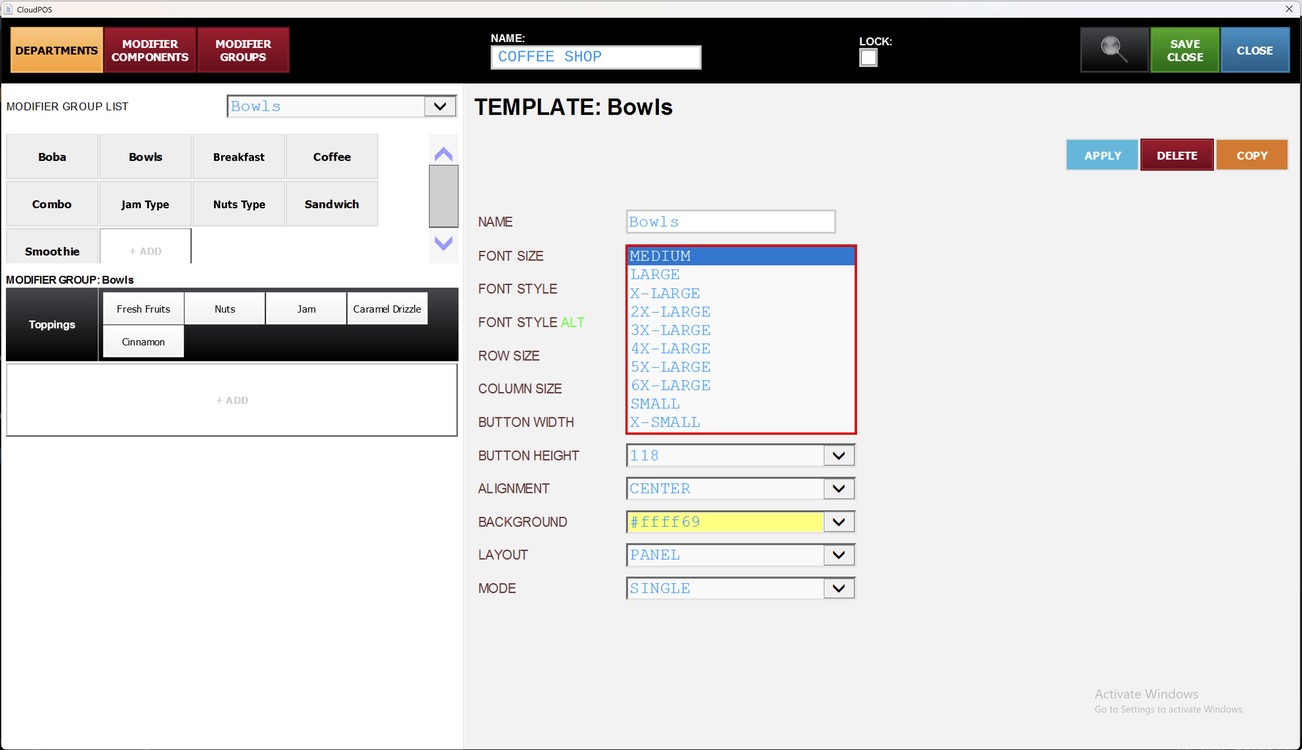
Font Size:
Sets the size of the text on the modifier buttons. Choose X-SMALL, SMALL, MEDIUM, LARGE, X-LARGE, 2X-LARGE, 3X-LARGE, 4X-LARGE, 5X-LARGE or 6X-LARGE.
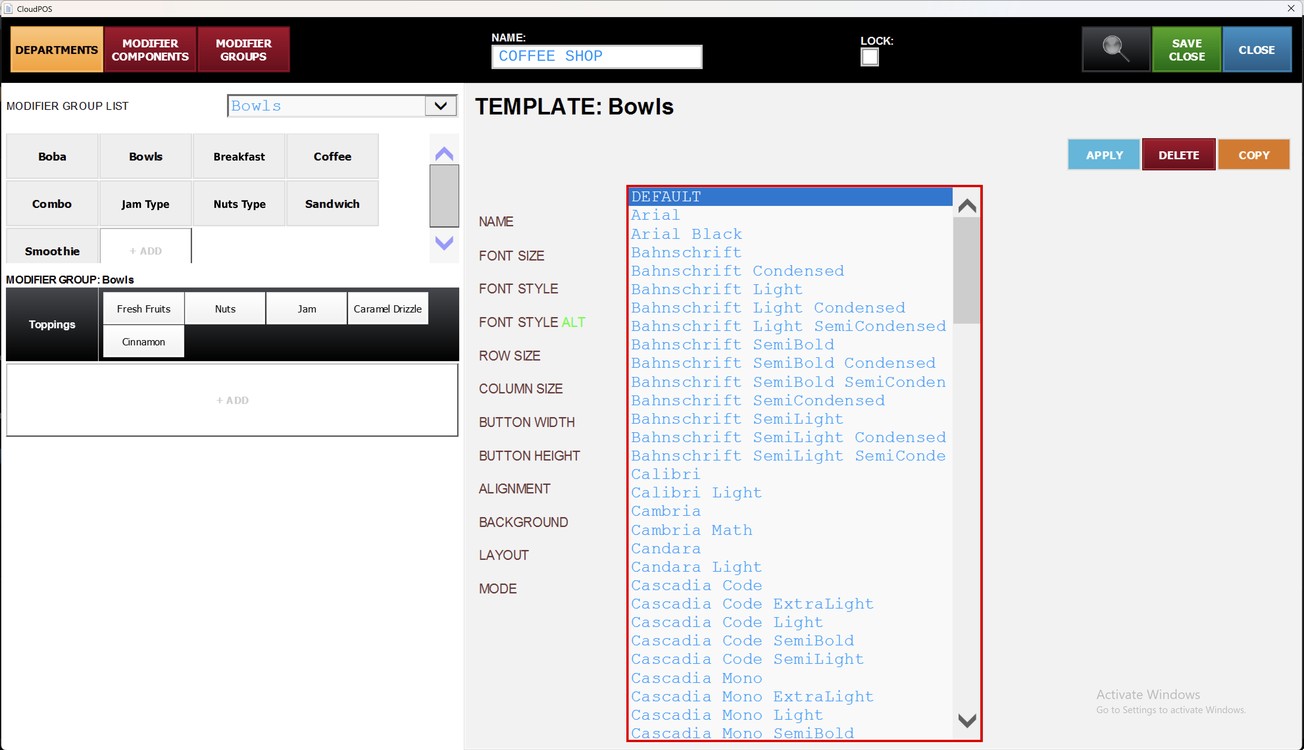
Font Style:
Sets the font of the modifier names. Choose DEFAULT or one of the fonts in the list.
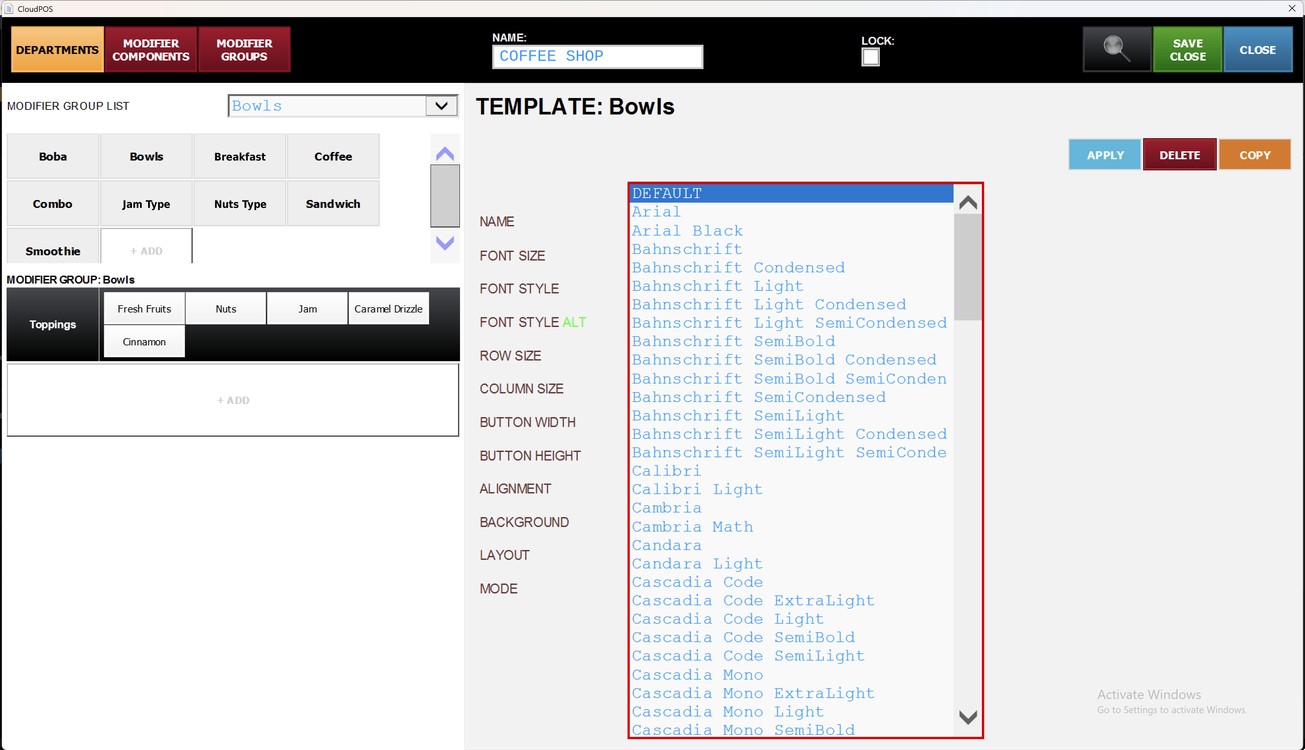
Font Style Alt:
Sets the font of the alternative name of the modifiers. It has the same font list as FONT STYLE.
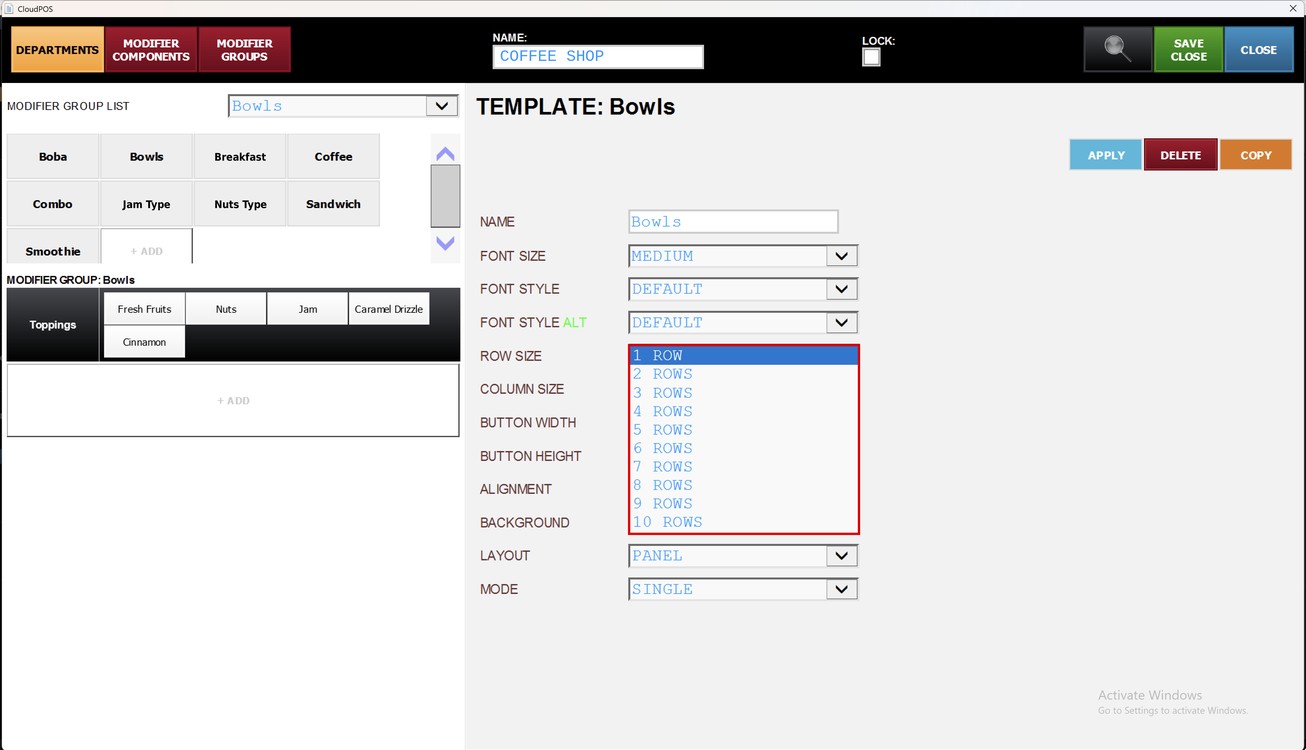
Row Size:
Sets how many rows of modifier buttons are shown. Choose from 1 ROW to 10 ROWS.
Column Size:
Sets how many modifier buttons are shown in each row.
Button Width:
Sets the width of each modifier button. Choose a number from the list; a higher number makes the button wider.
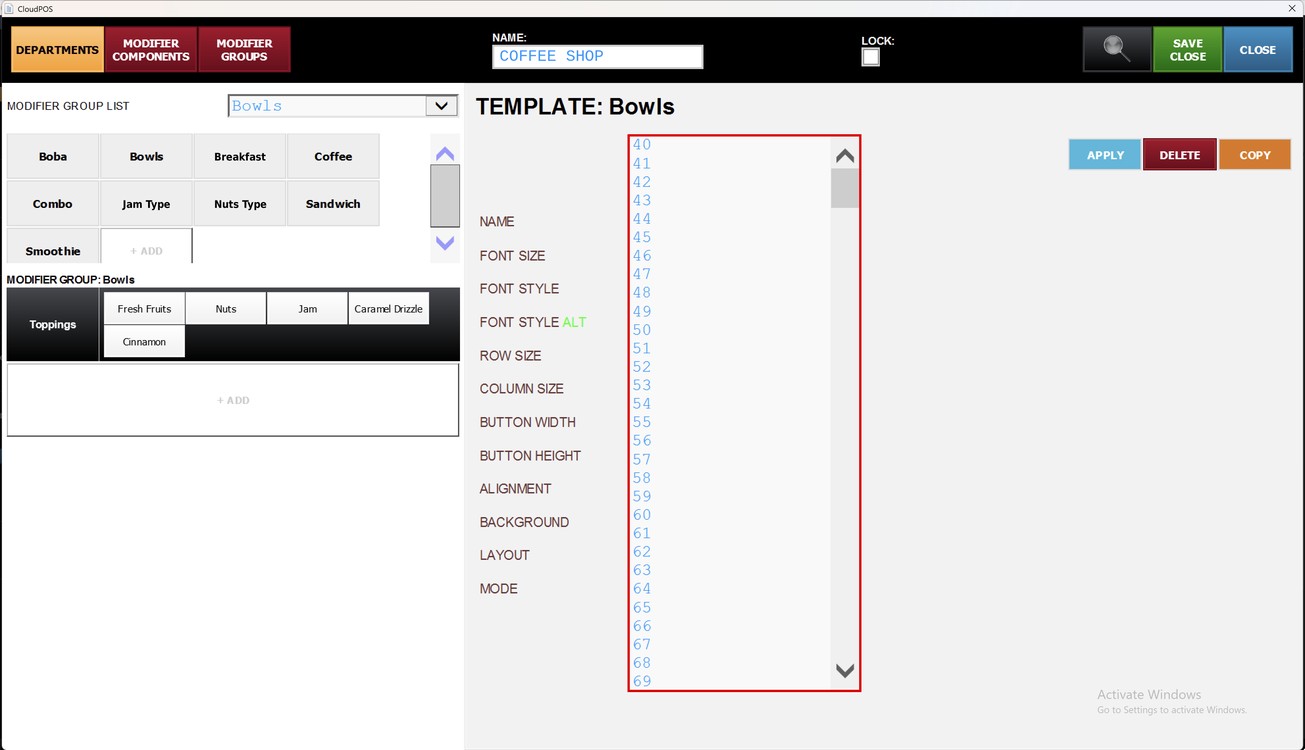
Button Height:
Sets the height of each modifier button. Choose a number from the list; a higher number makes the button taller.
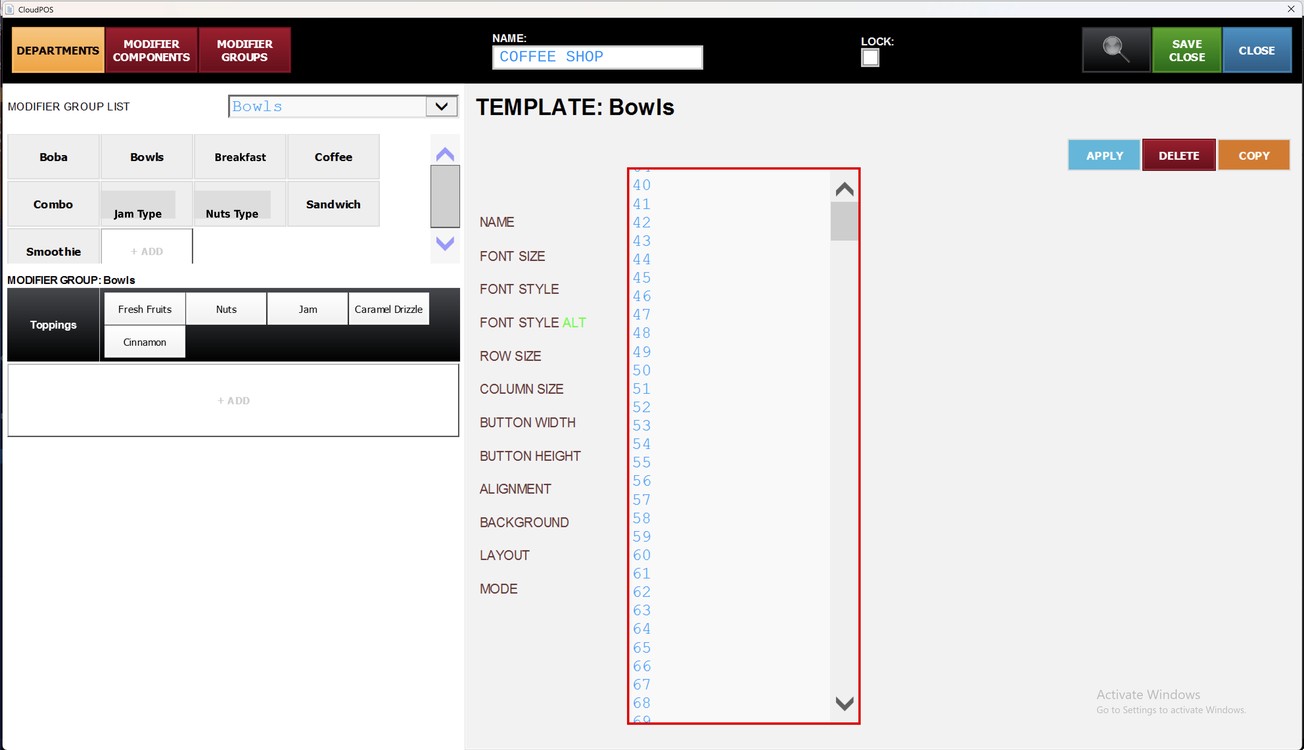
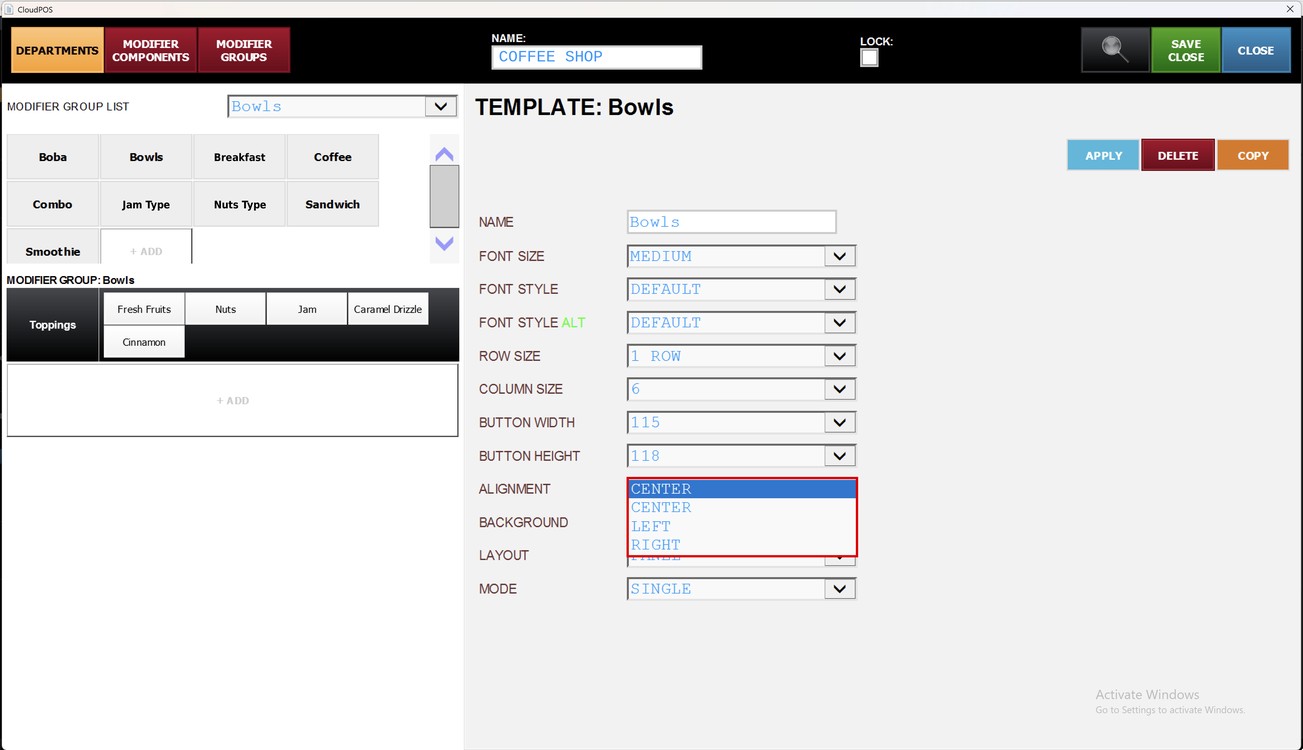
Alignment:
Sets the position of the text inside the button.
1. CENTER: The text is centered in the button.
2. LEFT: The text is aligned to the left of the button.
3. RIGHT: The text is aligned to the right of the button.
Background:
Sets the background color of the modifier buttons. Choose DEFAULT or one of the colors in the list. Each option shows its color code.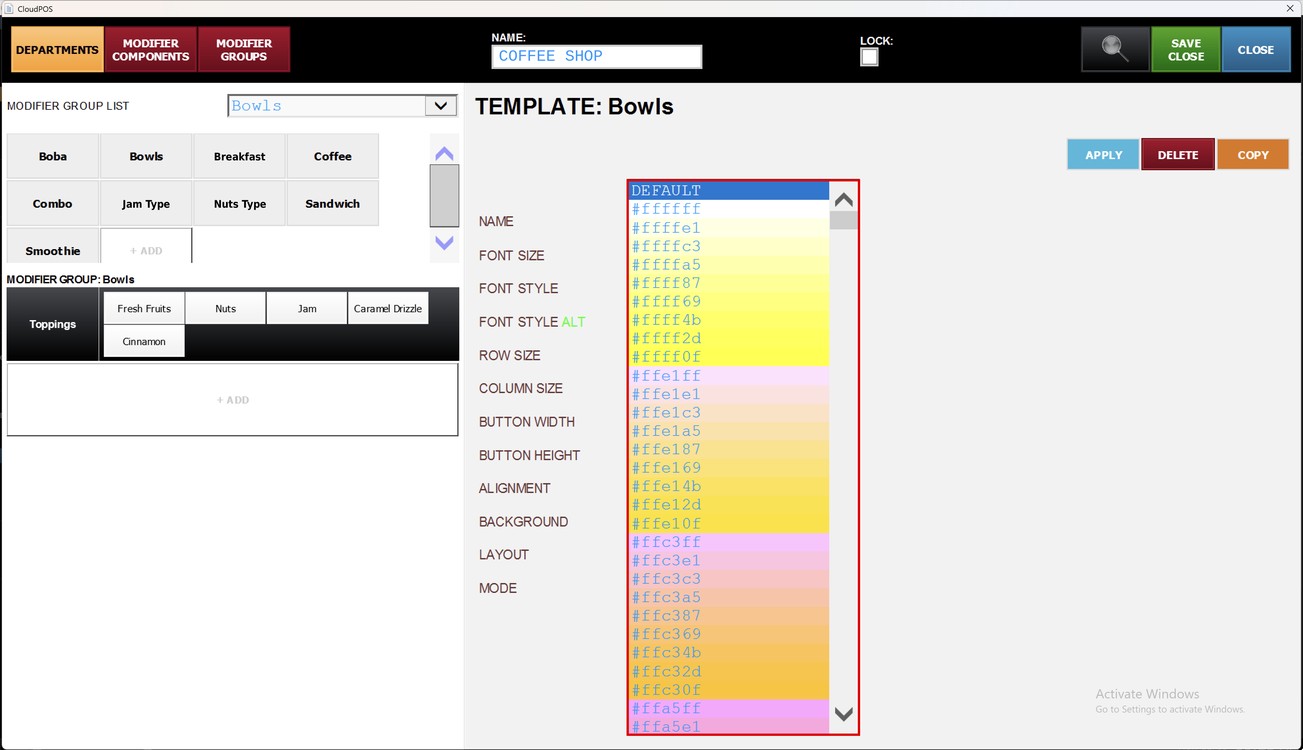
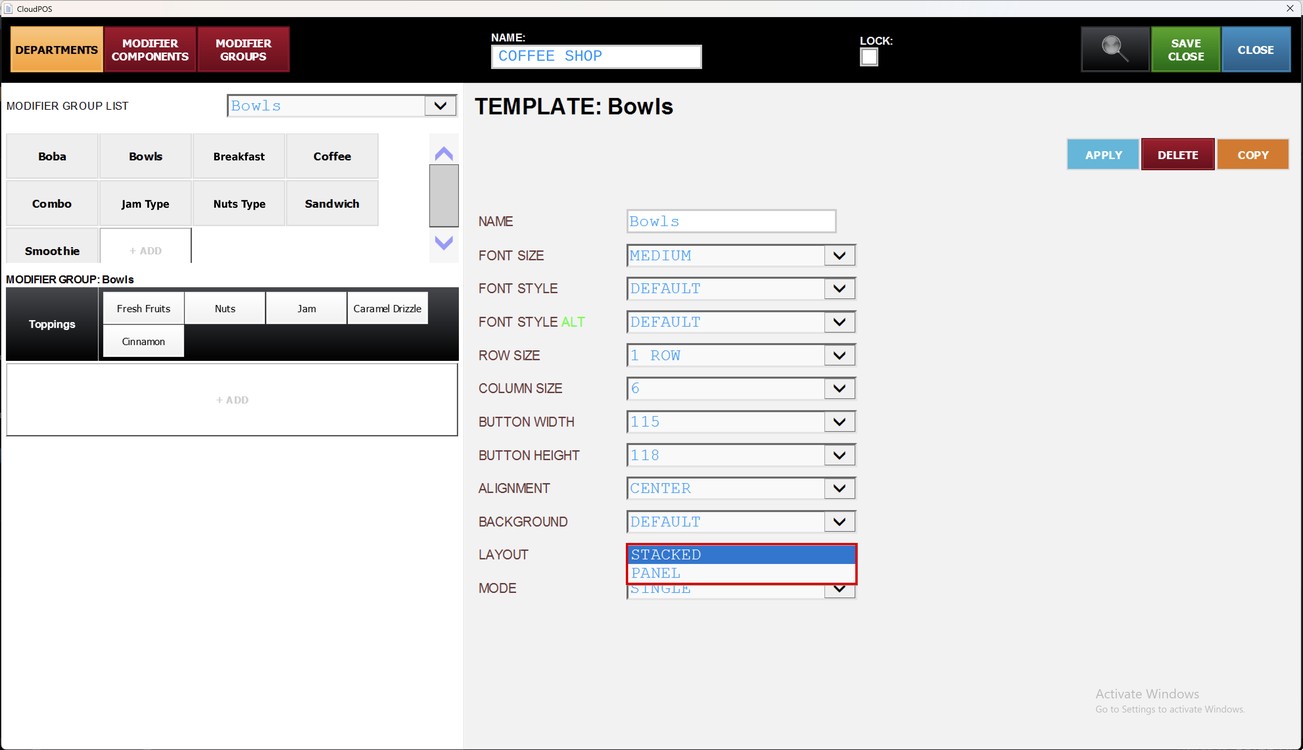
Layout:
Sets how the modifier name and the price are placed in the button.
1. STACKED: The price is shown under the modifier name.
2. PANEL: The modifiers are shown as panel buttons.
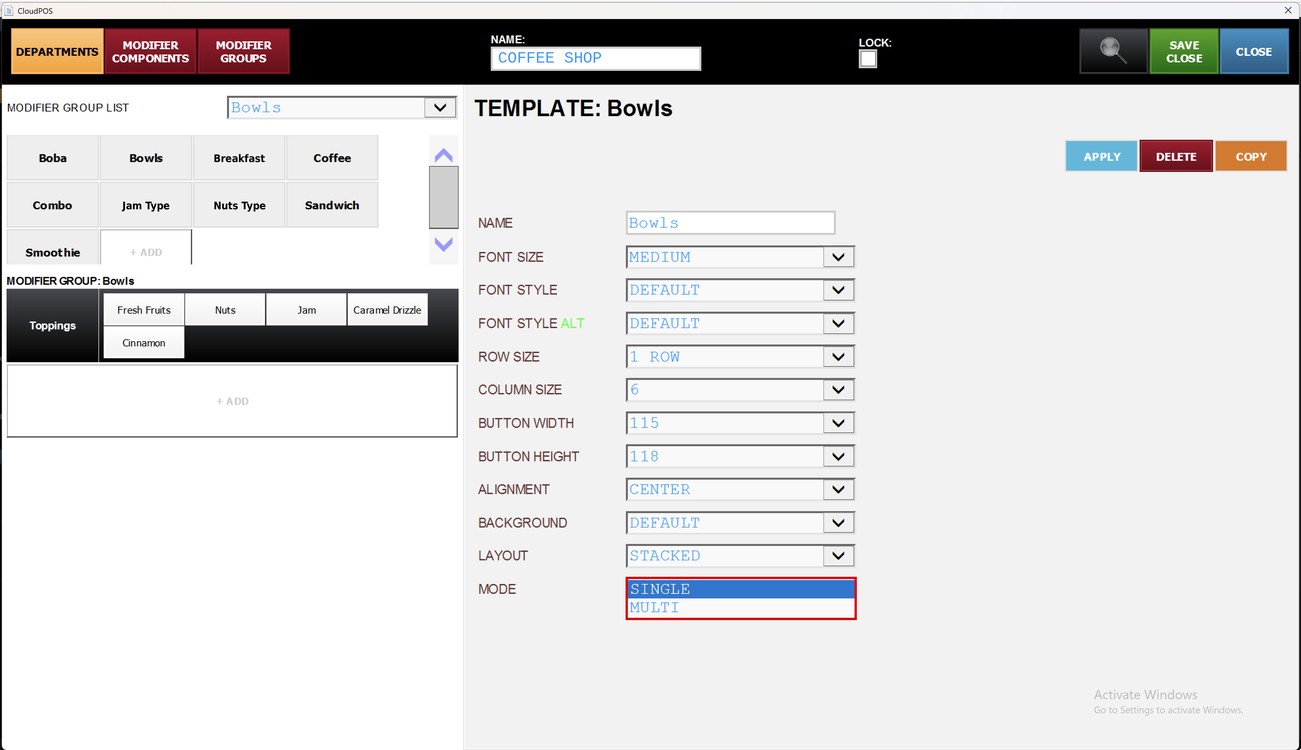
Mode:
Sets how the modifiers of the group are selected.
1. SINGLE: The modifier screen opens in SINGLE MODE.
2. MULTI: The modifier screen opens in multiple selection mode.
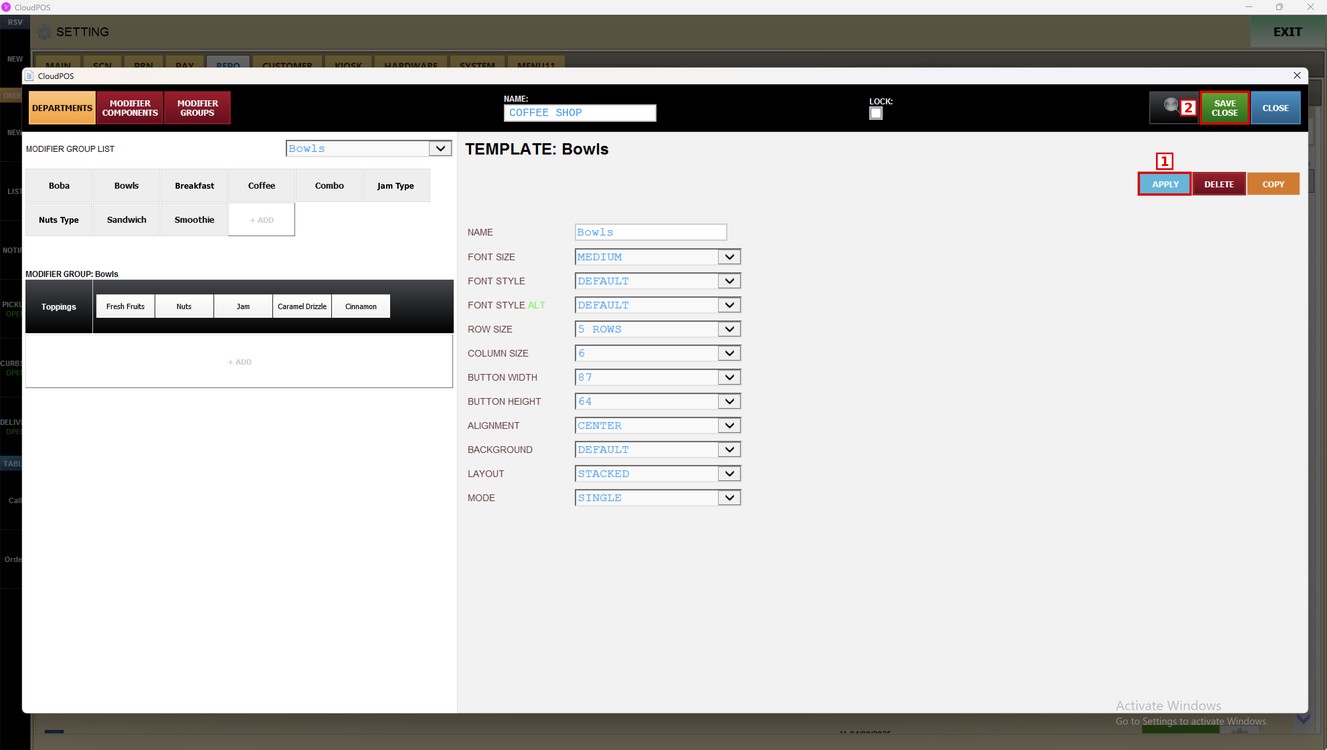
Press APPLY to apply the template to the group and then SAVE CLOSE to save the menu.
Result:
On the sales screen, select an item of the group, for example Oatmeal Bowl. The modifier screen shows the buttons with the template settings.
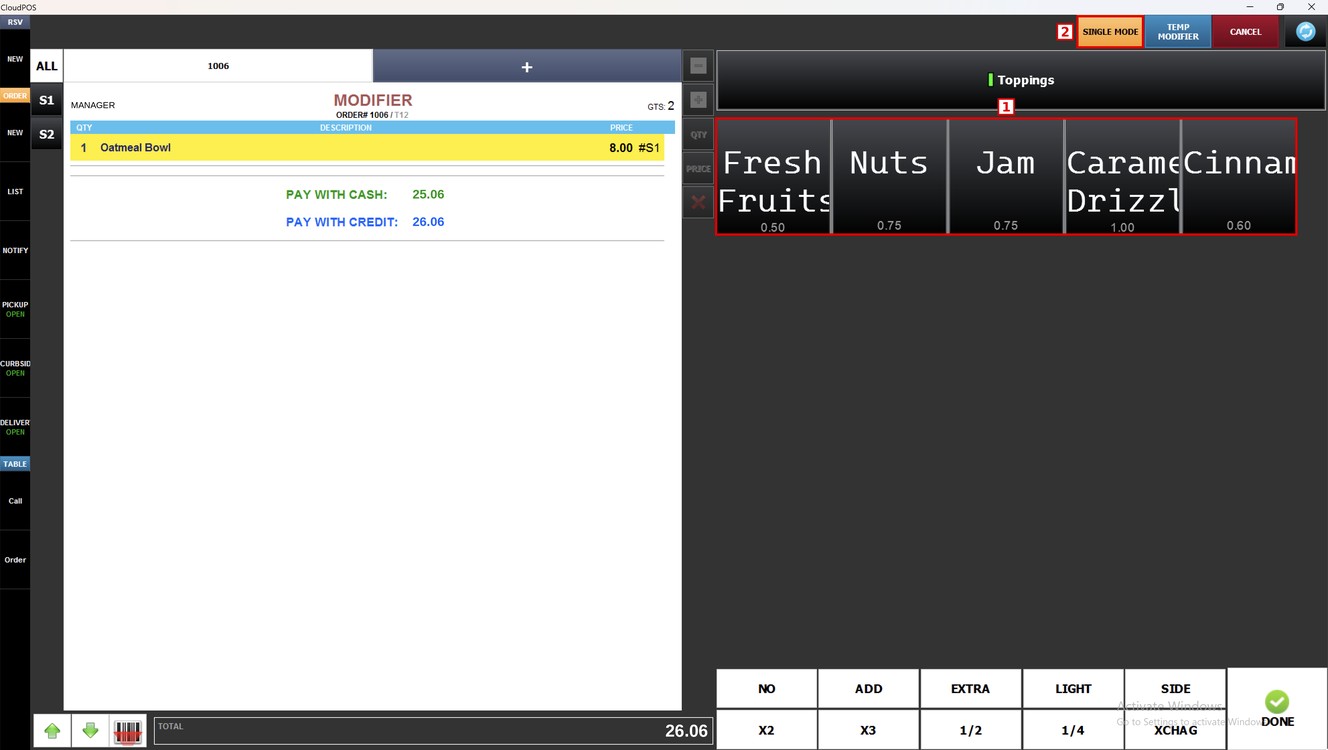
1. MODIFIER BUTTONS: The modifiers of the group with the price under the name.
2. SINGLE MODE: The mode set in the template.
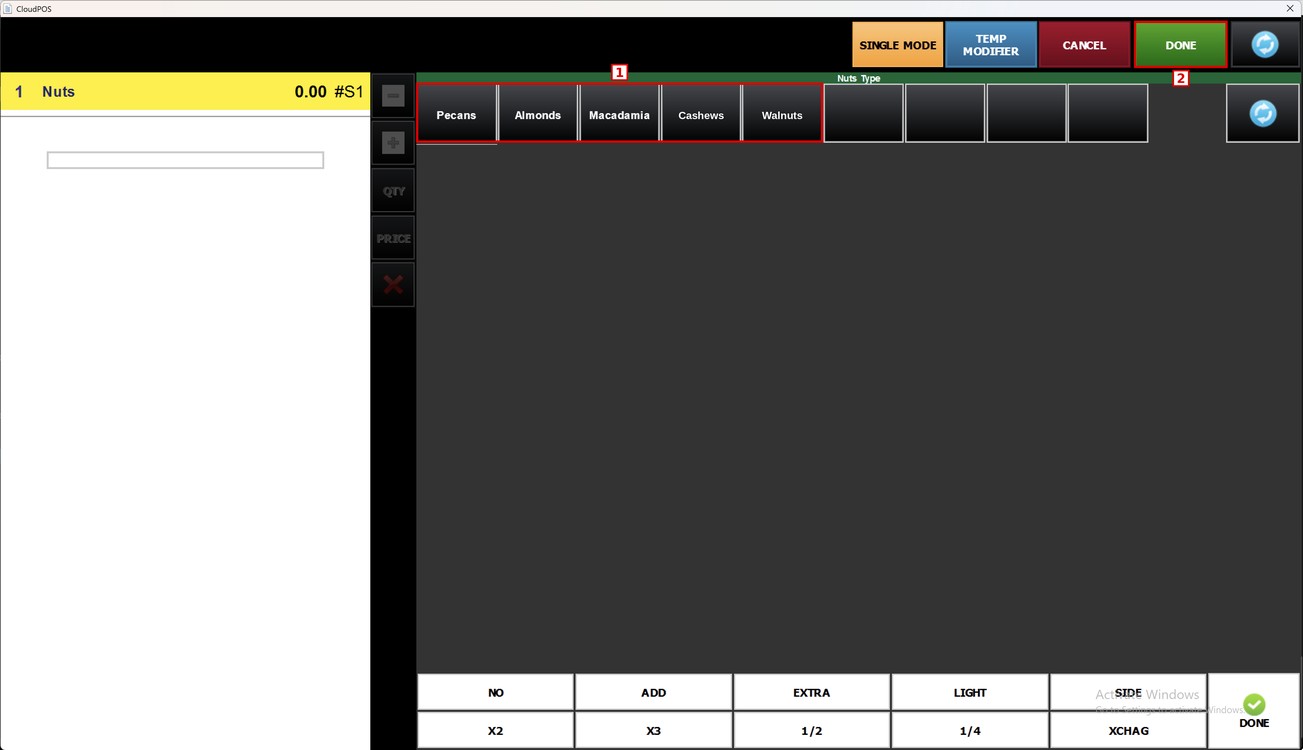
If a modifier has its own group, for example Nuts, its options open. Select the options and press DONE.
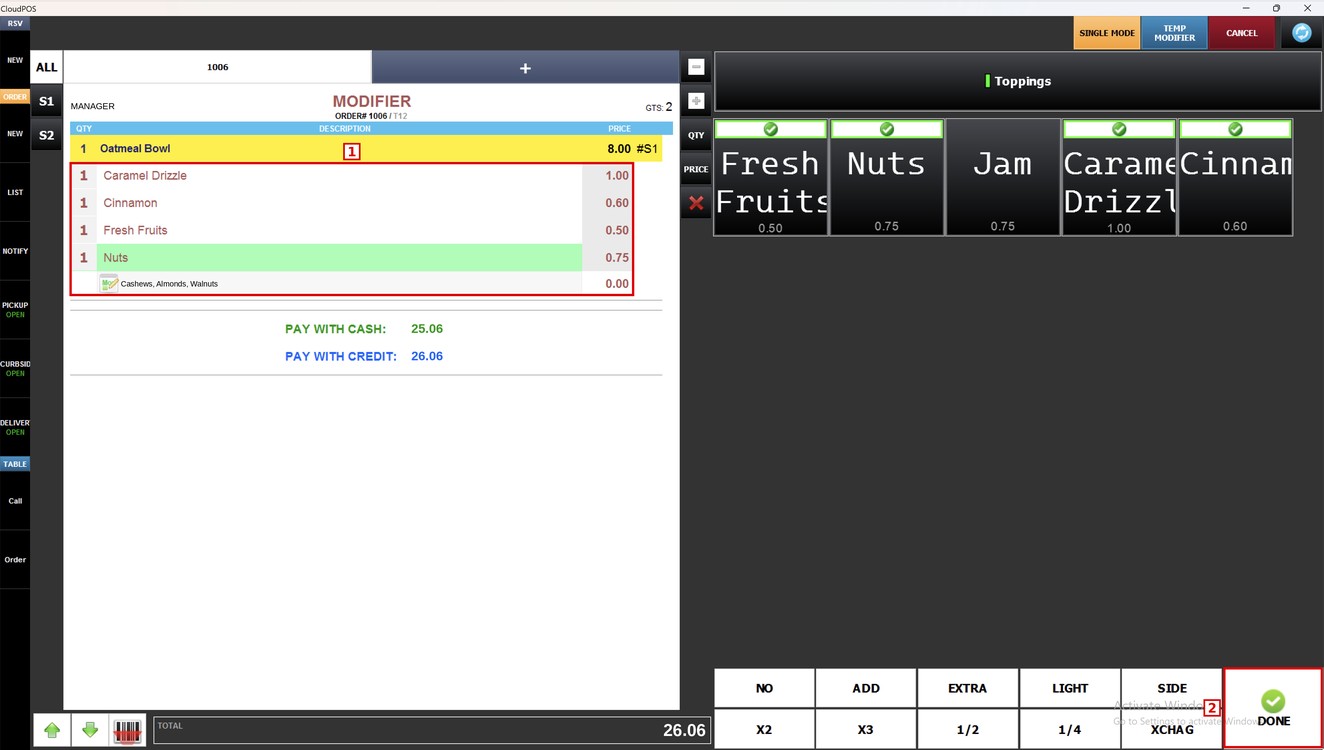
The selected modifiers show a check mark and are added under the item. Press DONE to go back to the sales screen.
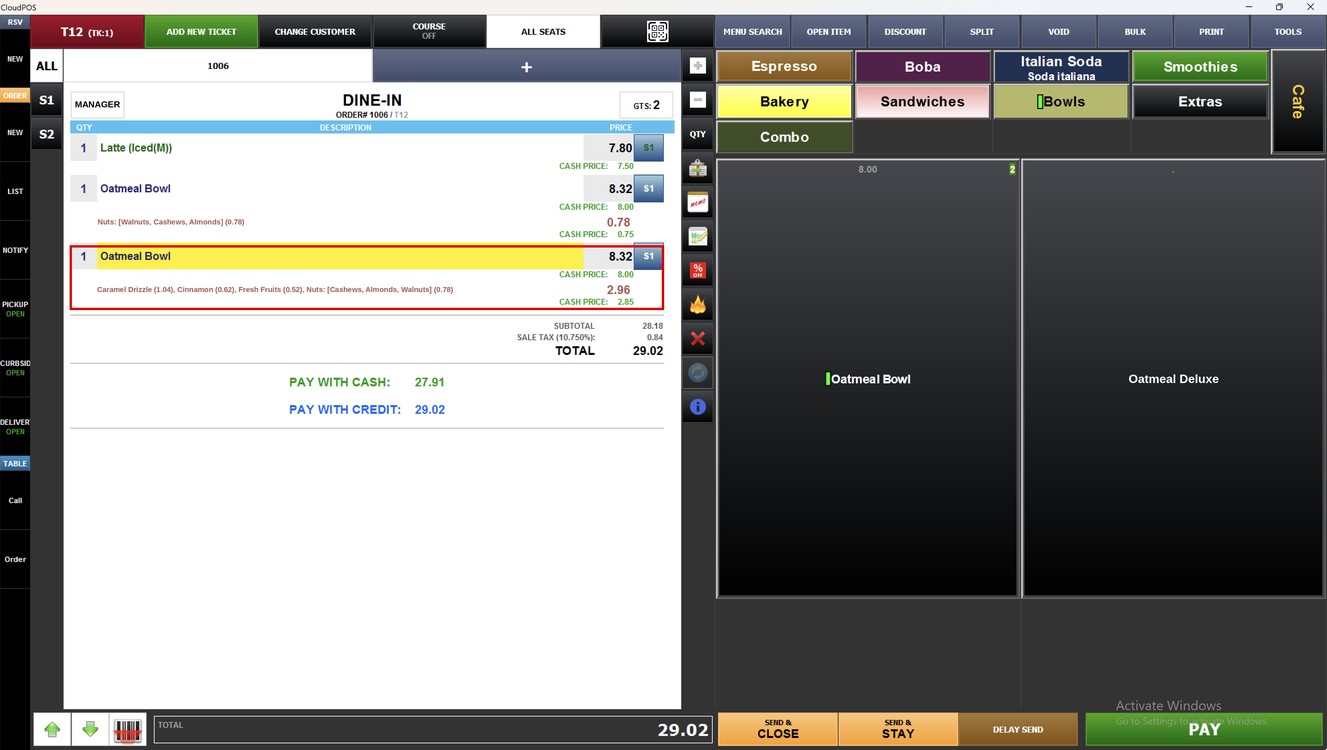
The item is added to the ticket with its modifiers and prices.
To learn how to set the visibility and style of a category, please refer to the Category Visibility and Style Guide.