Seat
The SEAT settings control how seats are managed while taking orders. These settings determine whether seat assignments are enabled, whether the currently selected seat is always displayed, and whether staff are prompted to choose a seat before adding menu items.
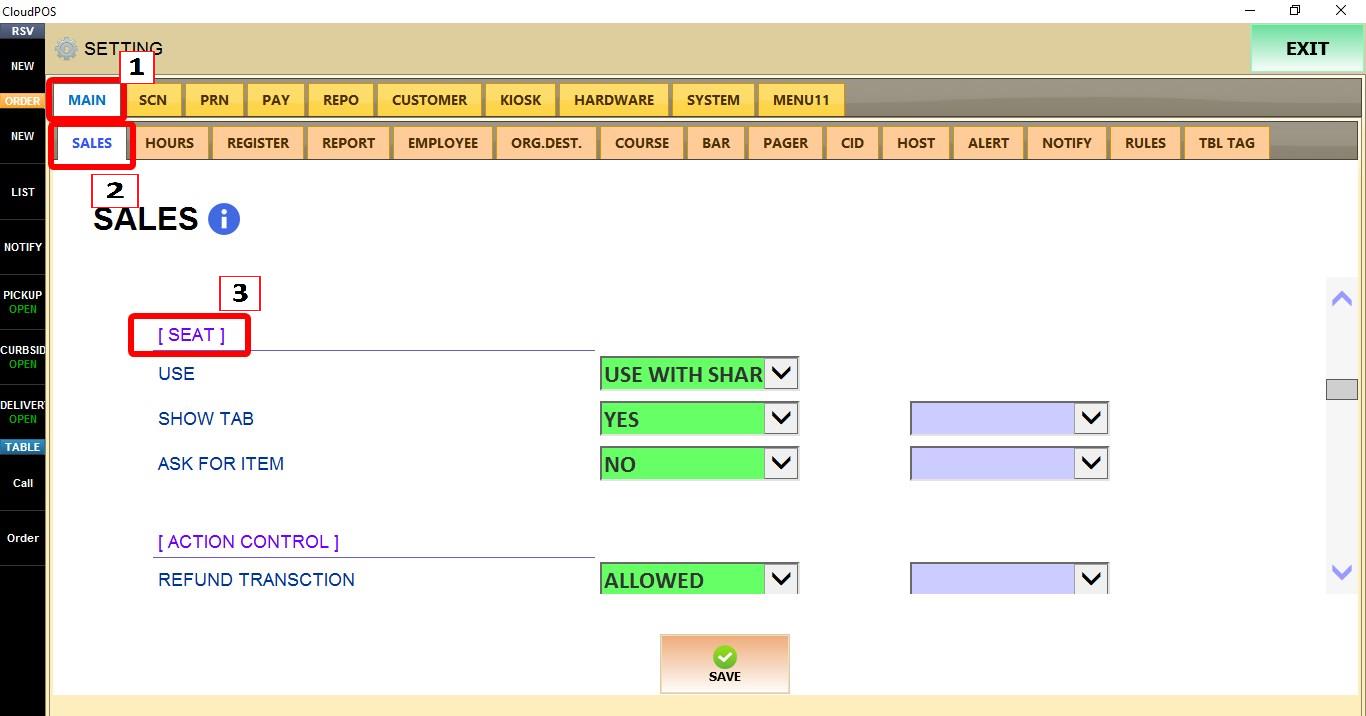
MENU > SETTINGS > MAIN > SALES > SEAT
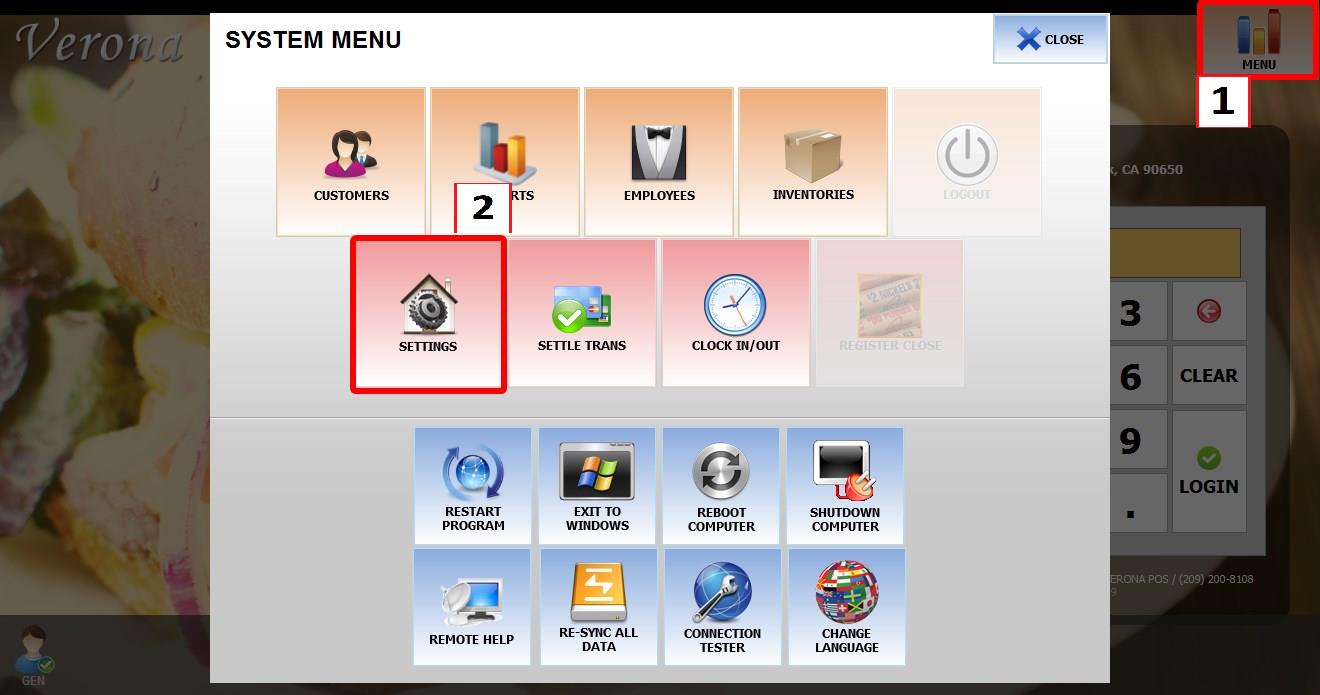
From the MAIN SCREEN, click MENU, then select SETTINGS.

Go to MAIN > SALES > SEAT.
USE
Controls whether seat assignments are available when taking orders.
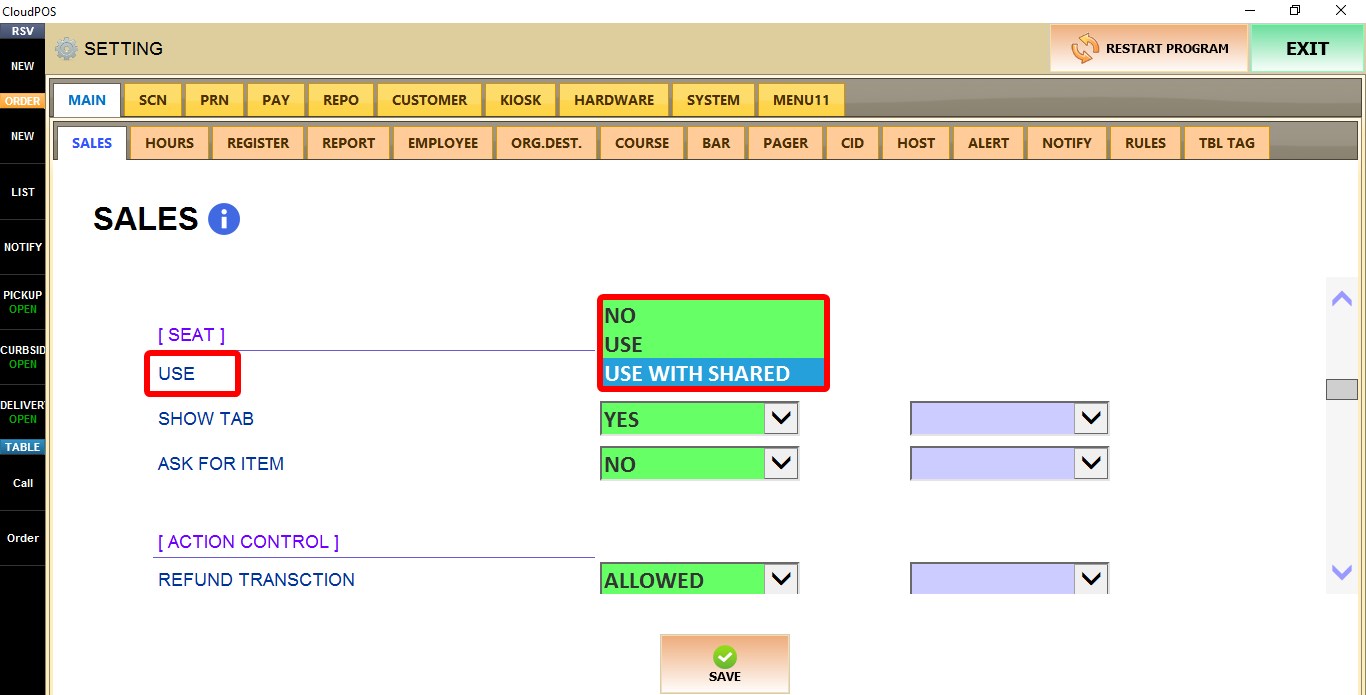
1. NO: Disables seat assignments. All items are added without being assigned to a seat.
2. USE: Enables seat assignments, allowing items to be assigned to individual seats.
3. USE WITH SHARED: Enables seat assignments and adds a SHARED seat option for items shared by the entire table.

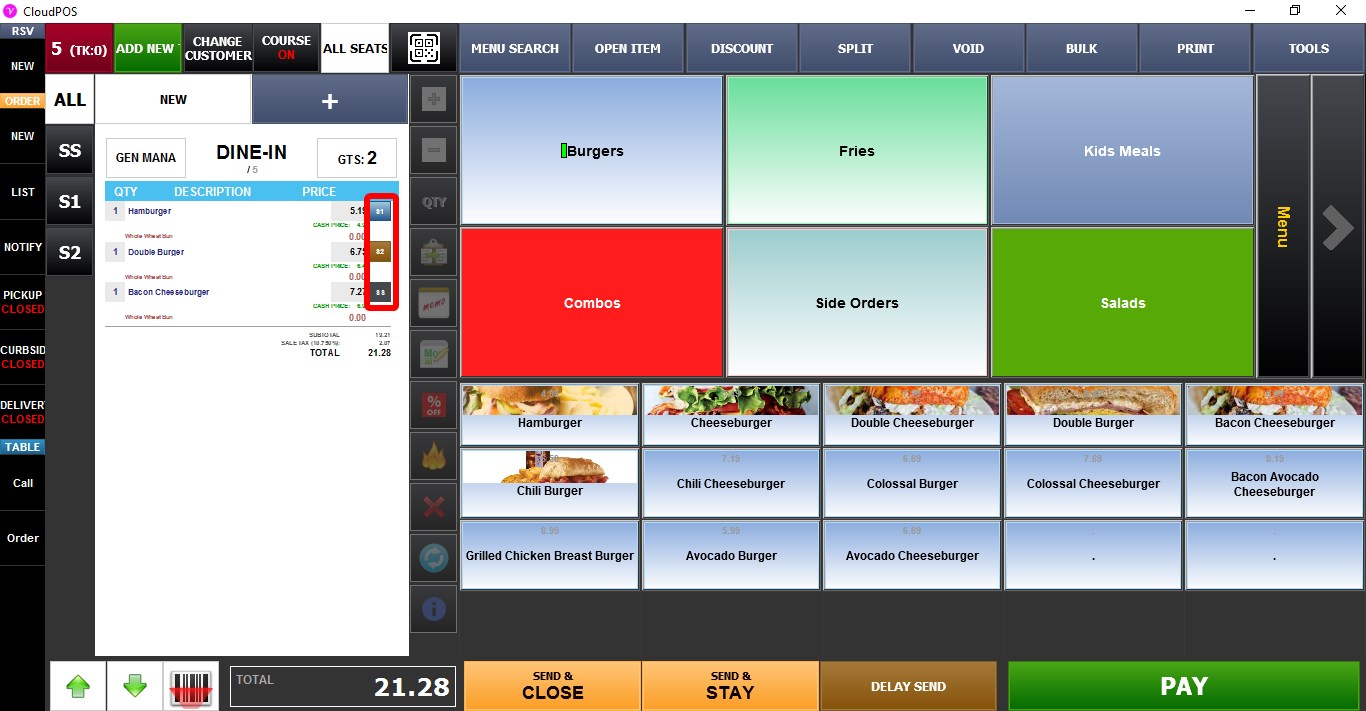
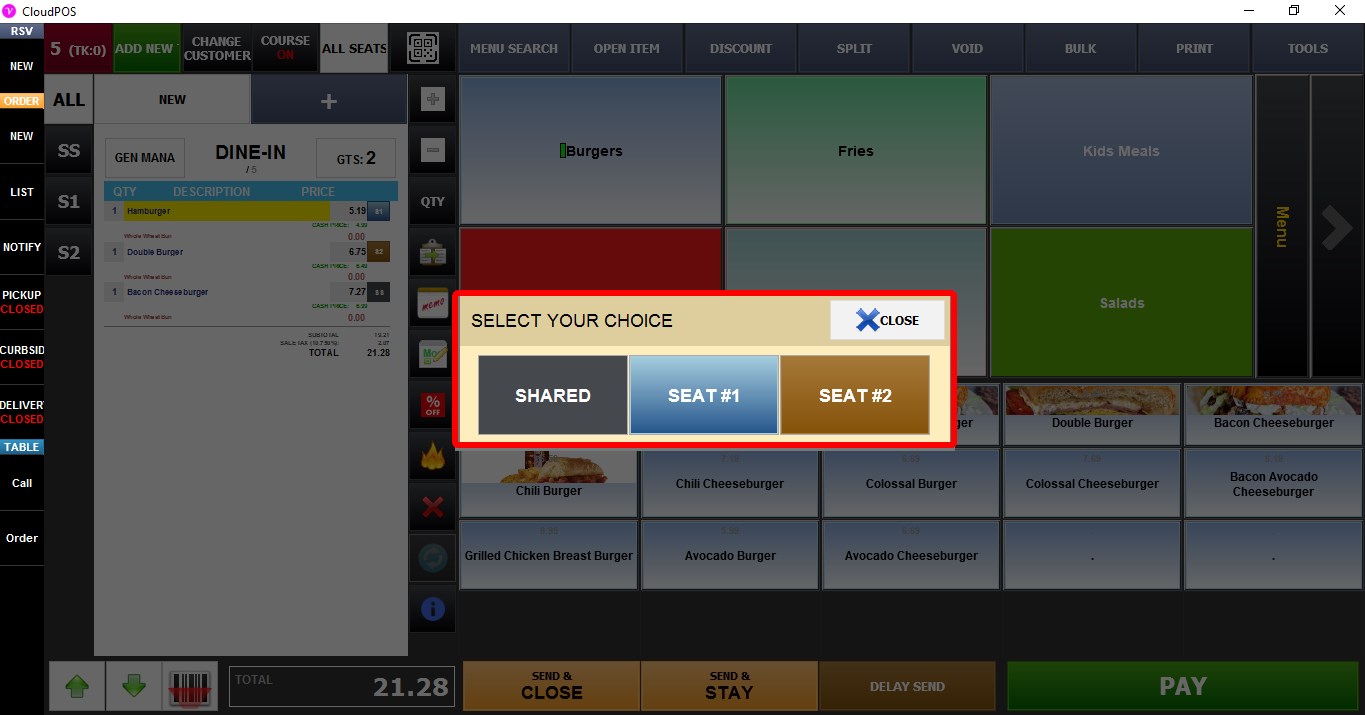
SHOW TAB
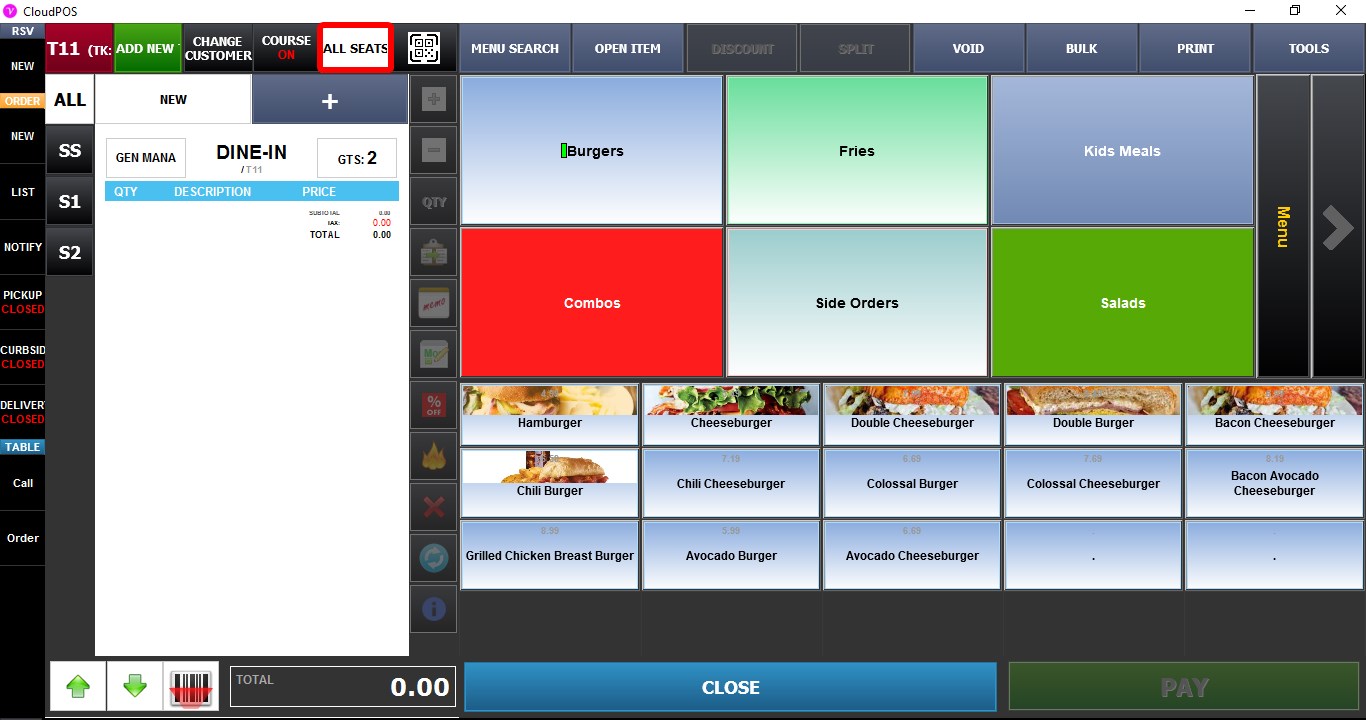
Controls whether the currently selected seat is always displayed on the SEAT button at the top of the SALES screen.
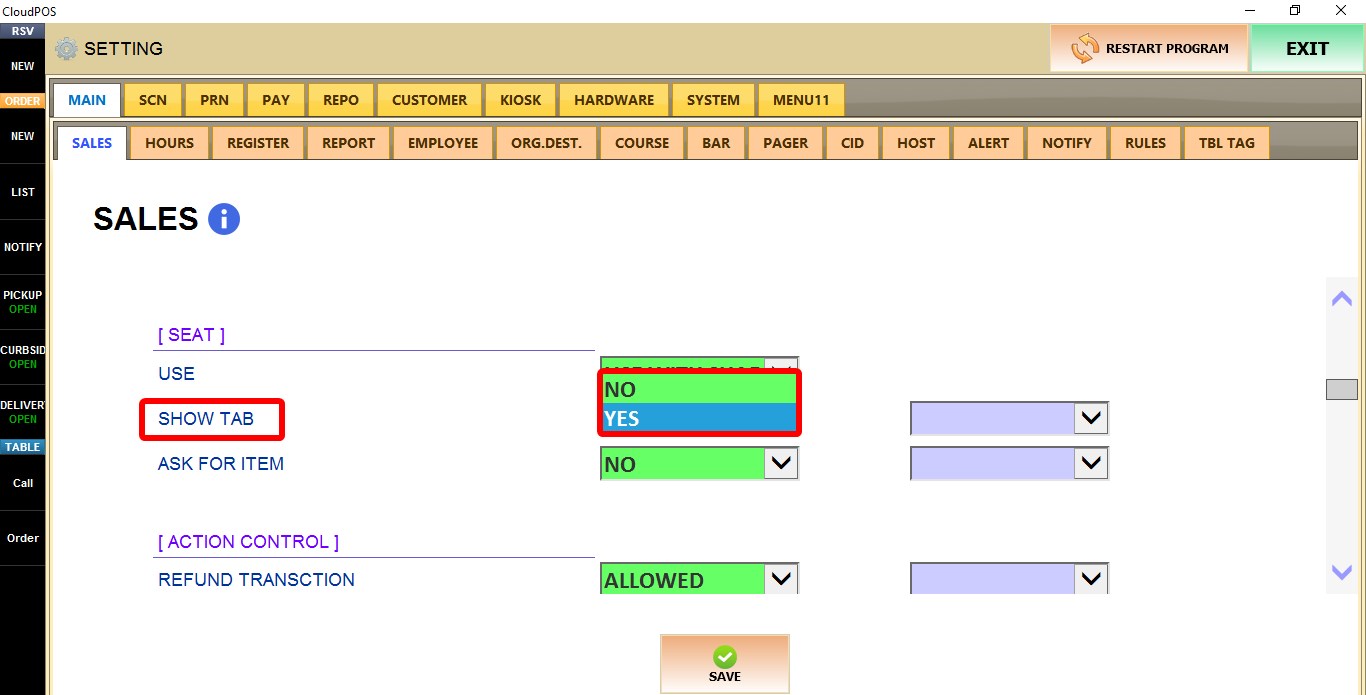
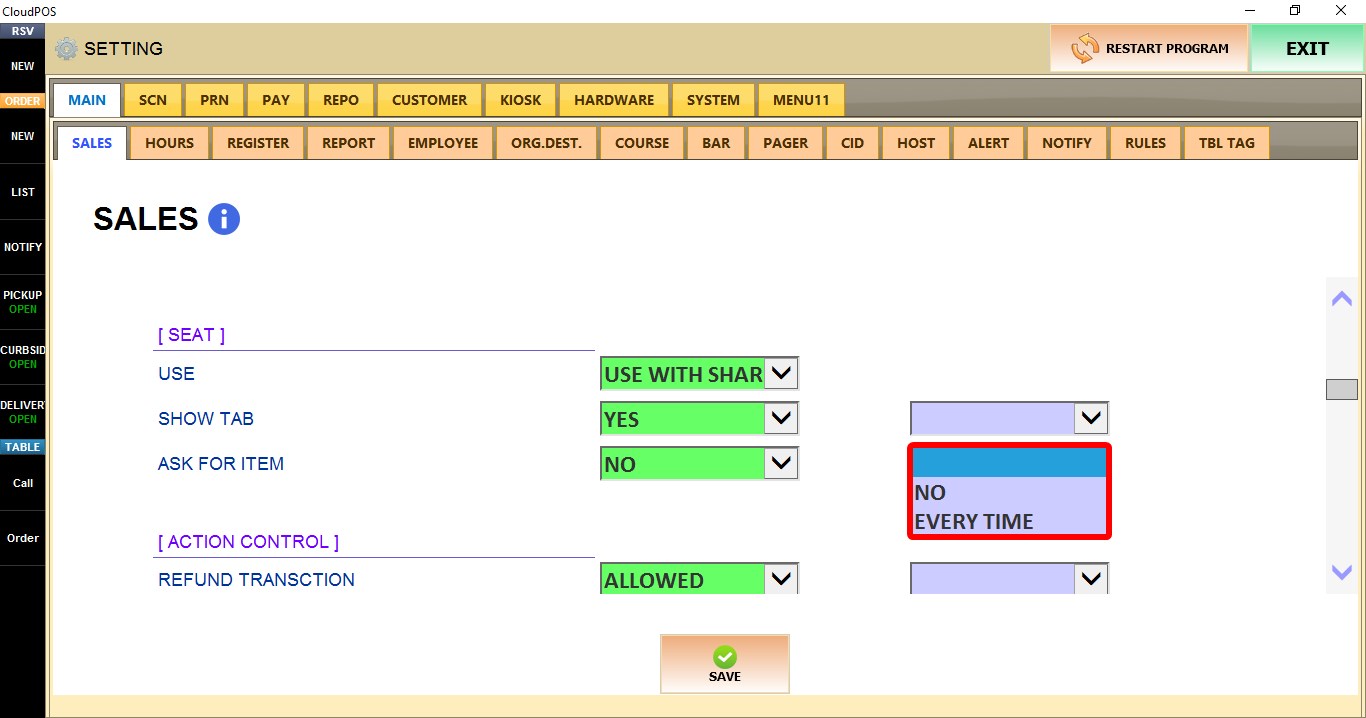
Use the TERMINAL dropdown to configure these settings for only the current POS terminal.
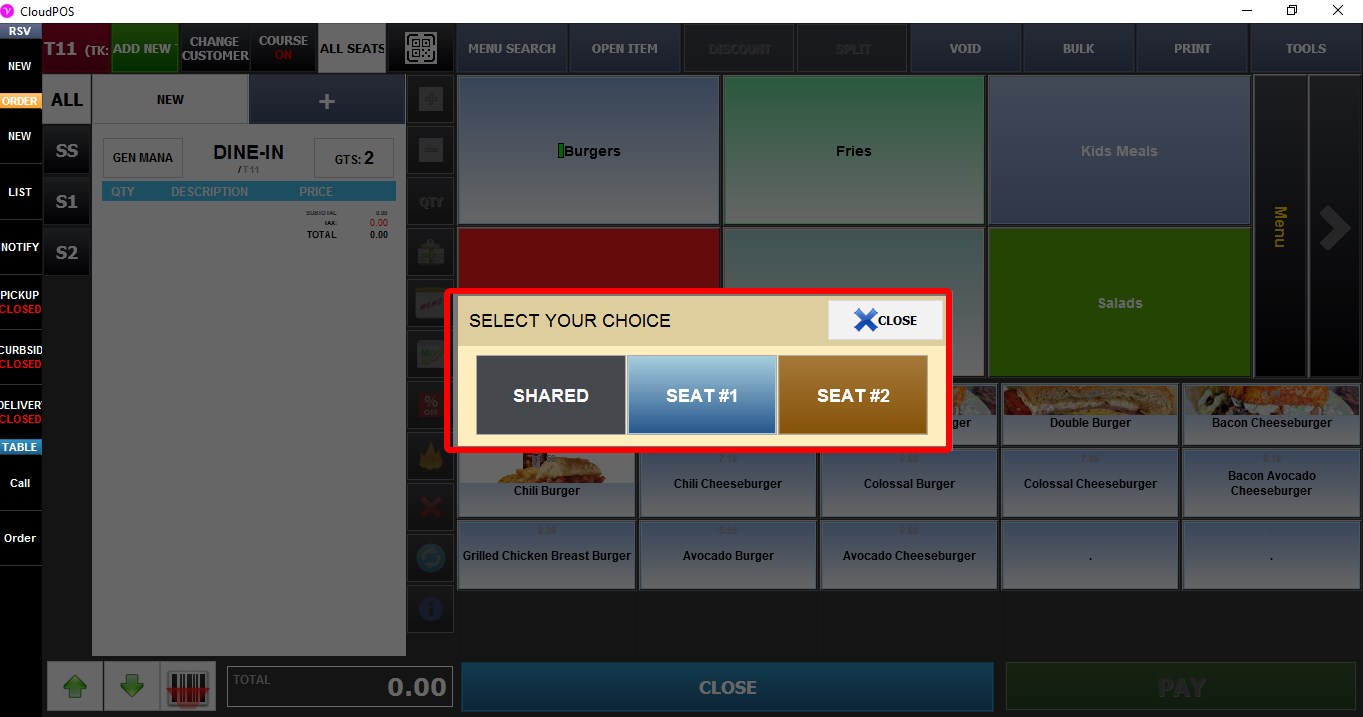
1. NO: Hides the current seat from the SEAT button. Tap the button to open the seat selection window and choose a seat.
2. YES: Always displays the currently selected seat (for example, SEAT 1) on the SEAT button, making it easy to see which seat is currently active.

ASK FOR ITEM
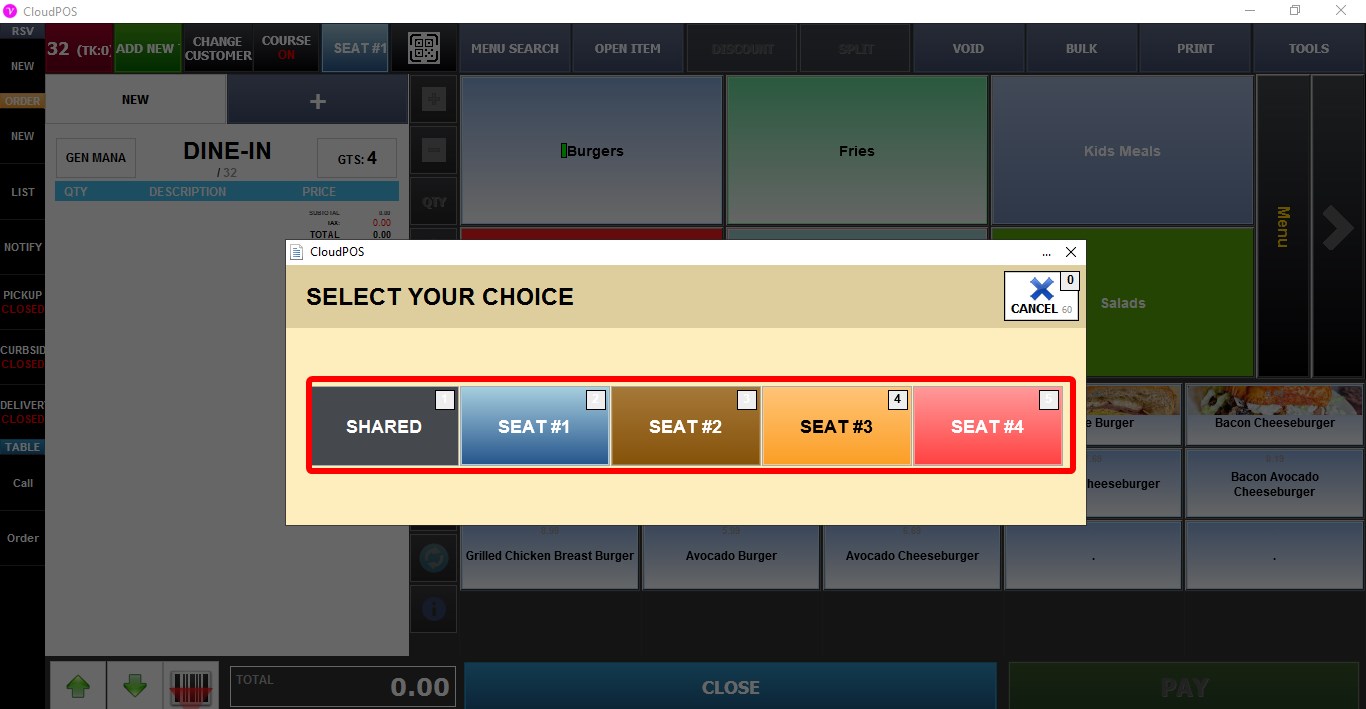
Controls whether the POS prompts the user to select a seat before adding menu items.

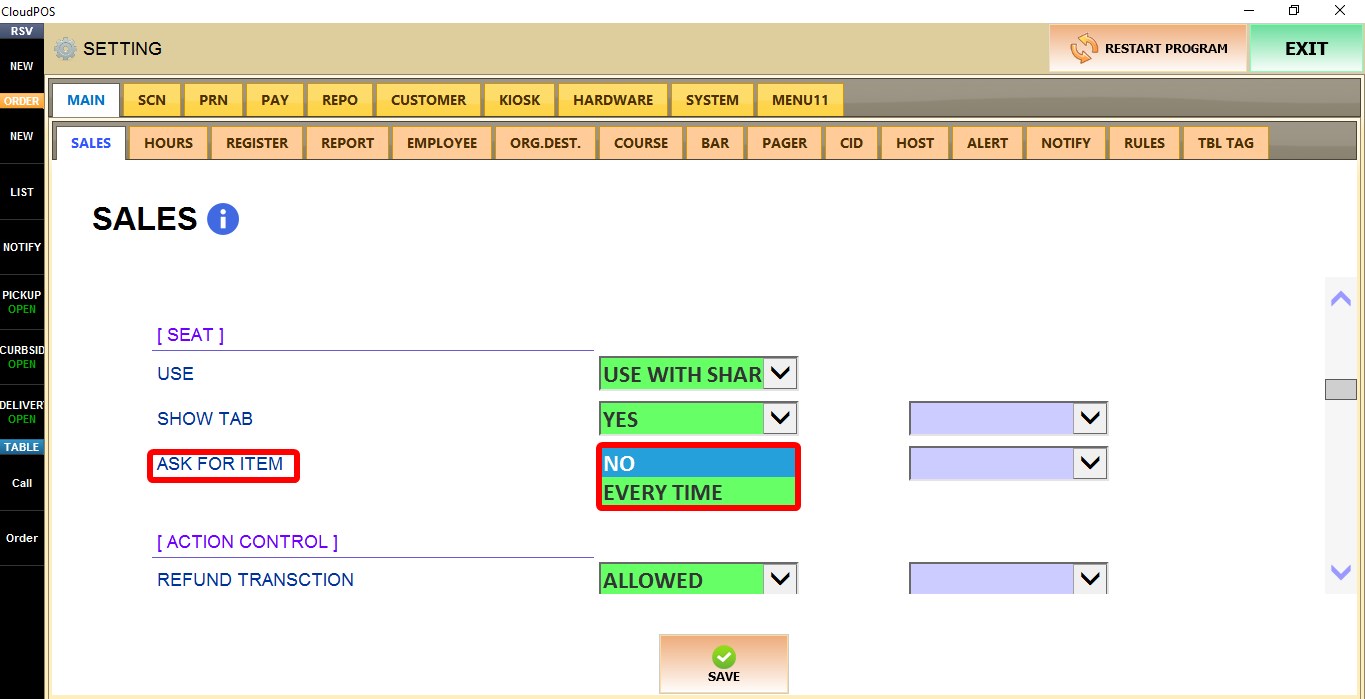
Use the TERMINAL dropdown to configure these settings for only the current POS terminal.
1. NO: Items are added immediately without prompting for a seat.
2. EVERY TIME: The POS prompts the user to select a seat each time an item is added.

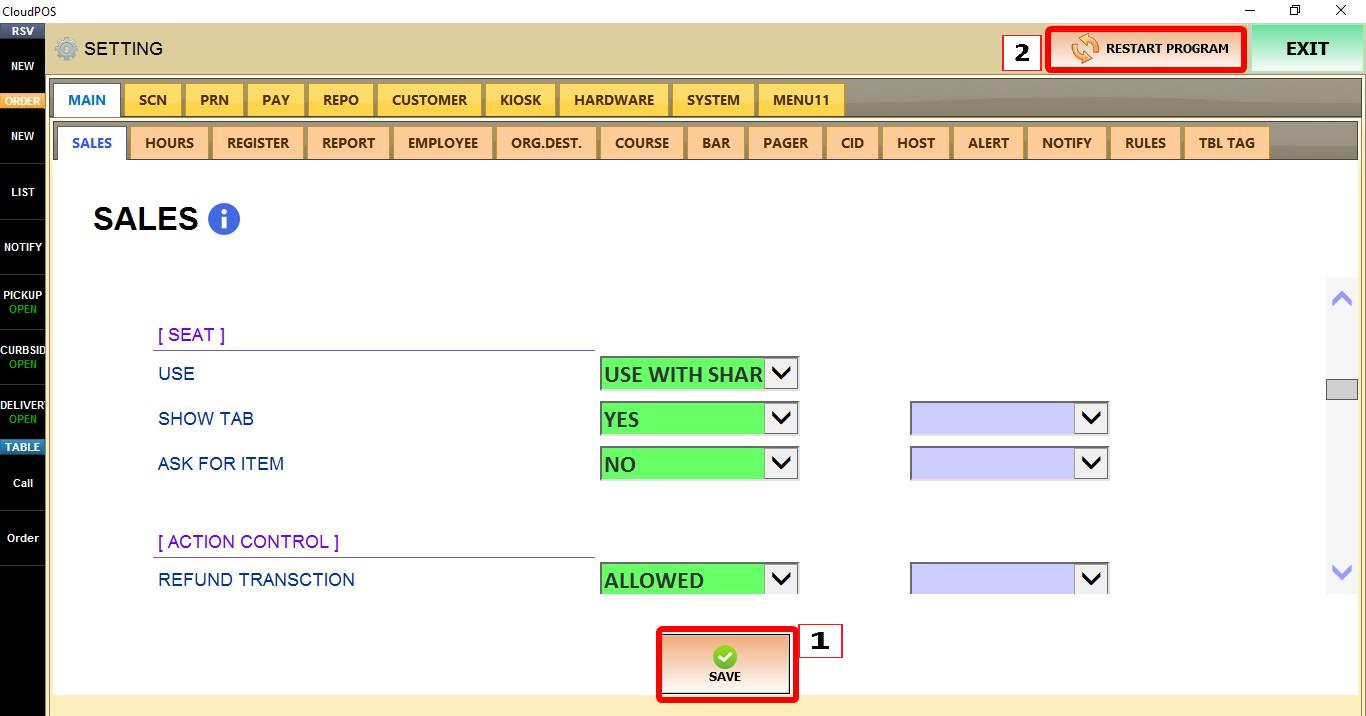
Click SAVE and RESTART THE PROGRAM to apply the changes.