Creating an Item
In this article, learn the process of building products for a menu, from initial creation to configuration, ensuring each item is ready for accurate use on the sales screen
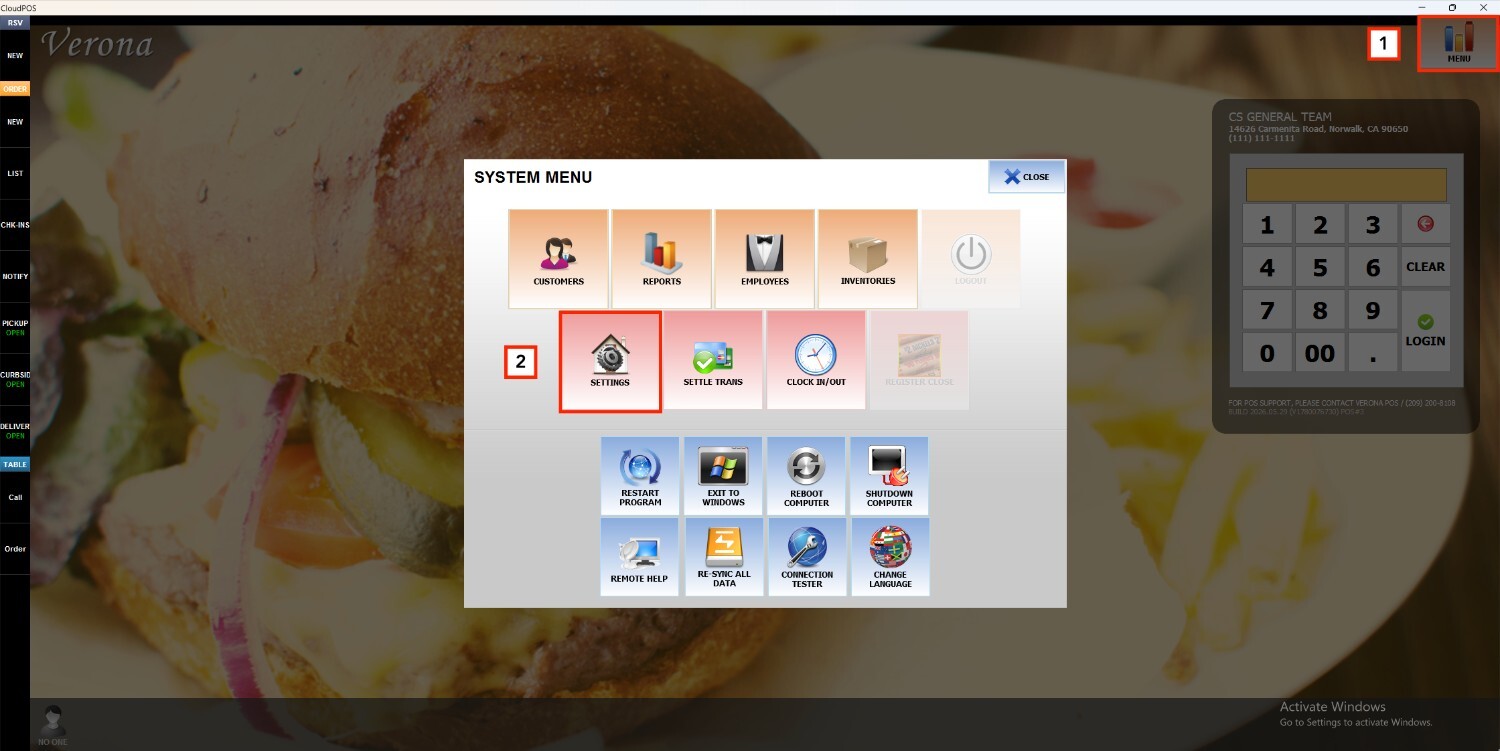
Main Screen> MENU> SETTINGS> REPO> MENU> EDIT
Go to MENU and press SETTINGS
Under REPO, select MENU, and press on EDIT next to the menu to modify.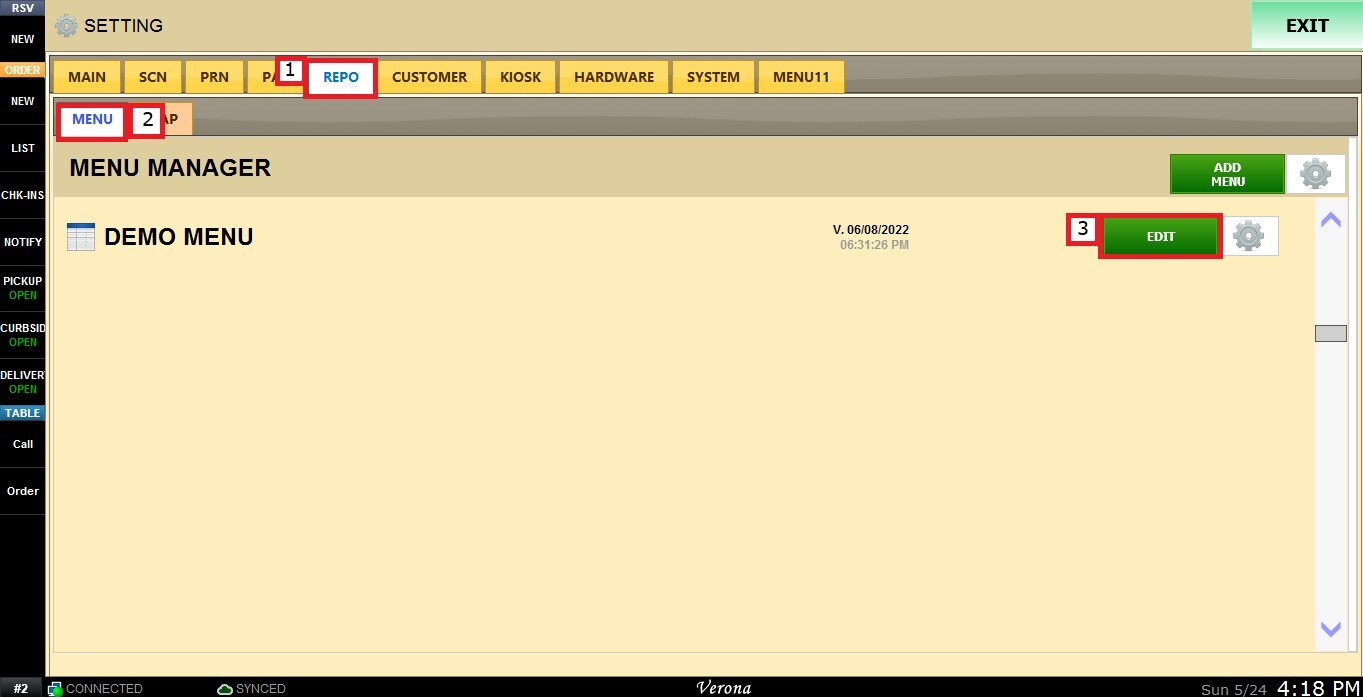
Navigate to the DEPARTMENT section and select a department. Then, in the CATEGORY section, choose the category where items will be added. The available item slots will appear below. Select one to begin creating the item.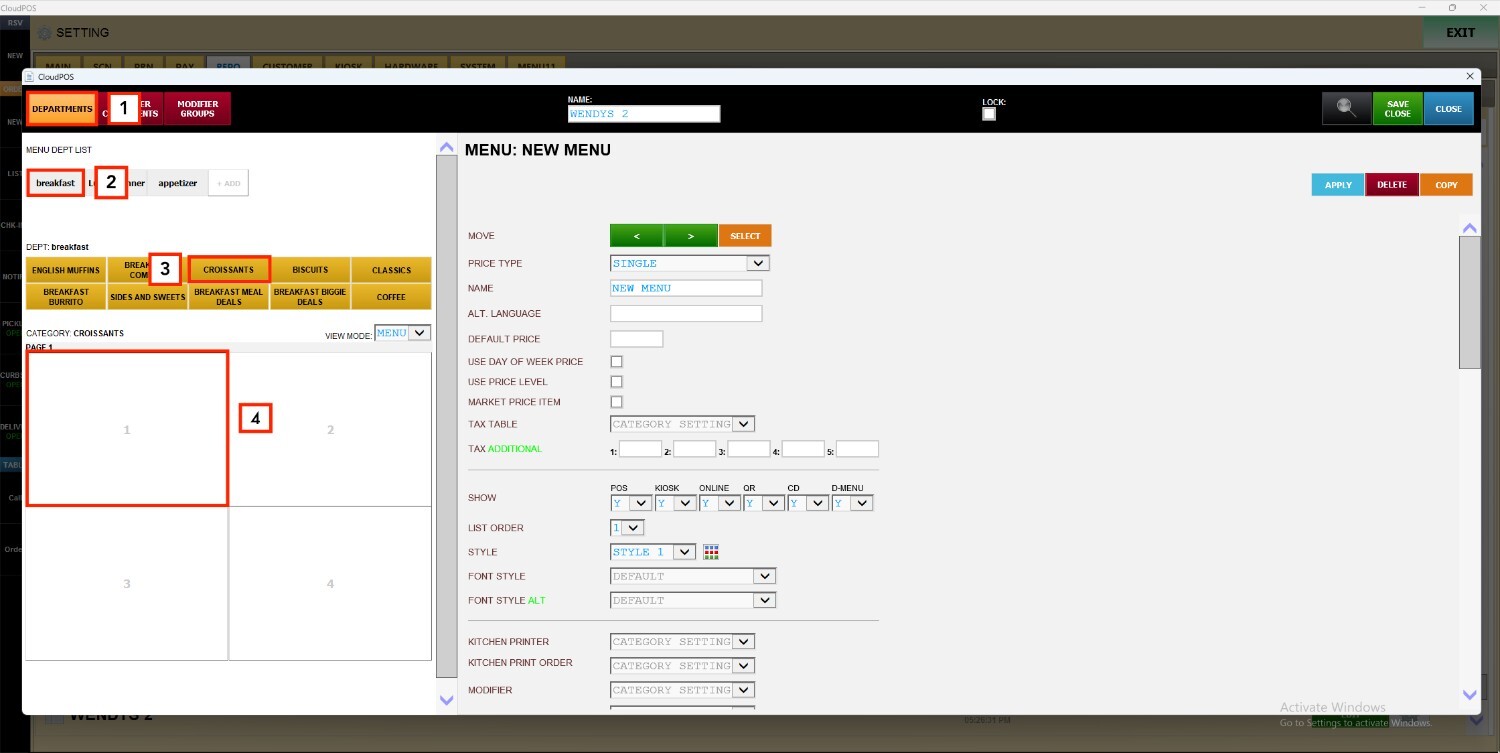
Hint: To learn how to create and configure departments and categories, see Creating a Department and Creating a Category.
After selecting an item slot, enter the item’s name in the NAME field. If necessary, provide an alternate version of the name in the ALT LANGUAGE field to support multilingual display. Next to the PRICE field, enter the value that defines the selling price of the item.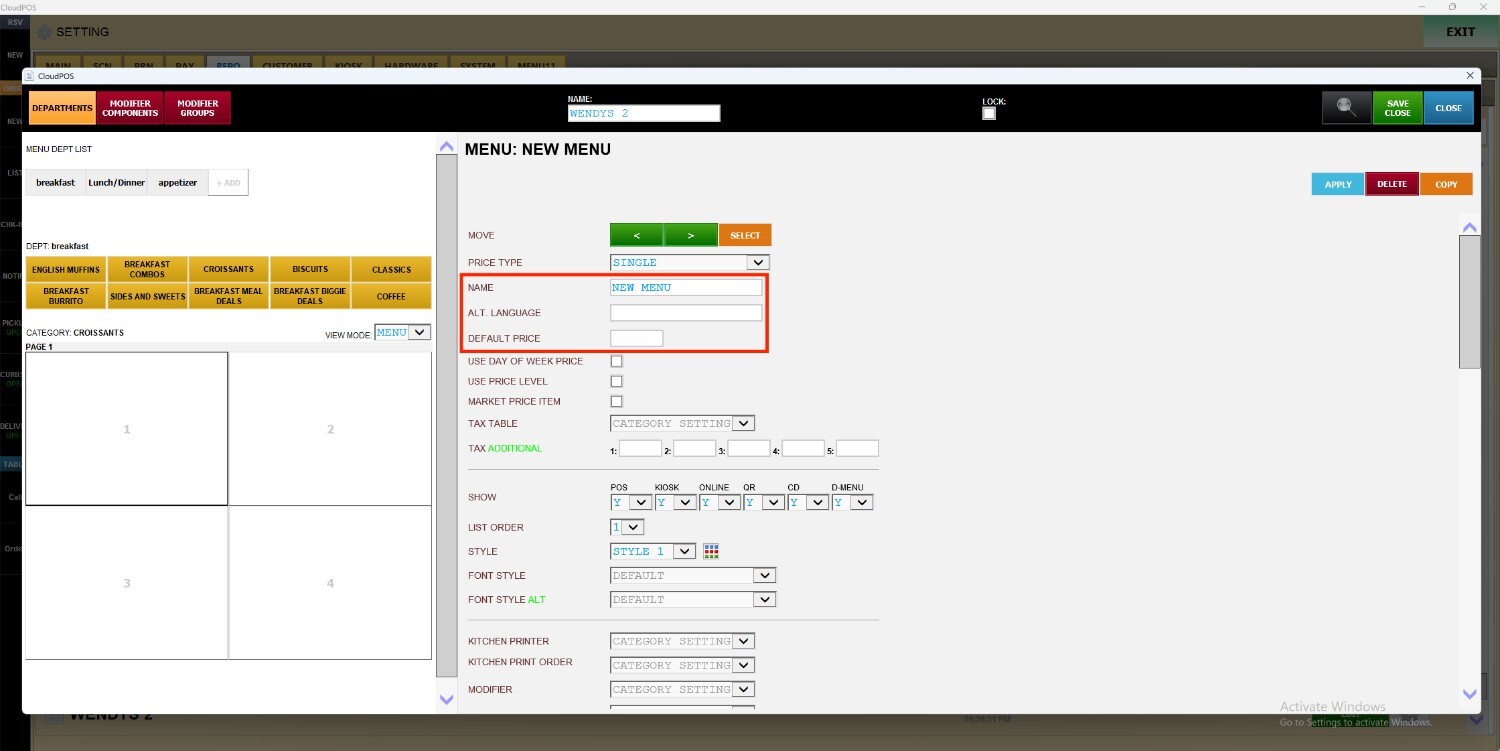
Once the item details are completed, press APPLY to confirm, then select SAVE & CLOSE to store the changes.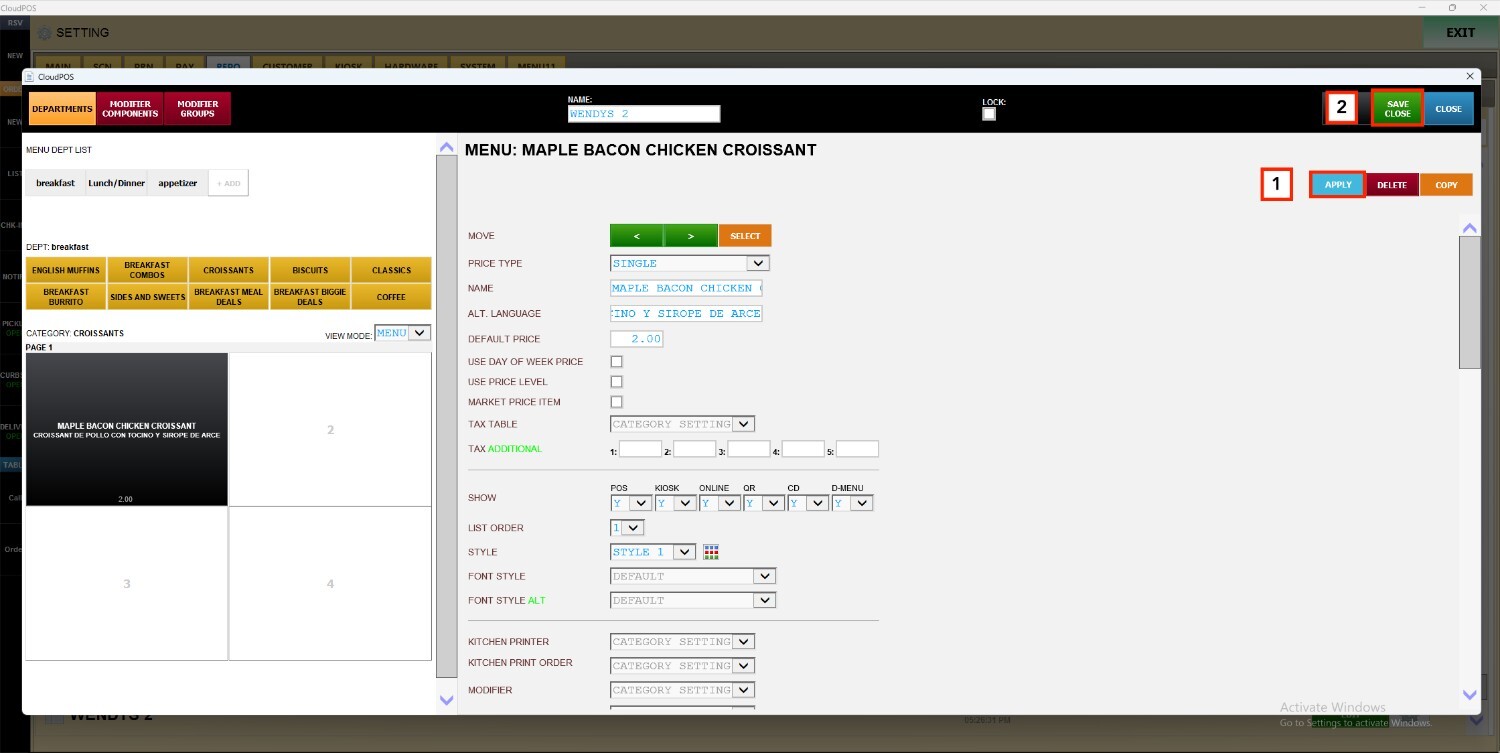
Hint: For additional options to style and configure how the item appears on the sales screen, refer to Item Visibility and Style.