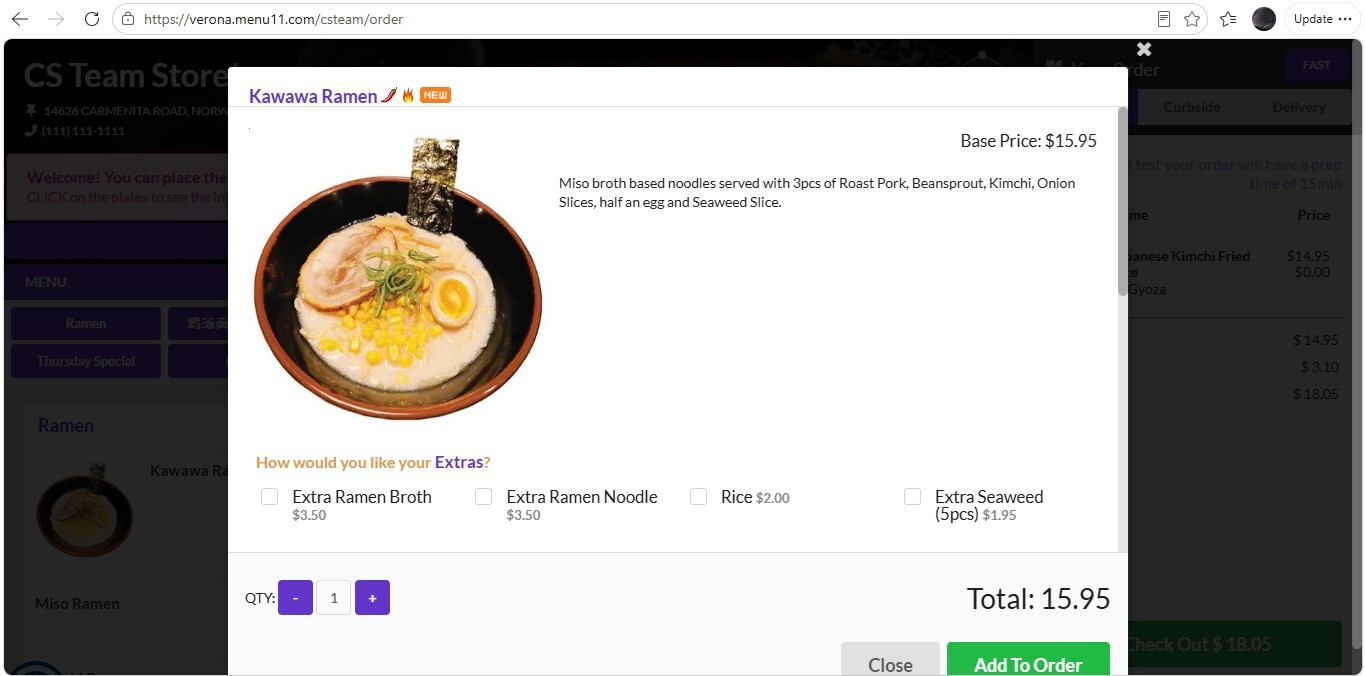
Online & Kiosk (Item)
This section allows you to customize how individual menu items are presented on supported digital ordering platforms. You can configure item labels, descriptions, display names, and images to provide customers with clear product information and improve the online ordering experience.
Main Screen> MENU> SETTING> REPO> MENU> EDIT> DEPARTMENTS> CATEGORY
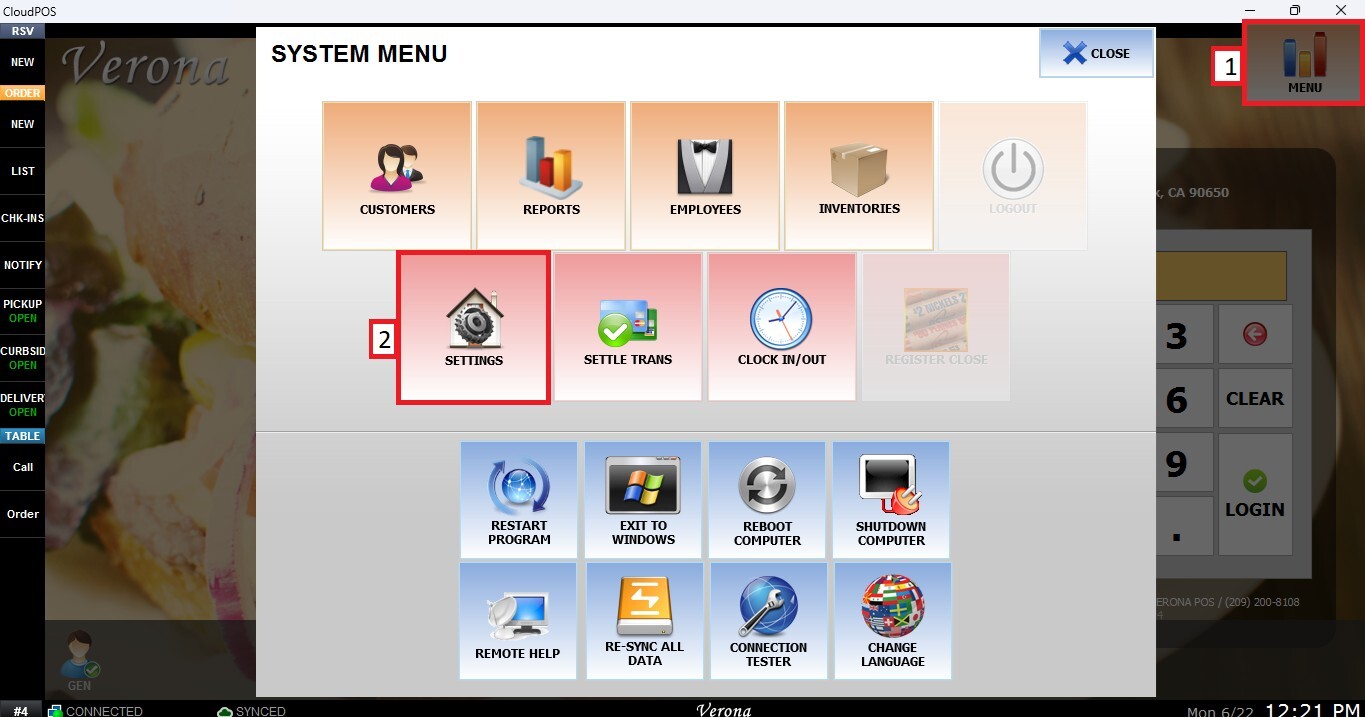
Go to MENU then SETTINGS.
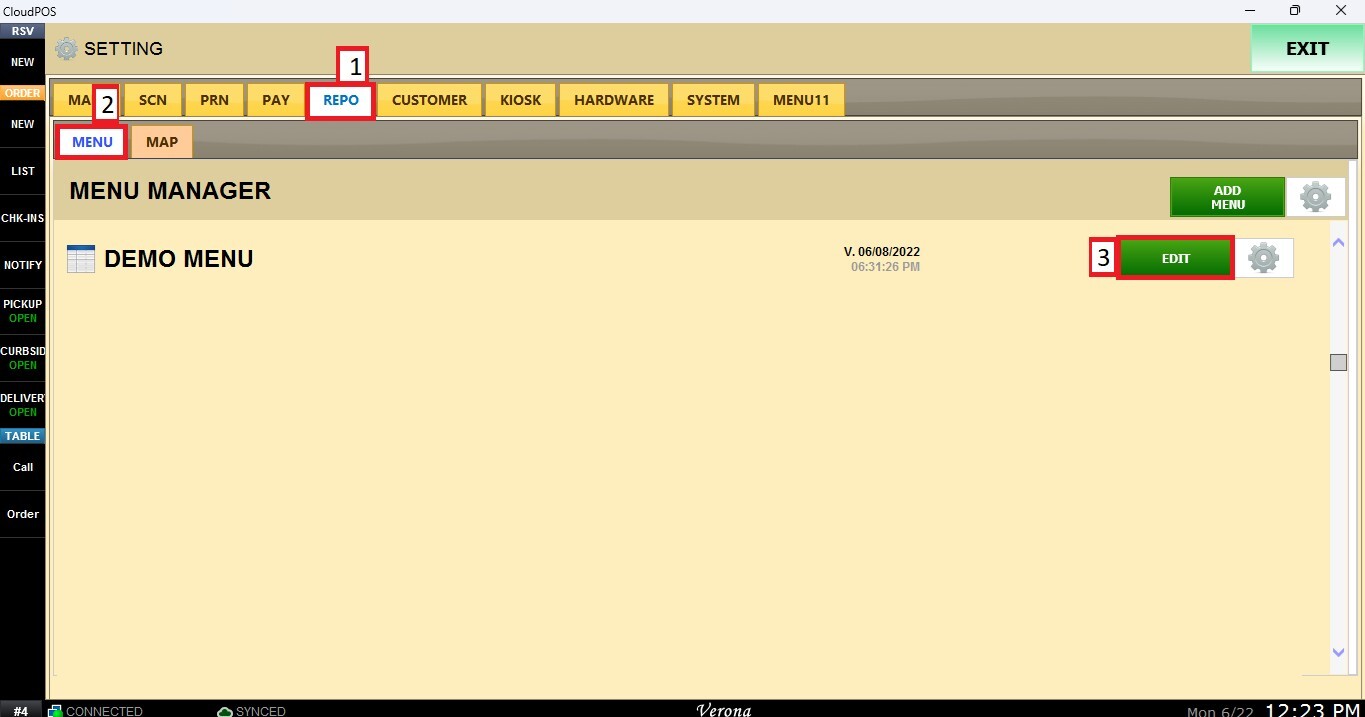
Open the REPO tab, select MENU and Locate the menu you want to modify and click EDIT.
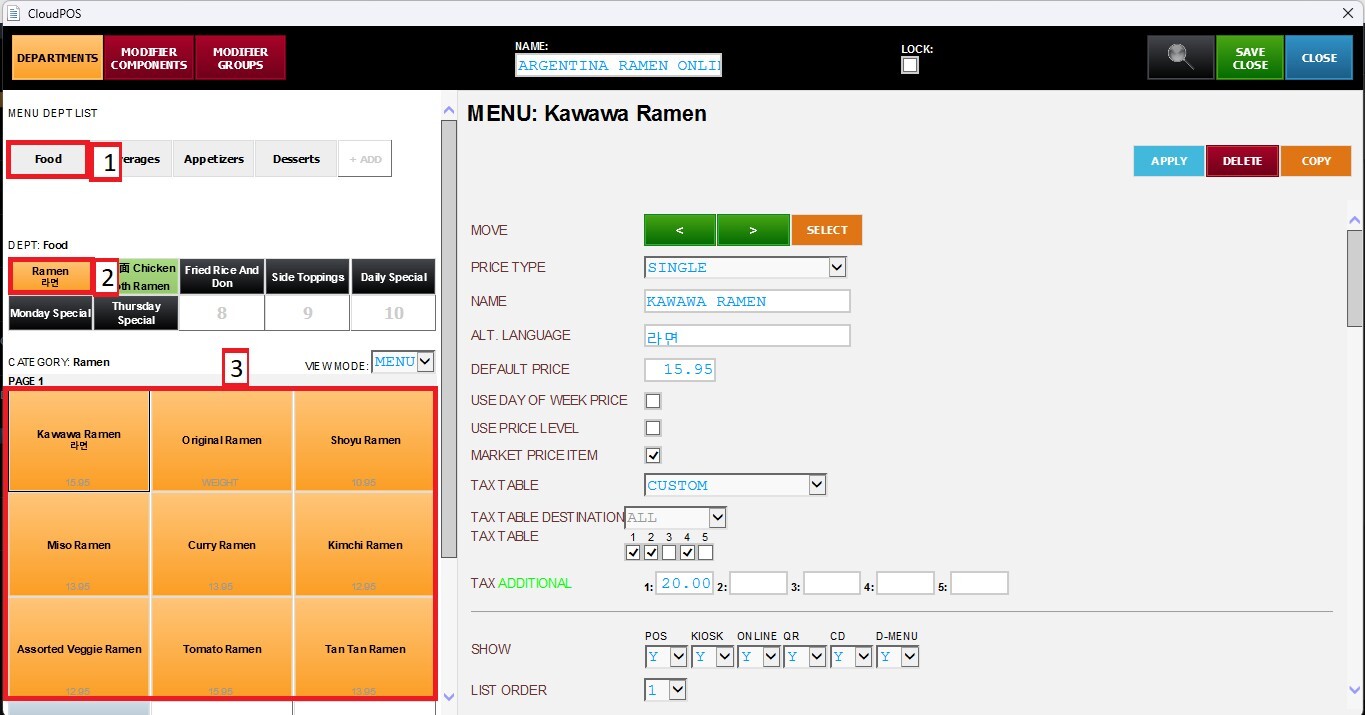
Navigate to the corresponding Department and Category, then select the Item you want to configure.
Scroll down until you reach the ONLINE & KIOSK section.
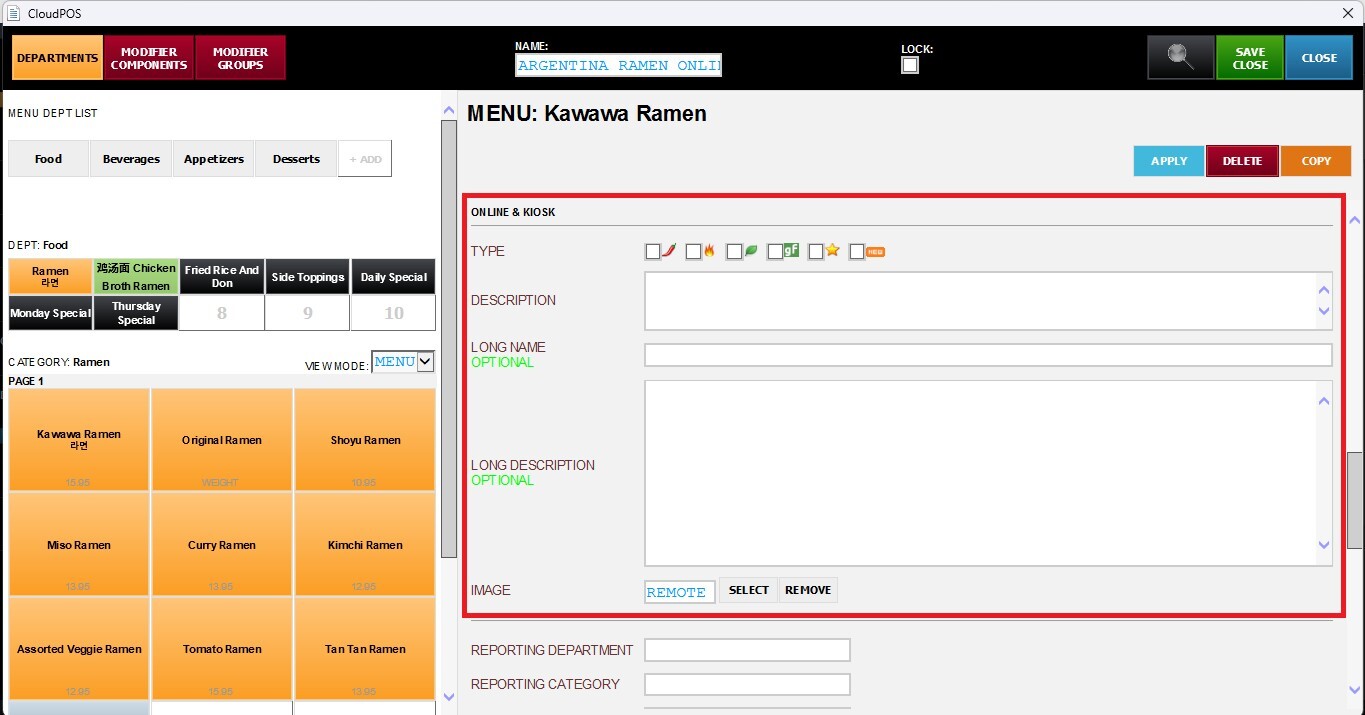
Type
Displays the selected labels for the item. Check the corresponding boxes to apply the desired labels.
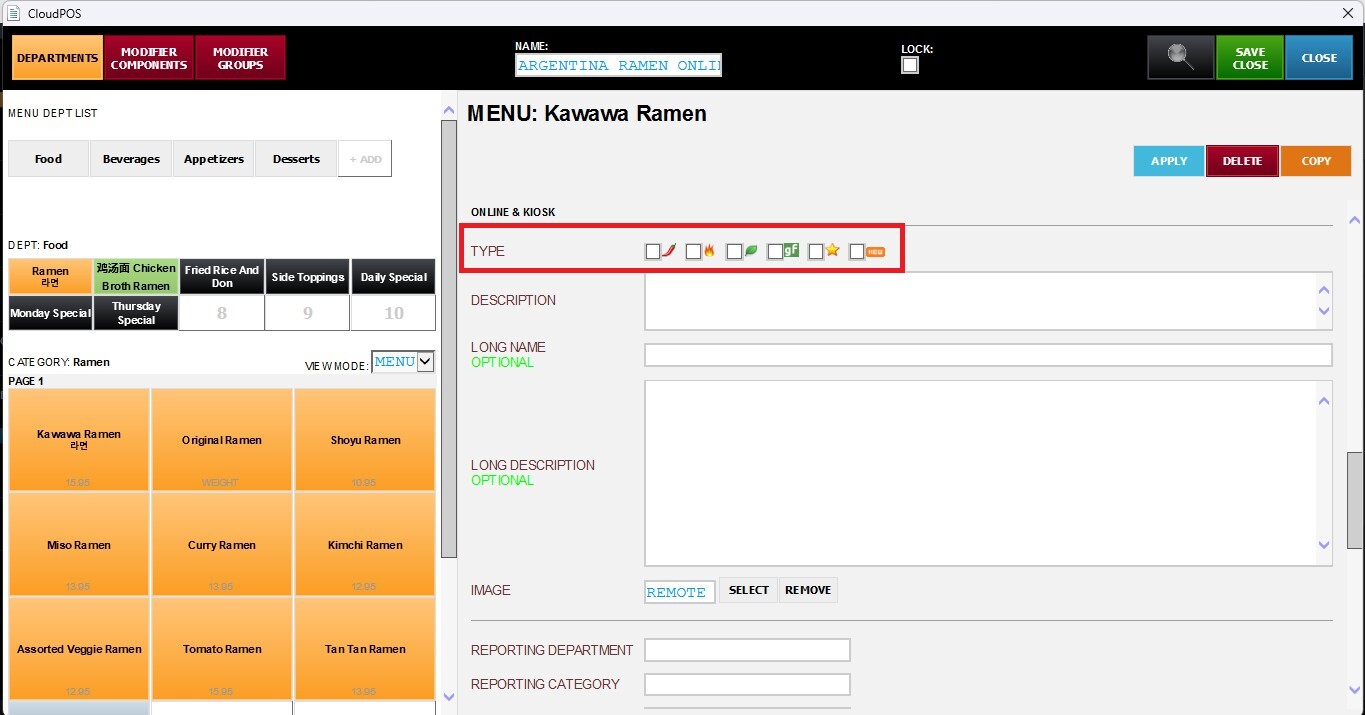
Description
Enter a short summary for the item. This description appears below the item name and helps customers better understand the product.
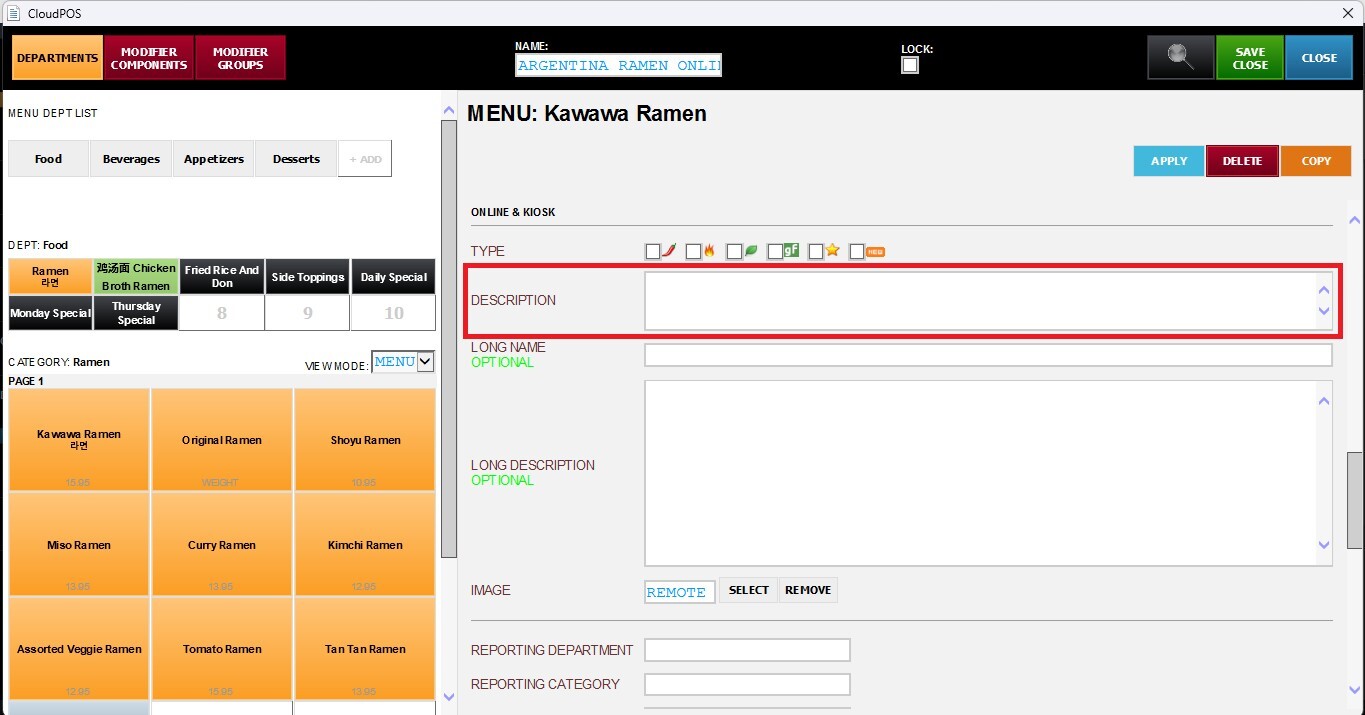
Long Name (Optional)
Allows you to define a more customer-friendly or descriptive name for the item. This field overrides the item name configured in the POS.
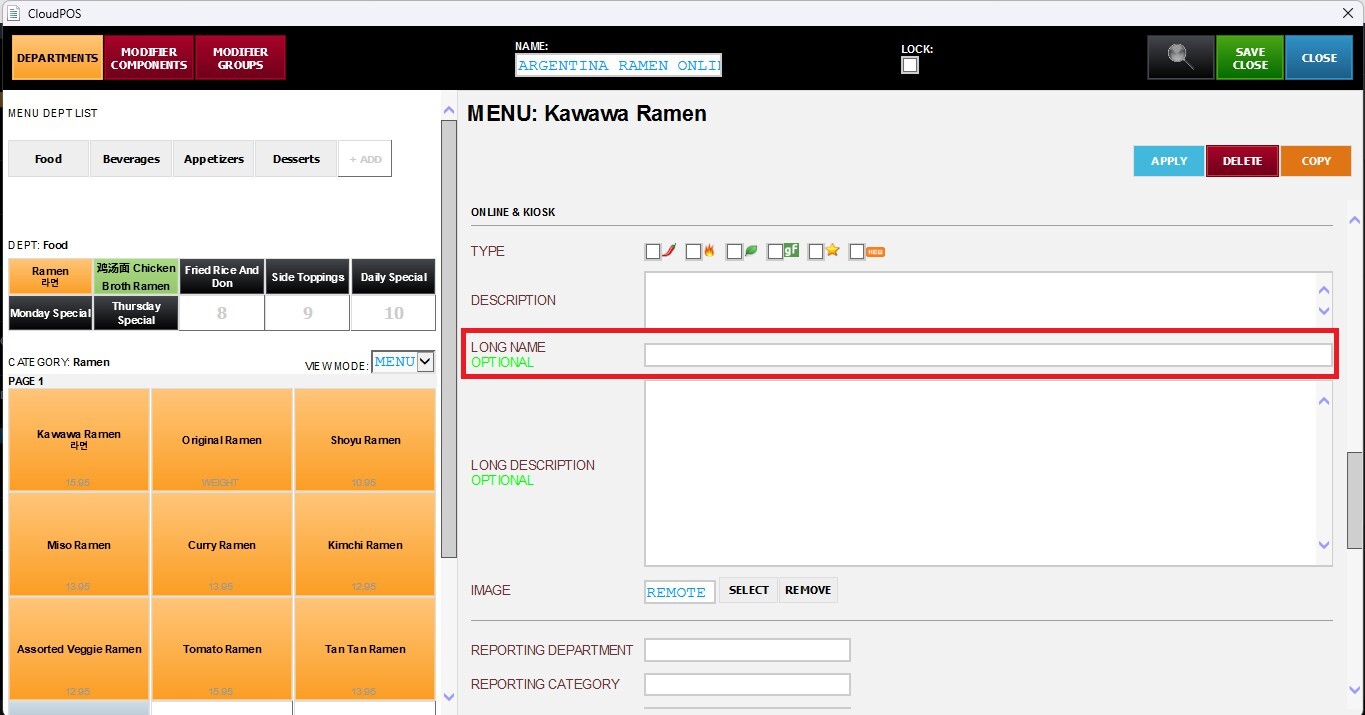
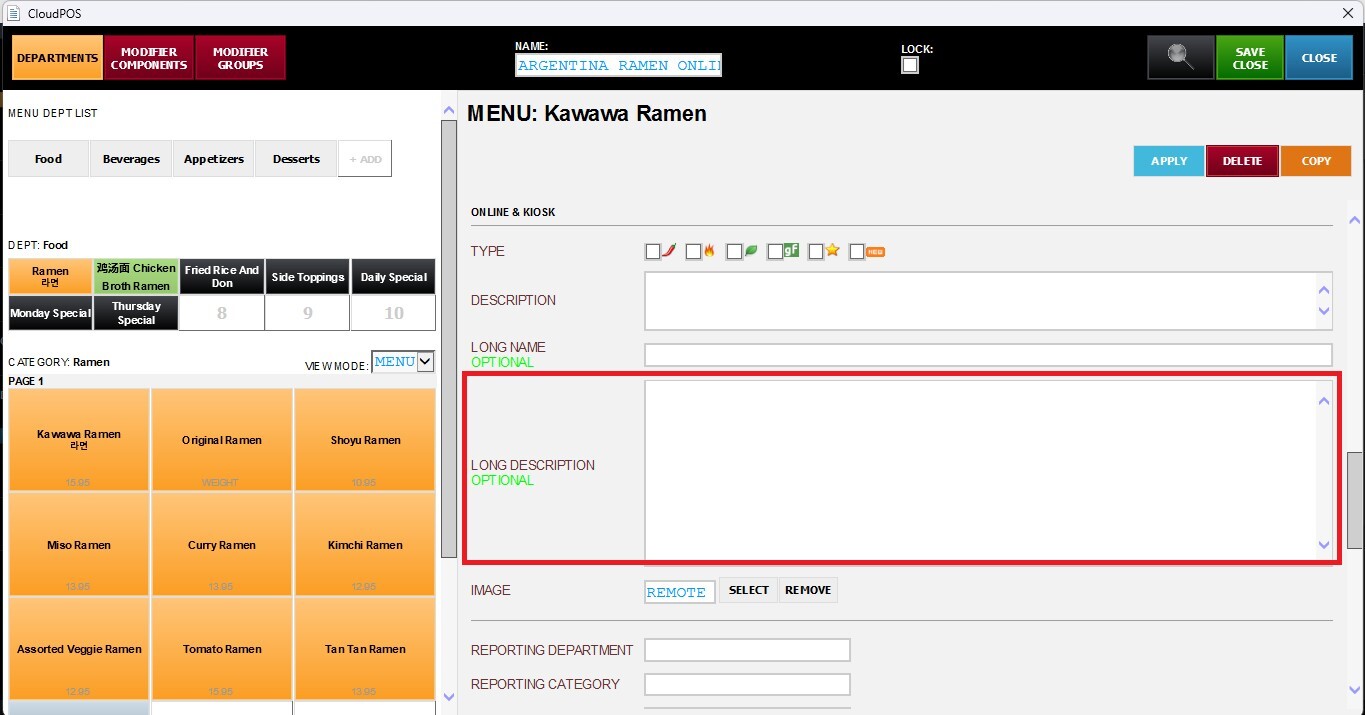
Long Description (Optional)
Provides additional detailed information about the item, such as ingredients, preparation details, promotional information, or allergy and dietary notices.
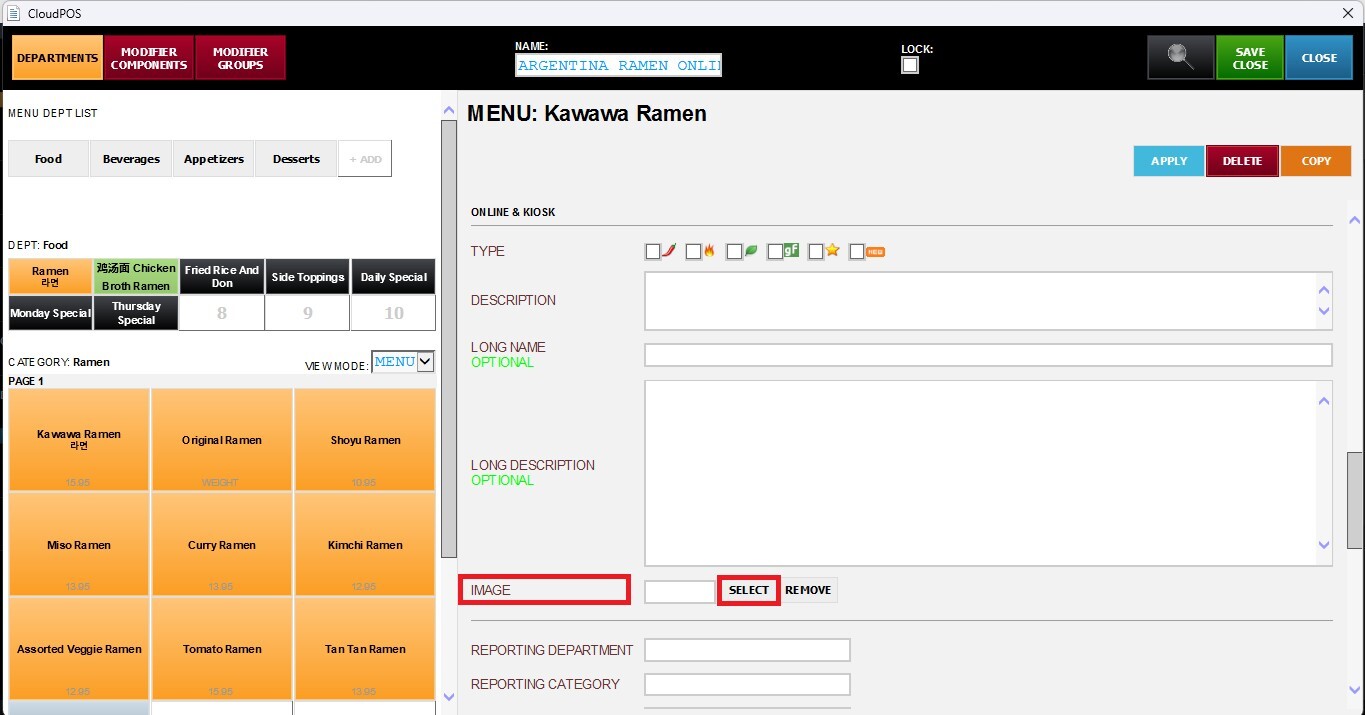
Image
Important: Images intended for Online Ordering must be uploaded using the Remote option so they are stored in the cloud and can be accessed by all supported platforms. Images selected through Local are only available on the current POS/Kiosk.
Upload an image to represent the item, click on SELECT, a new window will open.
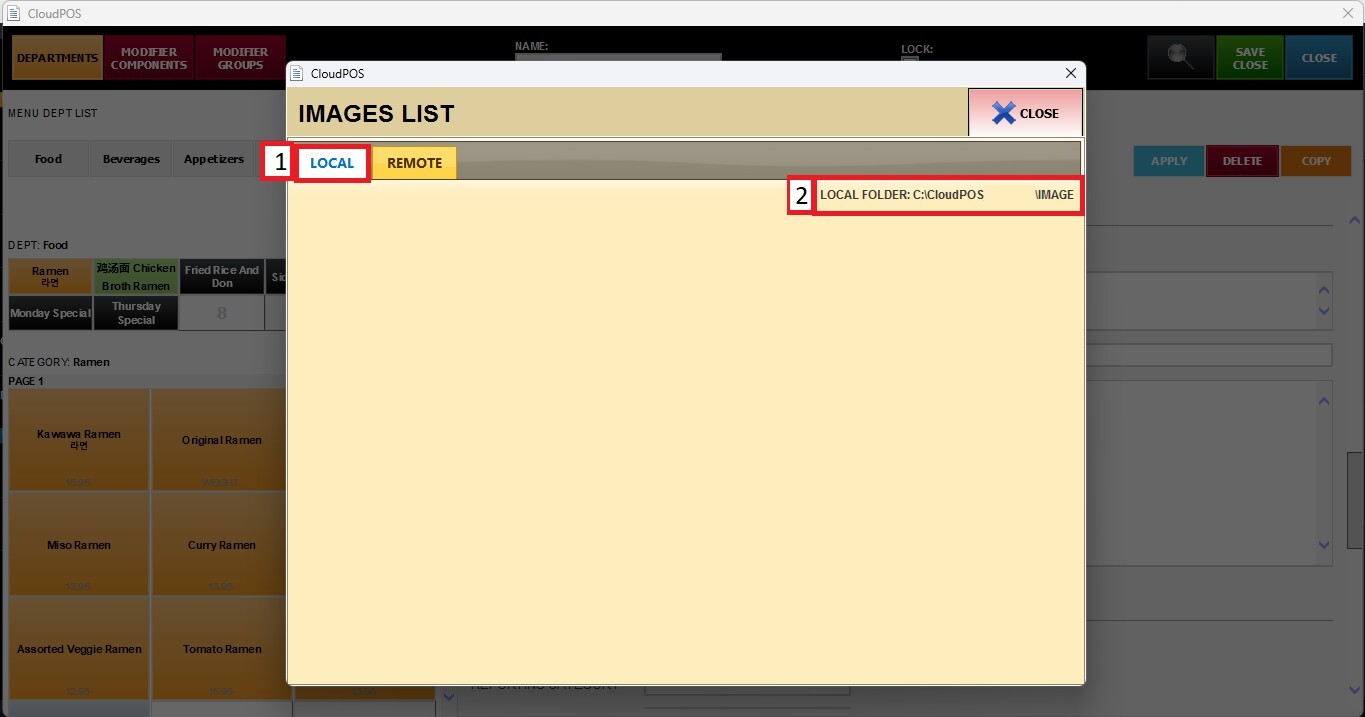
Local
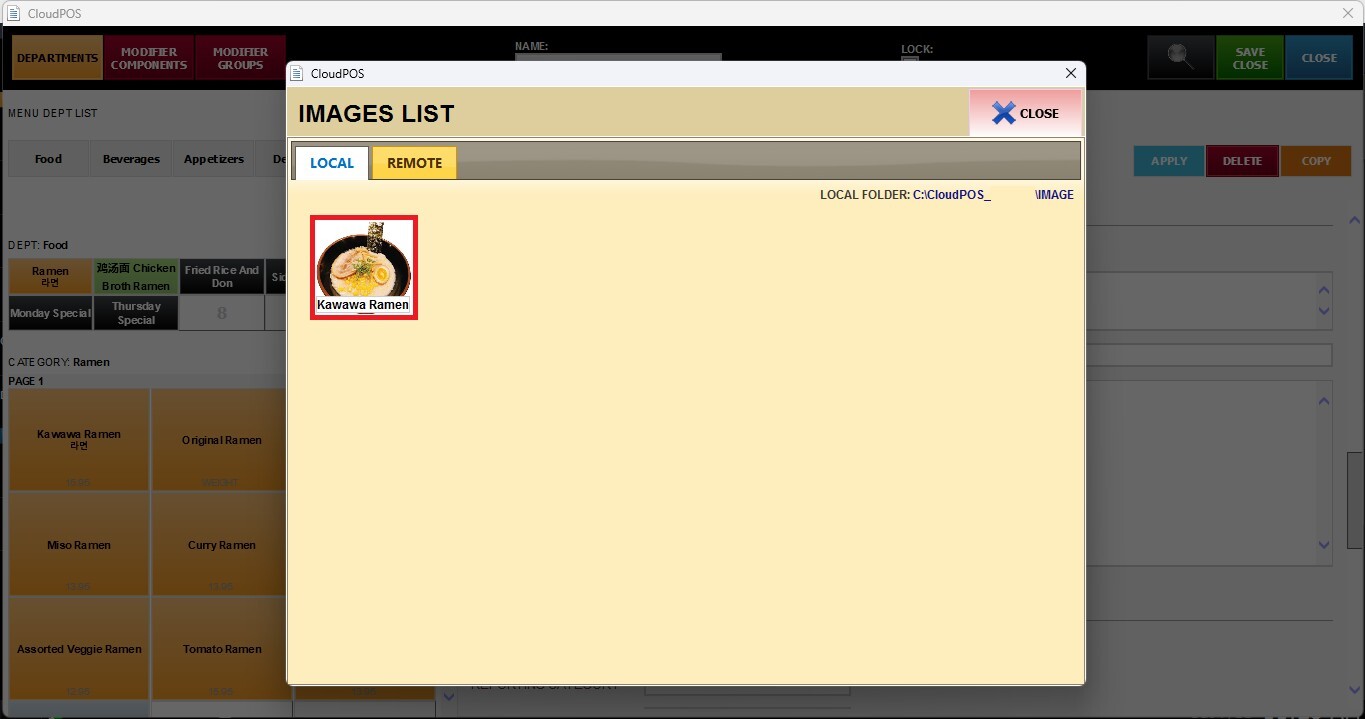
Use this option to select an image stored on the local computer, the local folder path is displayed in the upper-right corner of the window.
If the folder does not already exist, you can create it. Clicking the folder path will open (or redirect you to) that location in File Explorer.
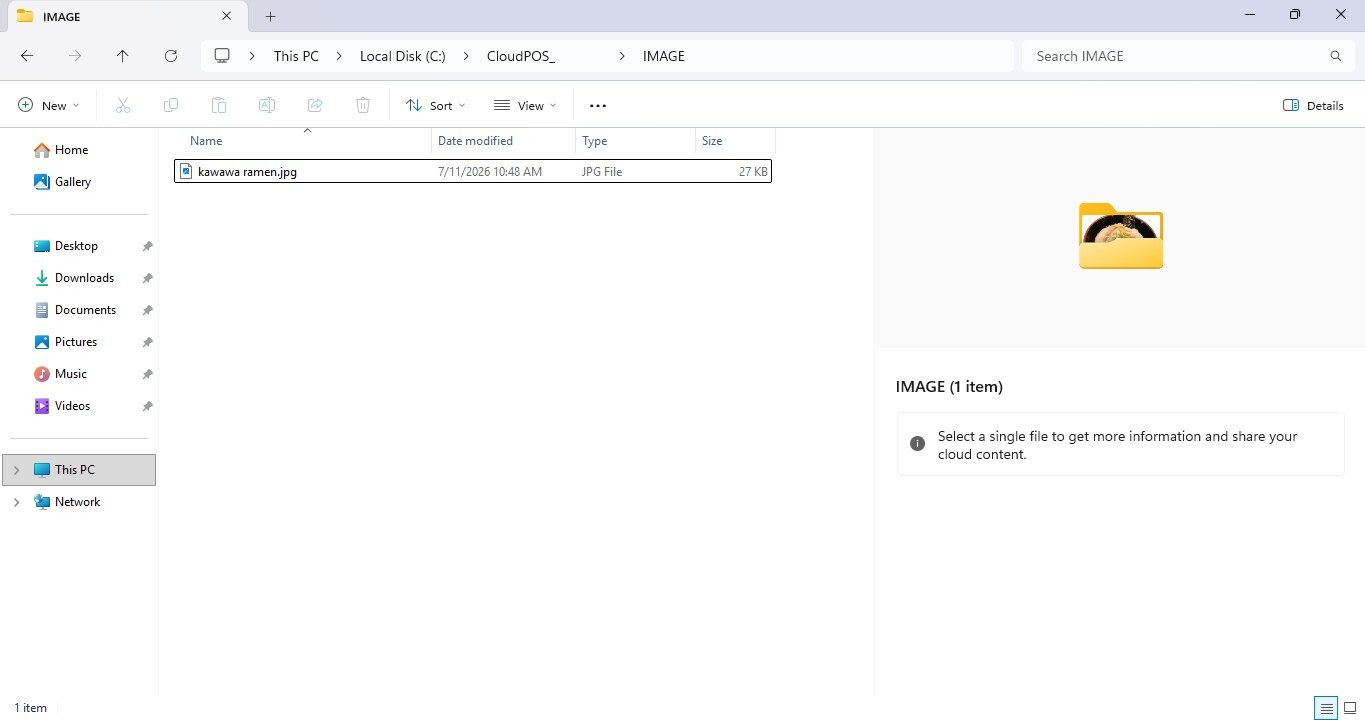
Copy or save your images to this folder so they appear in the list of available images, after that select the desired image.
Remote
Use this option to upload an image to the cloud, allowing it to be available on other POS terminals. Click on UPLOAD.
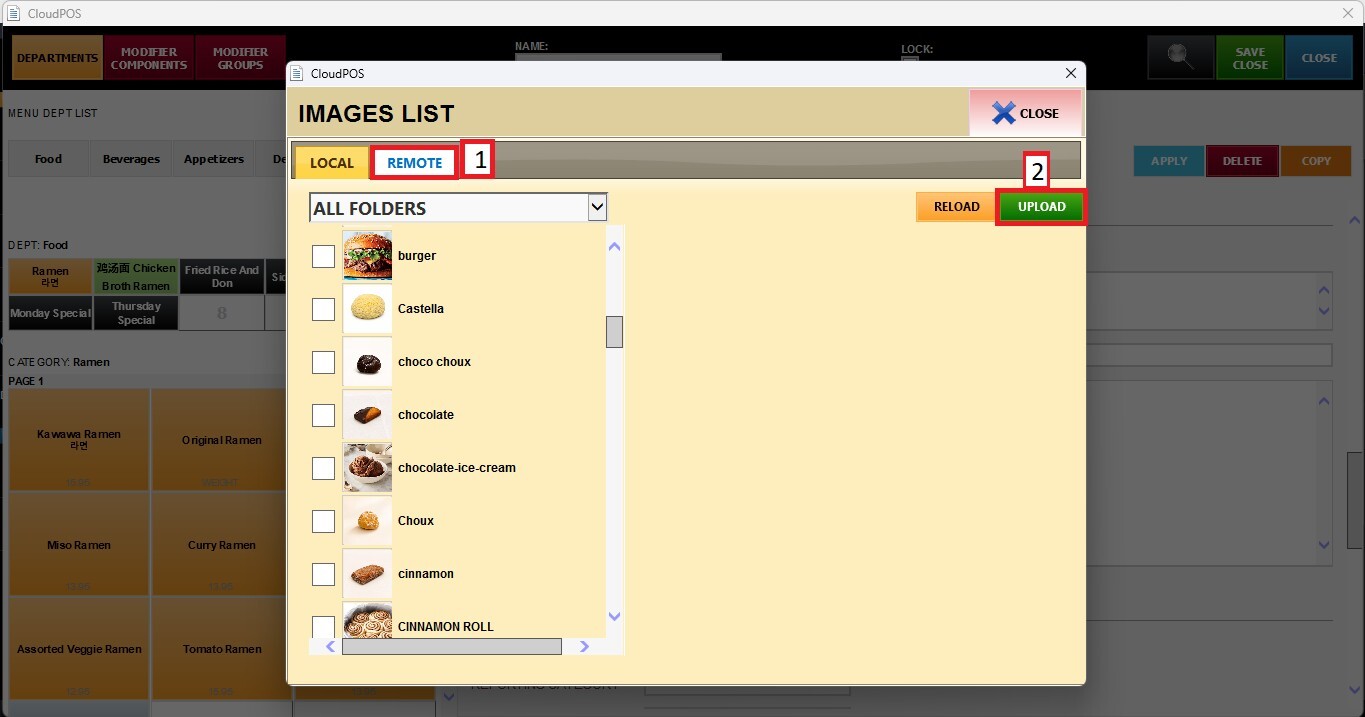
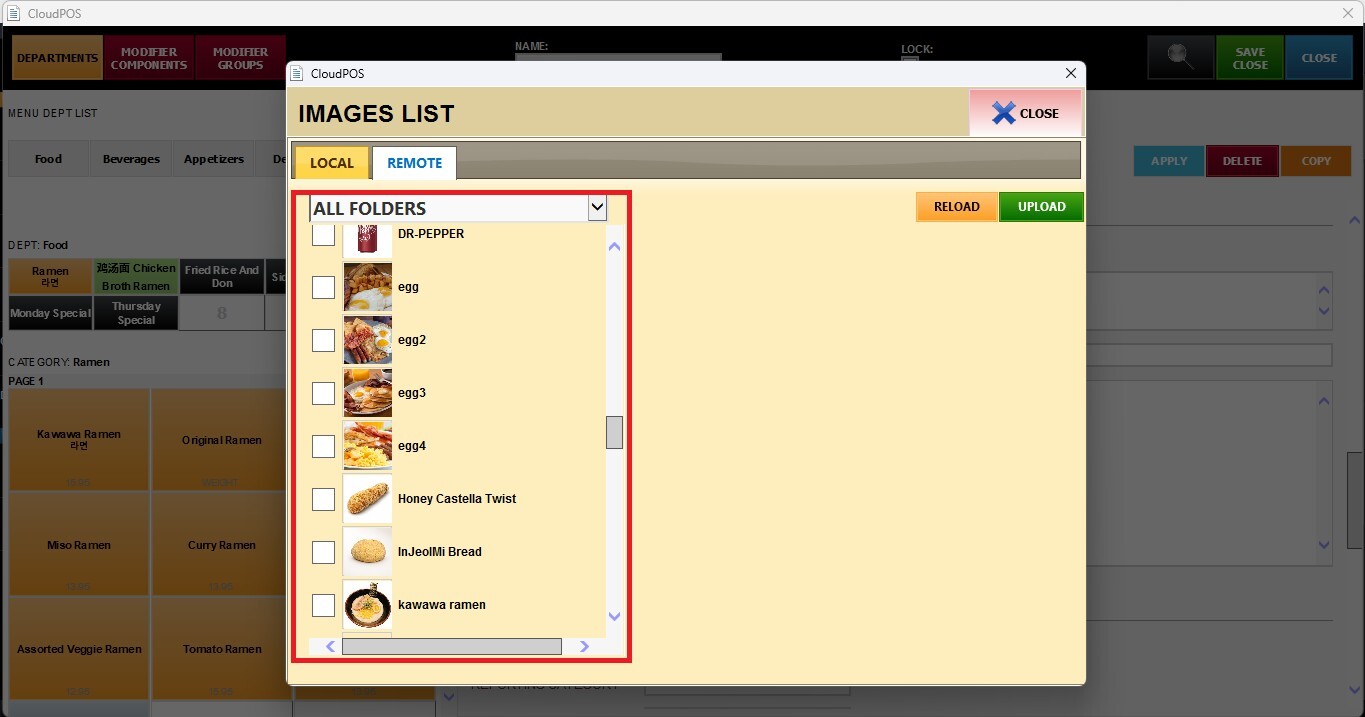
Browse your computer and select the image you want to upload. Once the upload is complete, select the image from the list on the left.
The following options are available:
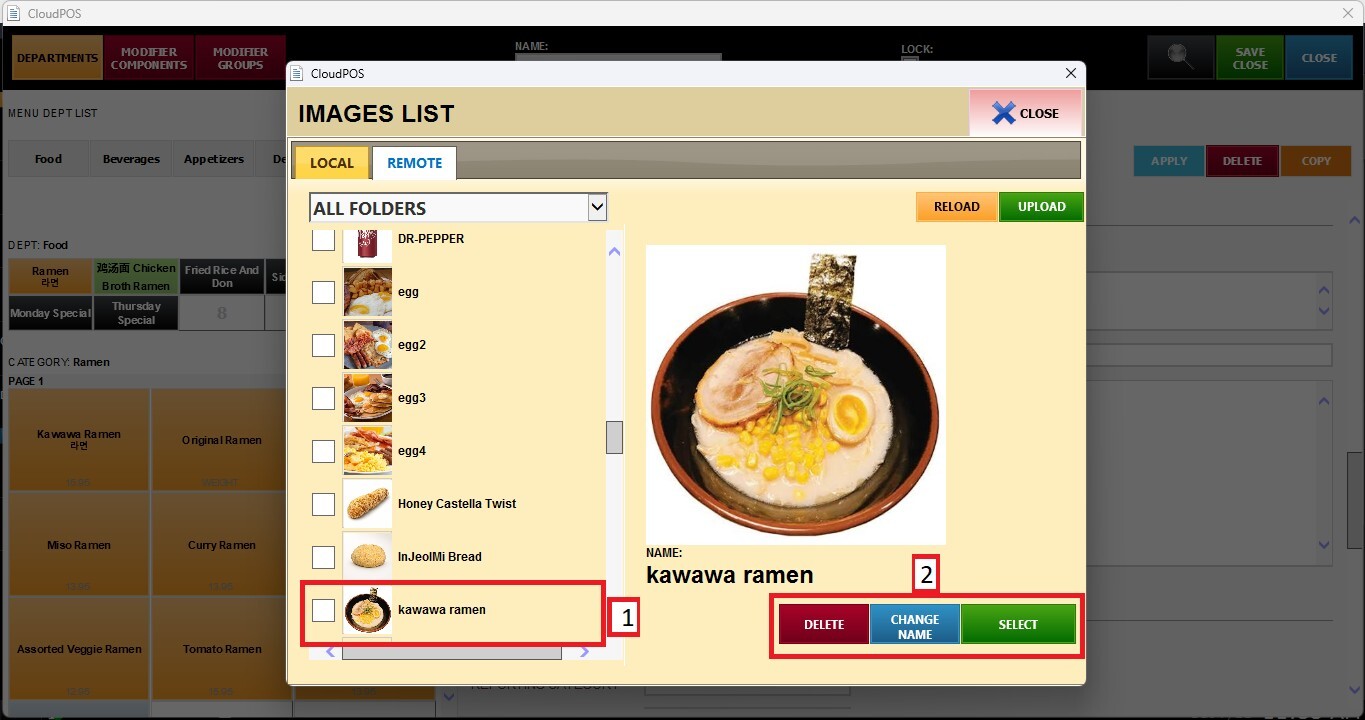
Delete – Removes the image from cloud storage.
Change Name – Renames the selected image.
Select – Assigns the selected image to the item being configured.
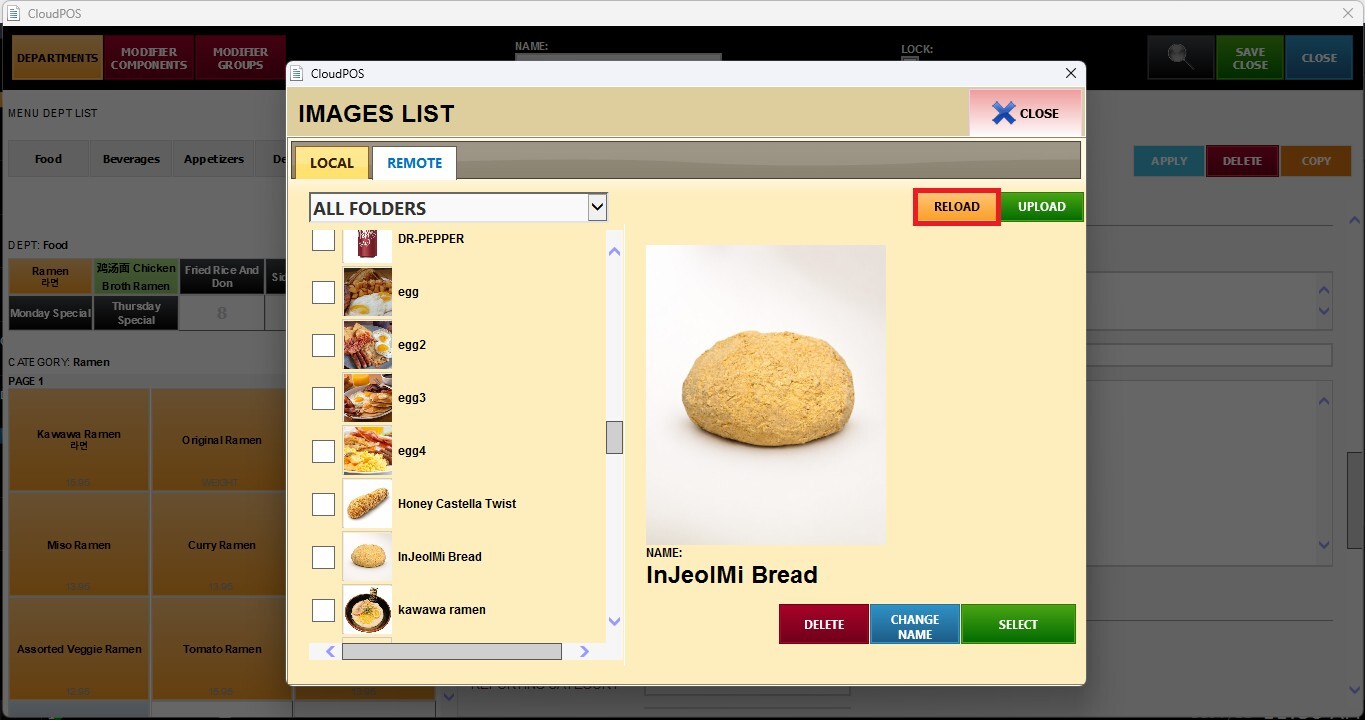
If the newly uploaded image does not appear in the list, click RELOAD to refresh and synchronize the available cloud images before selecting it.
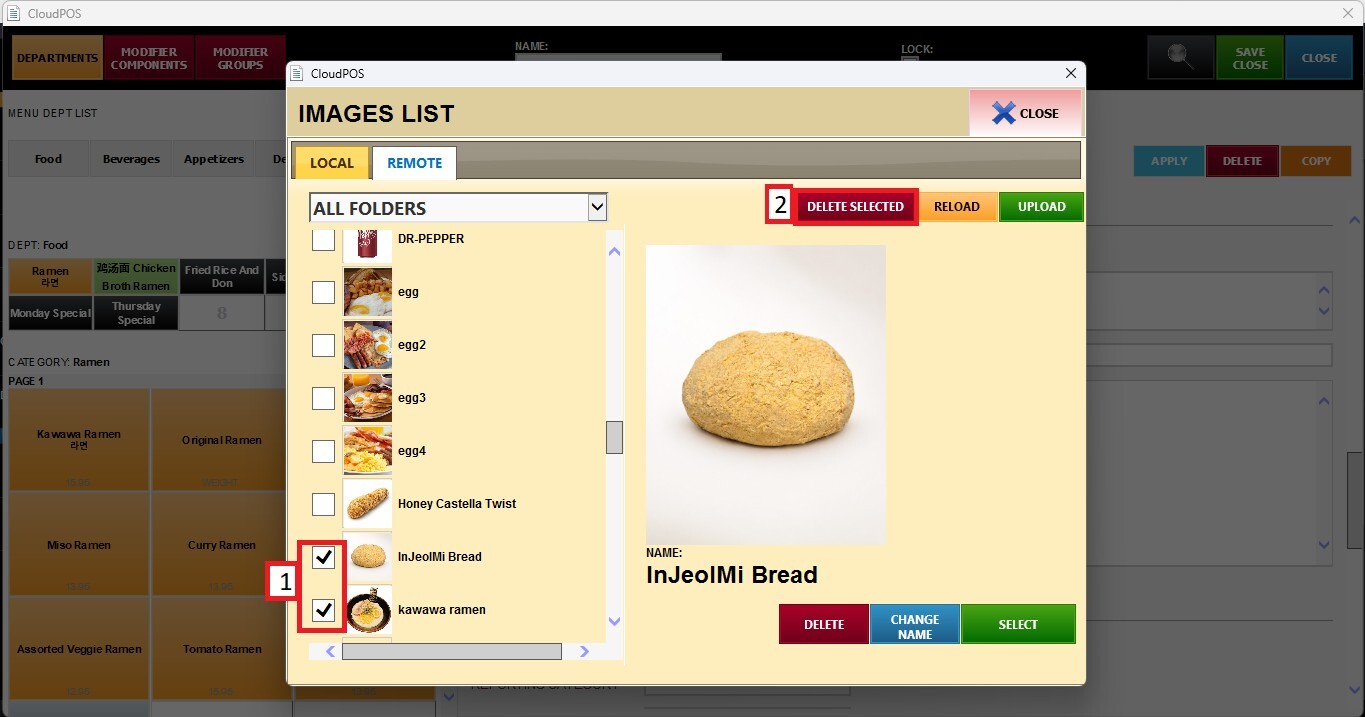
To delete multiple images from the cloud, select the checkbox next to each image you want to remove, then click DELETE SELECTED.
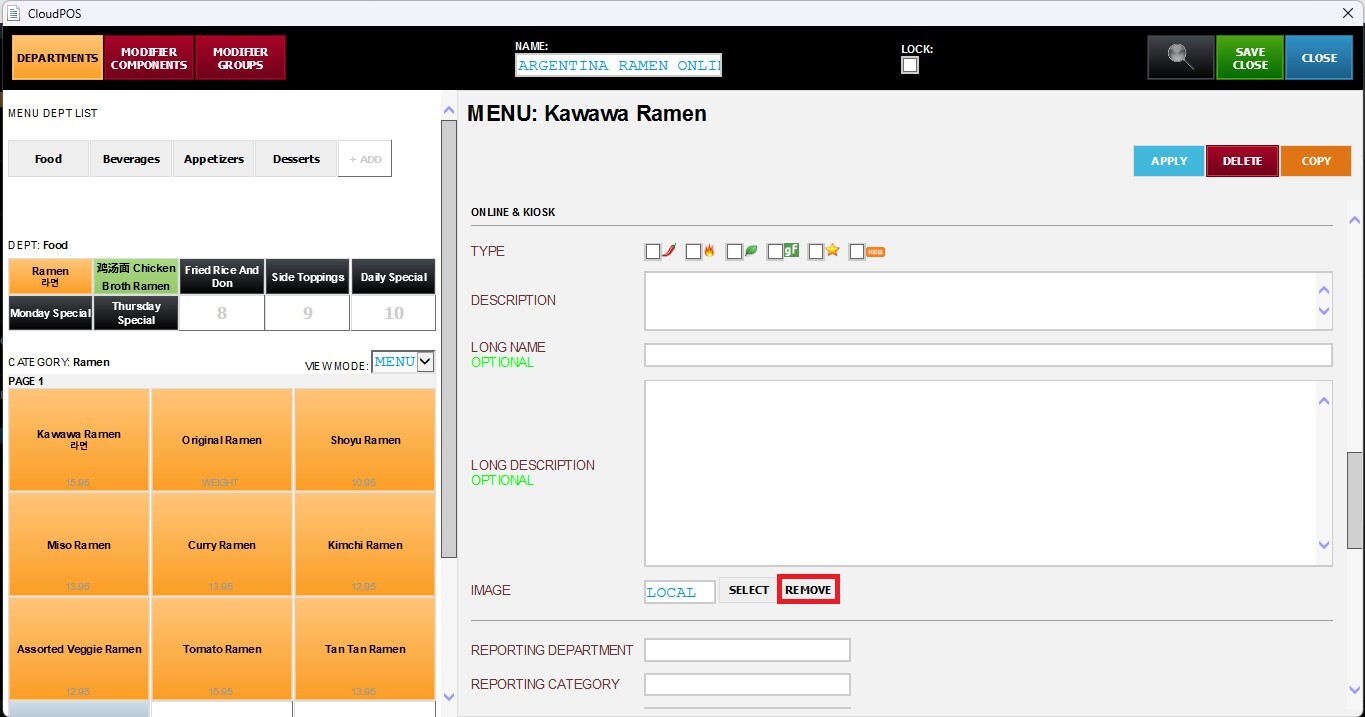
If the item already has an assigned image and you want to remove it, click REMOVE.
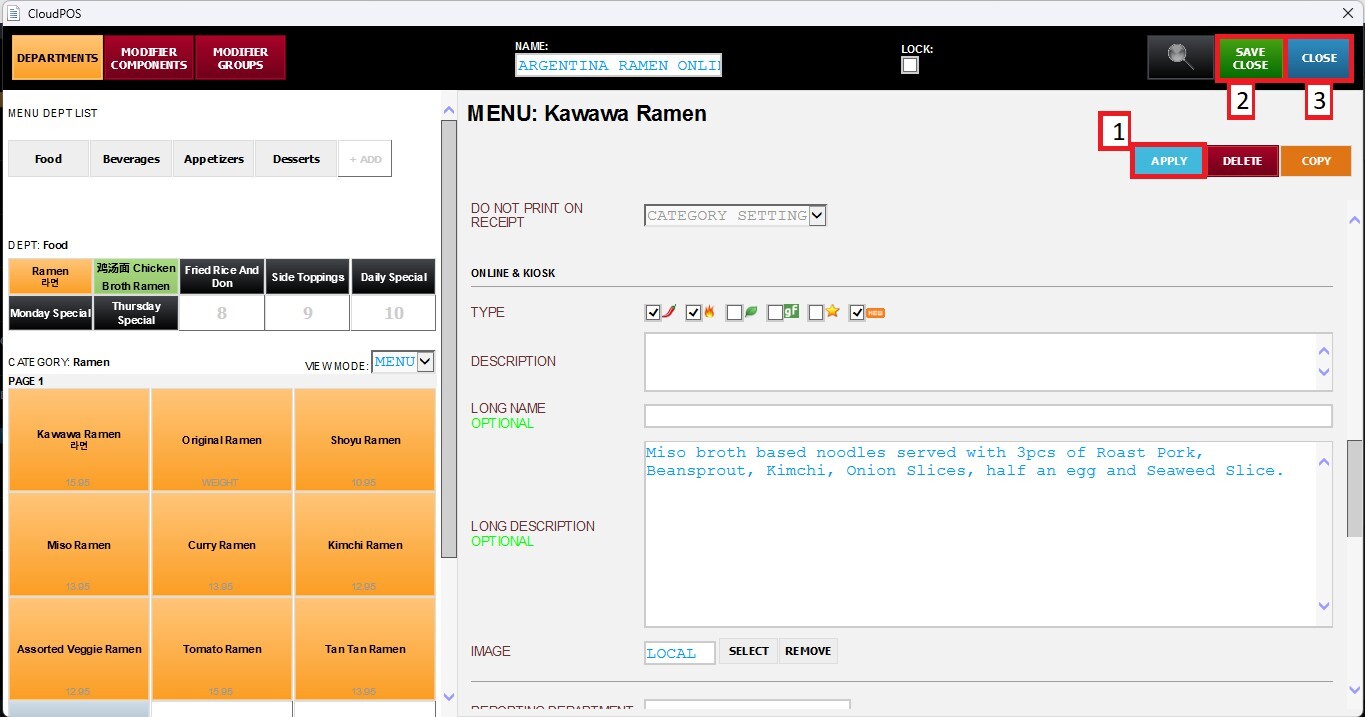
Click APPLY, then SAVE & CLOSE to save all changes.
Result
The configured item information, labels, and image will be displayed on supported online ordering platforms and kiosk interfaces, providing customers with a richer and more informative ordering experience.