Category Visibility and Style
In this article, you’ll learn how to style and configure the category’s appearance on the sales screen.
Main Screen> MENU> SETTINGS> REPO> MENU> EDIT.
Go to MENU and press SETTINGS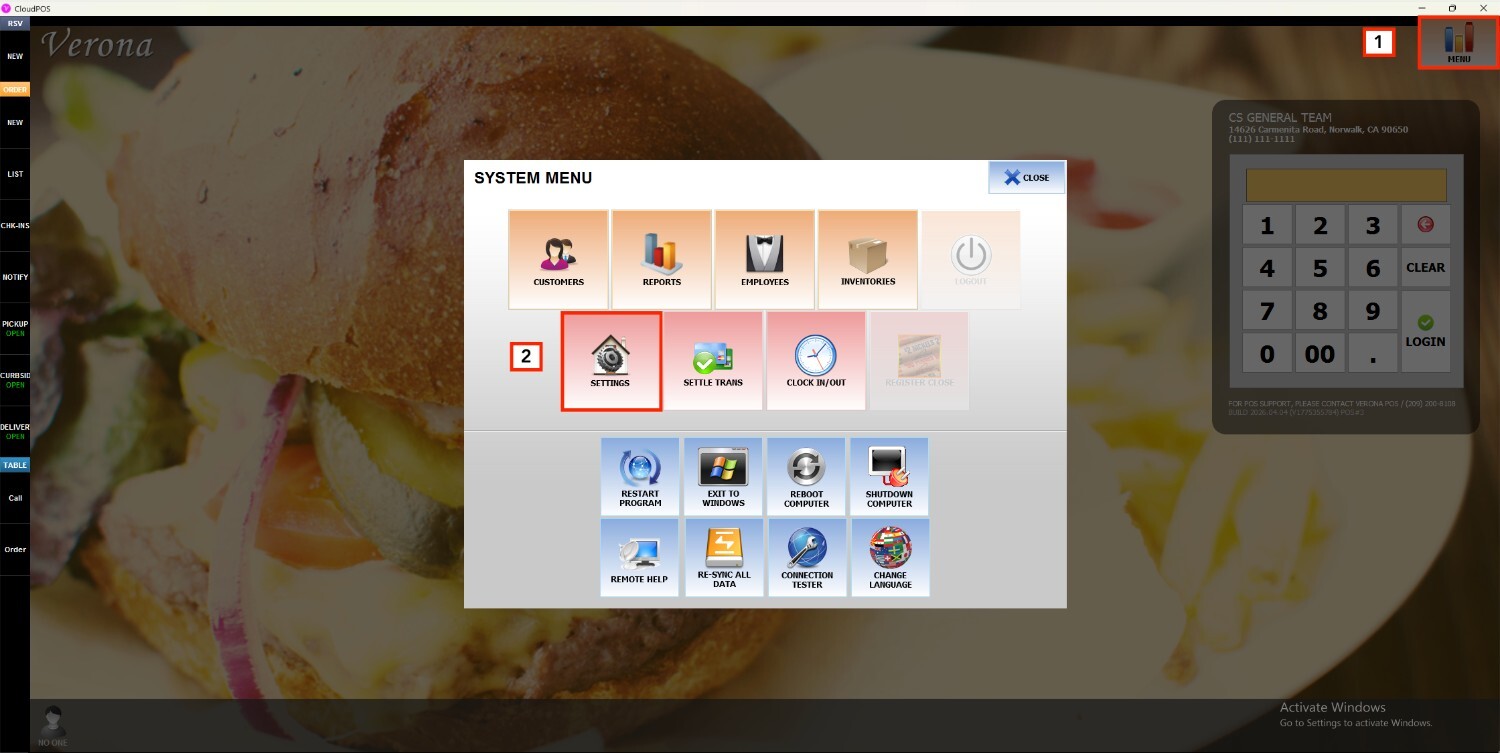
Under REPO, select MENU, and press EDIT next to the menu to modify.
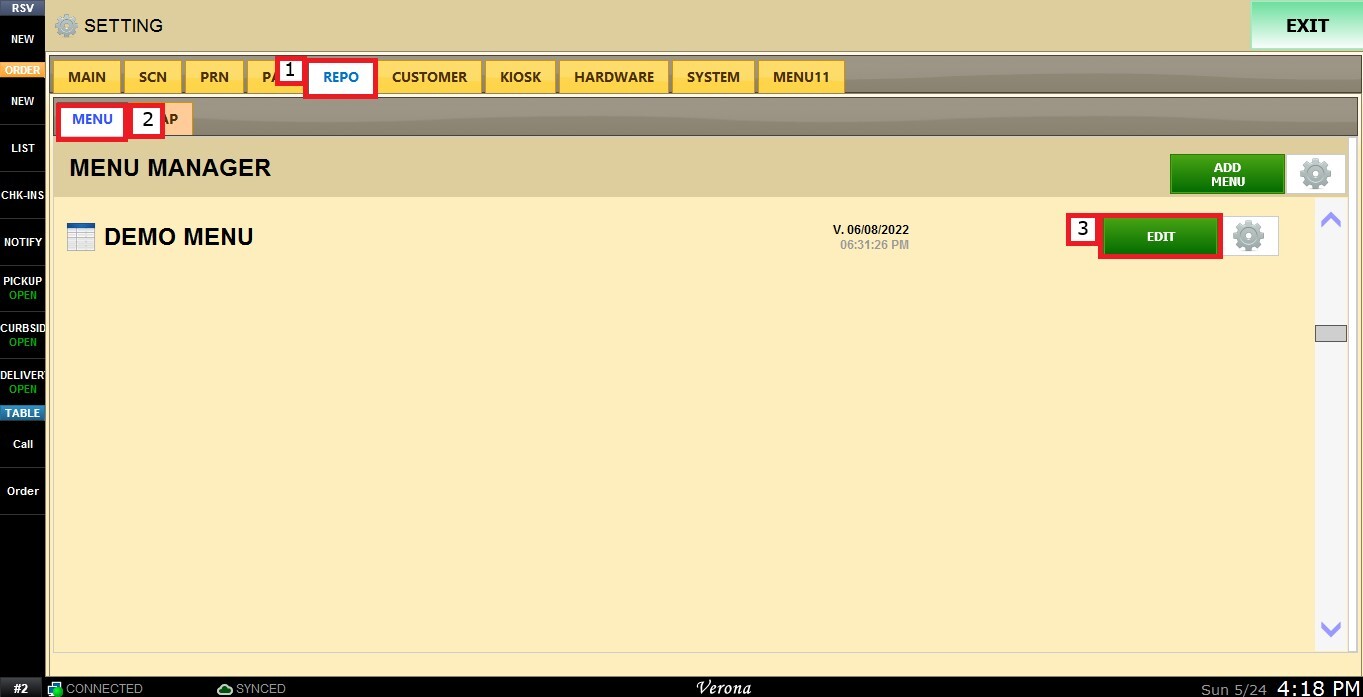
Select a department to view its categories, then choose one to continue.
When the category is selected, on the left side of the screen, scroll down to see the visibility and style options:
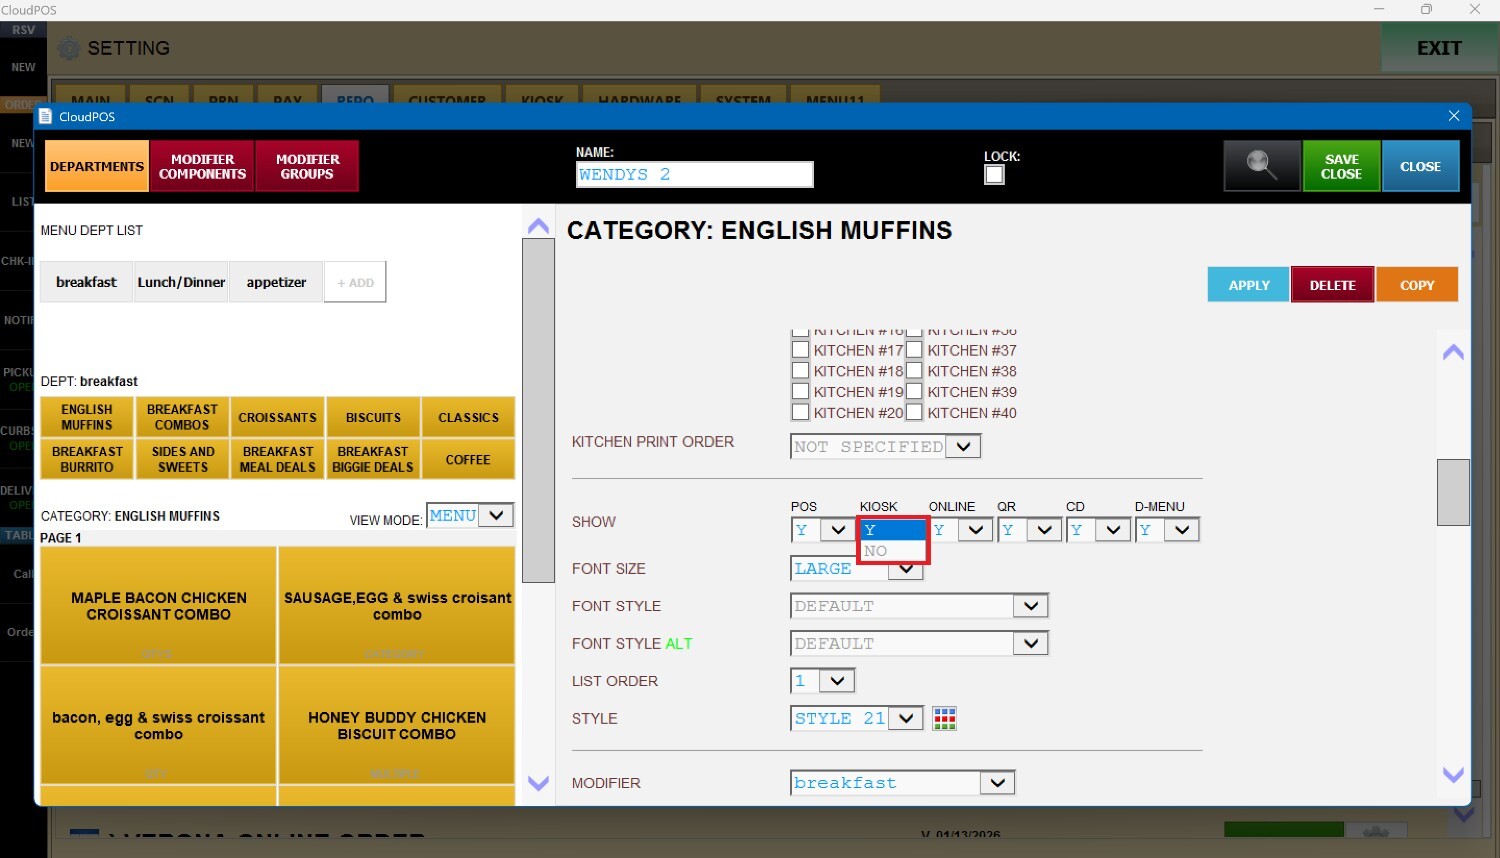
SHOW: Defines where the category will be visible. You can toggle its presence across different sales channels such as POS, Kiosk, Online, QR ordering, Contactless Dining (CD), or Digital Menu (D‑Menu).
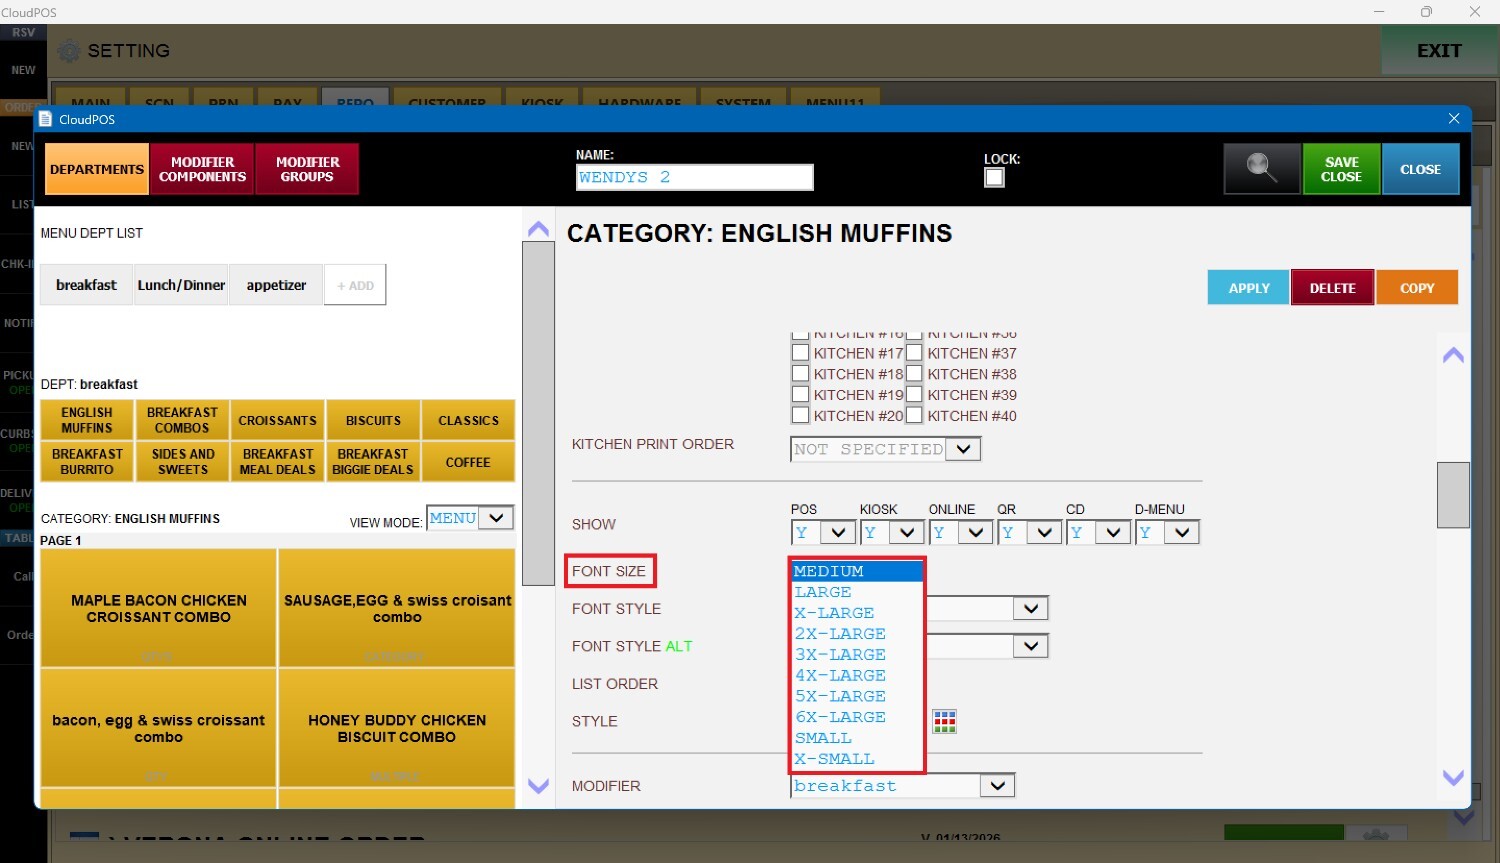
FONT SIZE: Controls the text size for the category name on the sales screen.
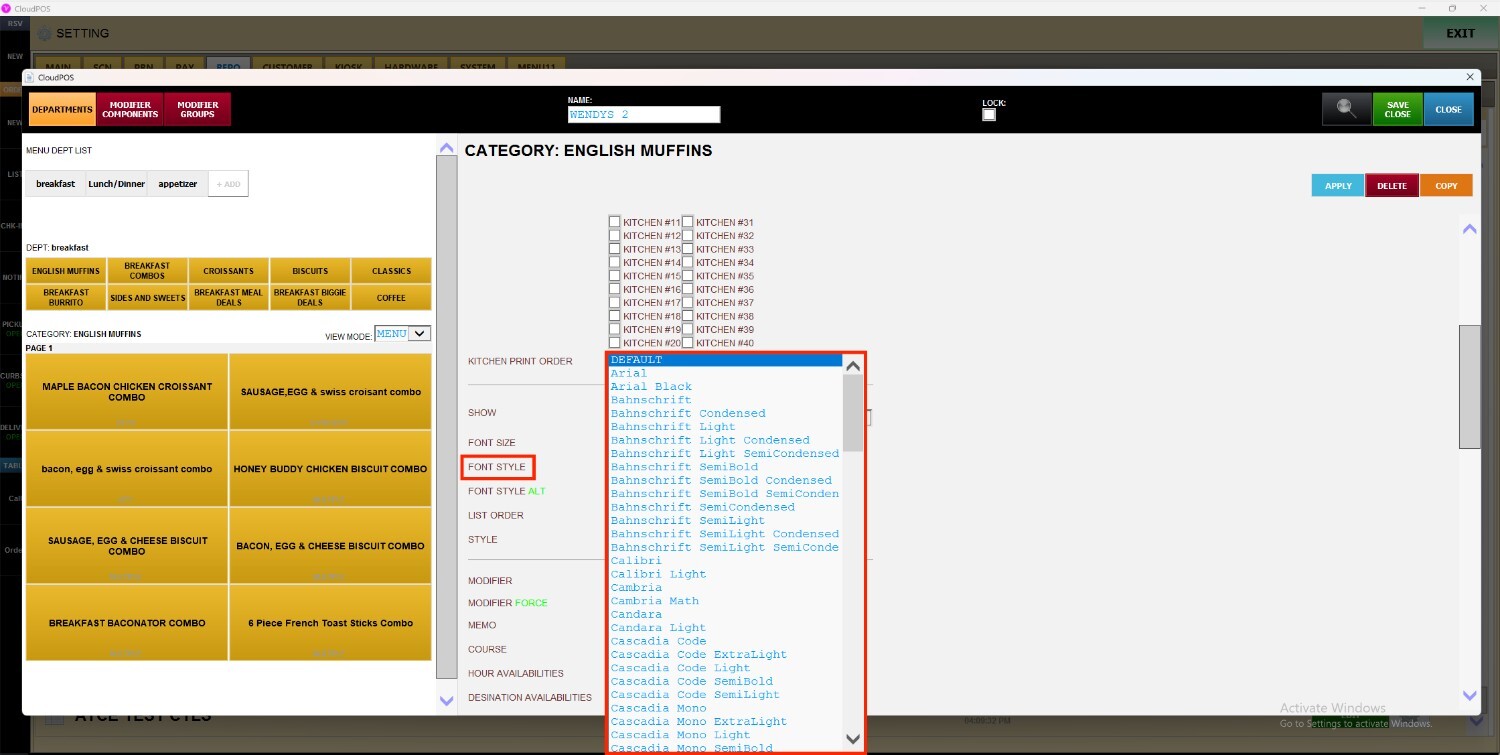
FONT STYLE: Determines the typeface used for the category name.
FONT STYLE ALT: Determines the typeface used for the alternative category name.
LIST ORDER: Sets the sequence in which categories appear on the sales screen.
STYLE: Applies the color to the category button on the sales screen.
Show:
All available sales channels are listed. To configure visibility, open the dropdown menu for the desired channel and choose between the options:
1. YES: The category will be shown in that channel.
2. NO: The category will not be shown in that channel.
Font Size:
Open the dropdown menu to view the complete range of available font measurements.
Result:
Font Style:
Open the dropdown menu to explore the full selection of available font styles.
Result:
Font Style Alt:
When using an alternative language, open the dropdown menu to browse the complete set of available font styles.
Hint: To add an alternative language to the menu, refer to Alternative Language
Result:
List Order:
Select the position number from the dropdown menu to define where the category will be displayed.
Result:
Style:
Open the dropdown menu to select between the style options for the category and its products.
Result:
Hint: Choose the color grid to preview the actual color linked to each style number.


Result:
After making any changes, press APPLY and then SAVE AND CLOSE to ensure the updates appear on the sales screen.