Creating a Category
Categories are used to organize menu items within a department and help structure how items appear on the Sales Screen. Each category acts as a subsection of a department and contains the items assigned to it. In this guide, you’ll learn how to create a new category inside an existing menu and department.
Main Screen> MENU> SETTINGS> REPOSITORY> MENU> EDIT
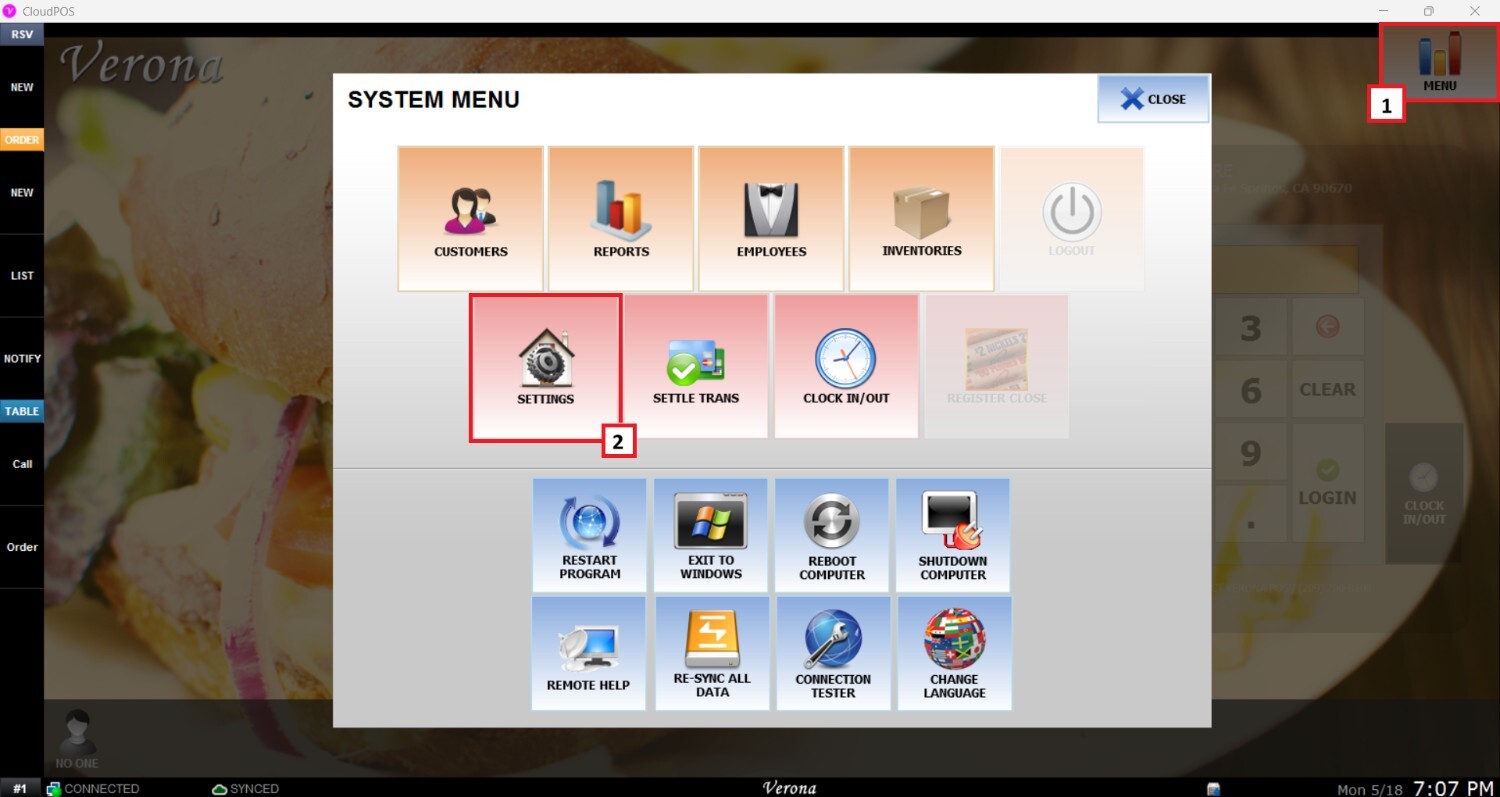
To create and configure a category, access MENU and then SETTINGS.
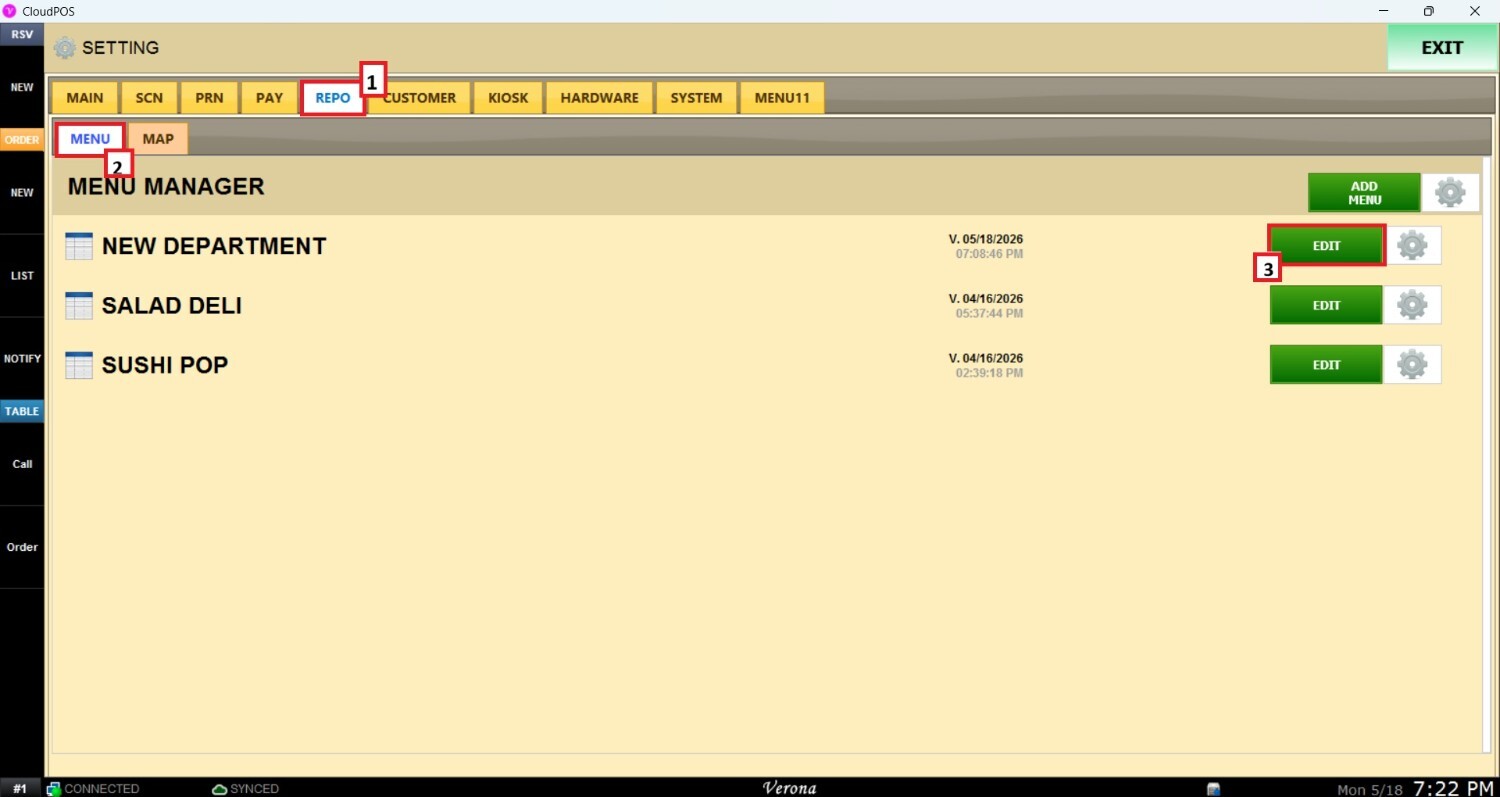
Go to the REPO tab, go to MENU, locate the menu you want to modify and click EDIT.
Navigate to the DEPARTMENT section, select the department where you want to create the category. Then choose one of the available category slots displayed below the department section .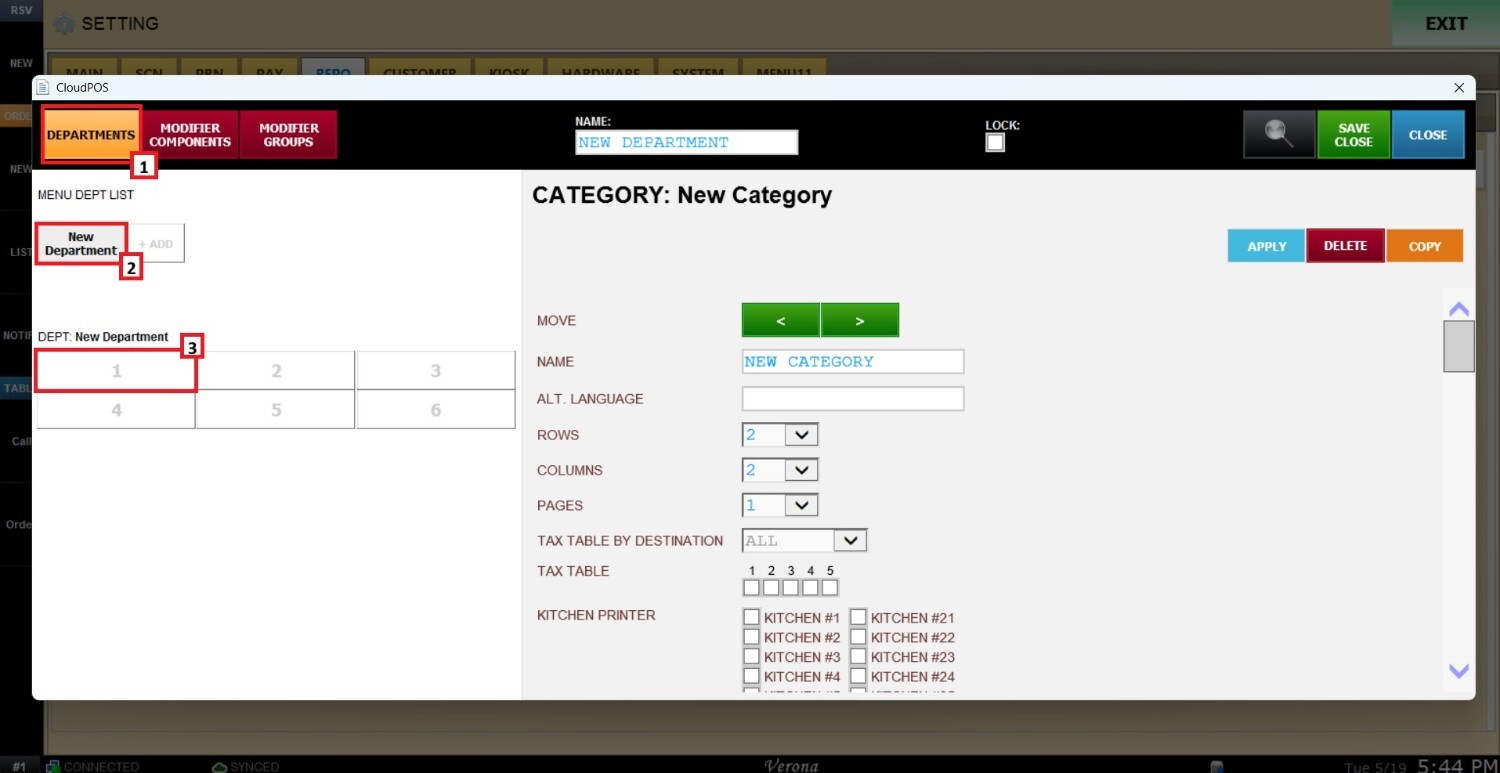
Note: To learn how to create and configure department layouts, refer to the Create a Department guide.
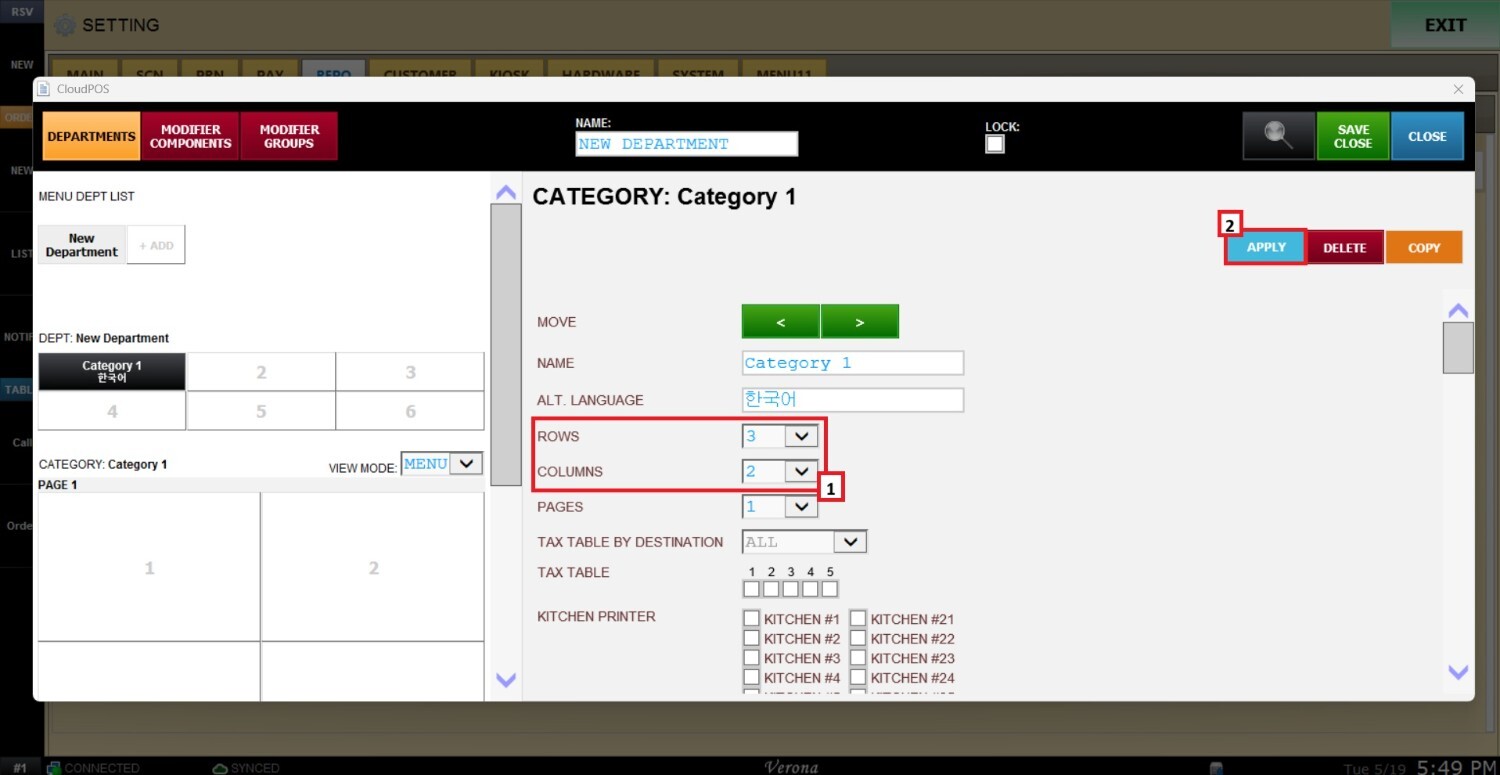
Once inside the CATEGORY panel, enter the category name in the NAME field. If needed, enter an alternate language version of the category name in the ALT. LANGUAGE field.
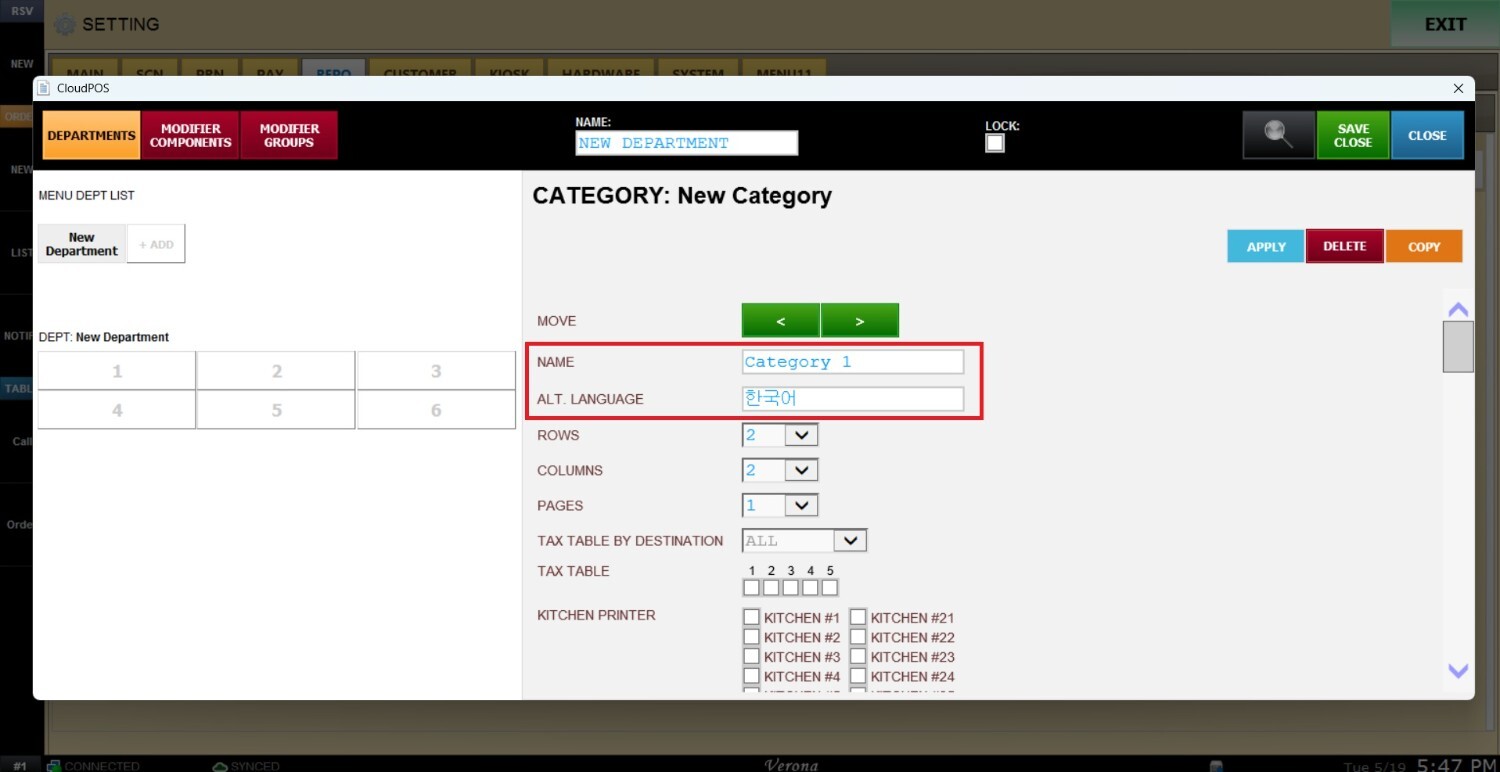
Use the ROWS and COLUMNS settings to configure how many items can be displayed within the category grid. After making the desired changes, press APPLY to save and preview the layout updates.