Applying Taxes to a Category
In this article, you’ll learn how to apply taxes to menu categories using either a single default tax table for all destinations or custom tax tables based on the order destination.This feature allows restaurants to apply different tax rules for Dine-In, Take-Out, Delivery, and other sales channels when required by local regulations or business needs.
Main Screen> MENU> SETTINGS> REPO> MENU> EDIT> CATEGORY> TAXES.
Go to MENU and press SETTINGS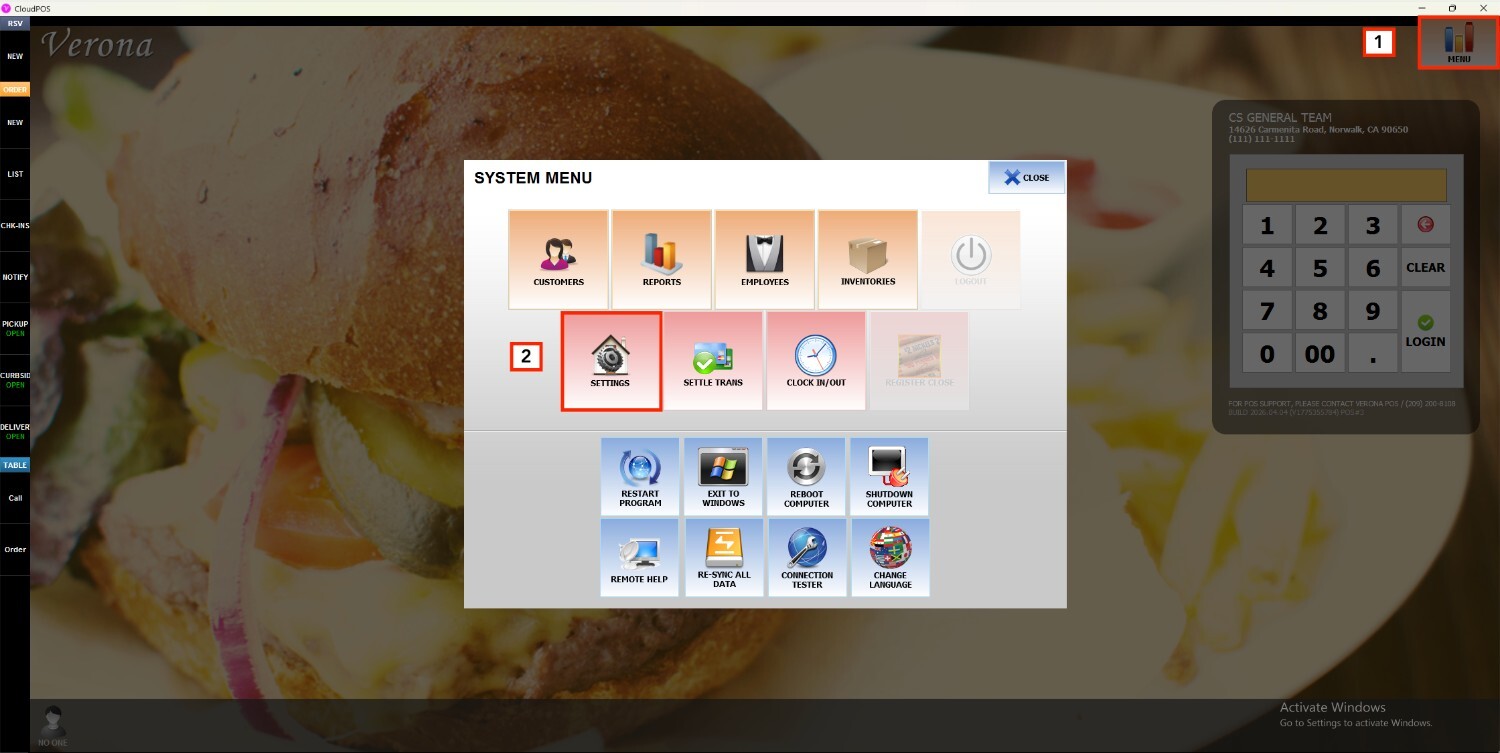
Under the REPO tab, select MENU, locate the menu you want to modify and press EDIT.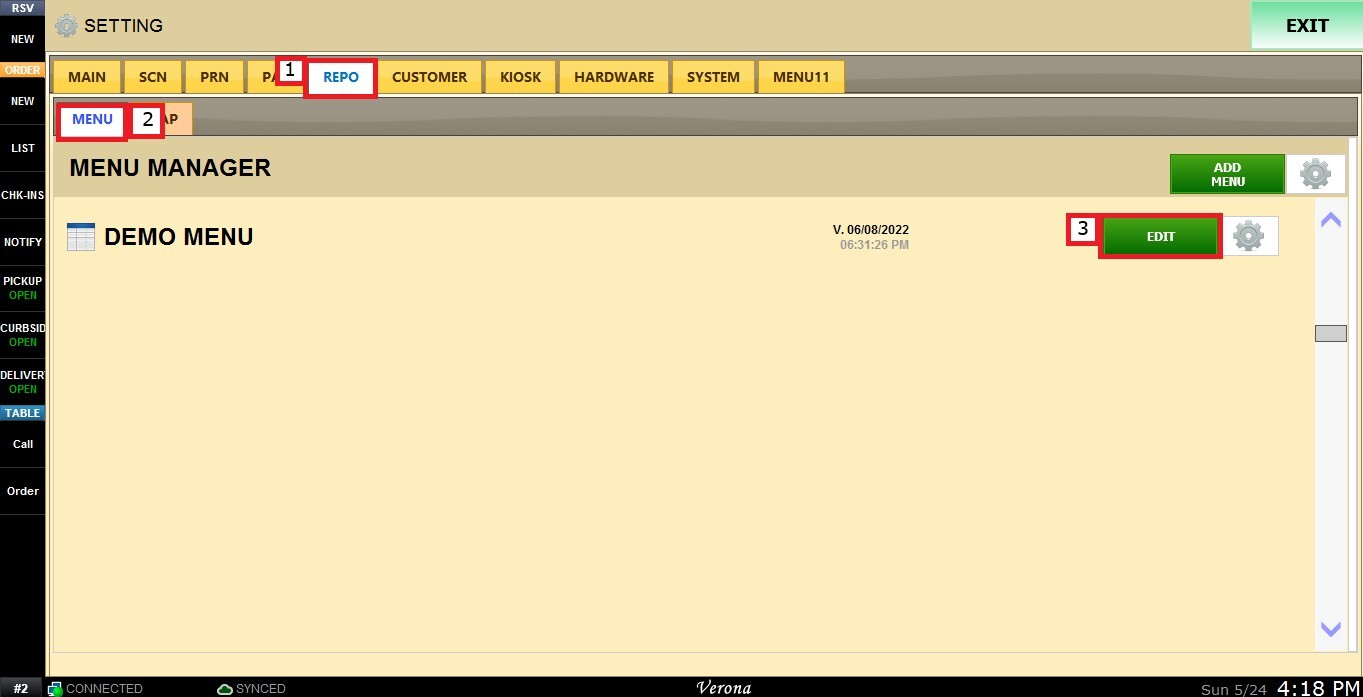
Select a department to display its categories, then choose the category you want to configure.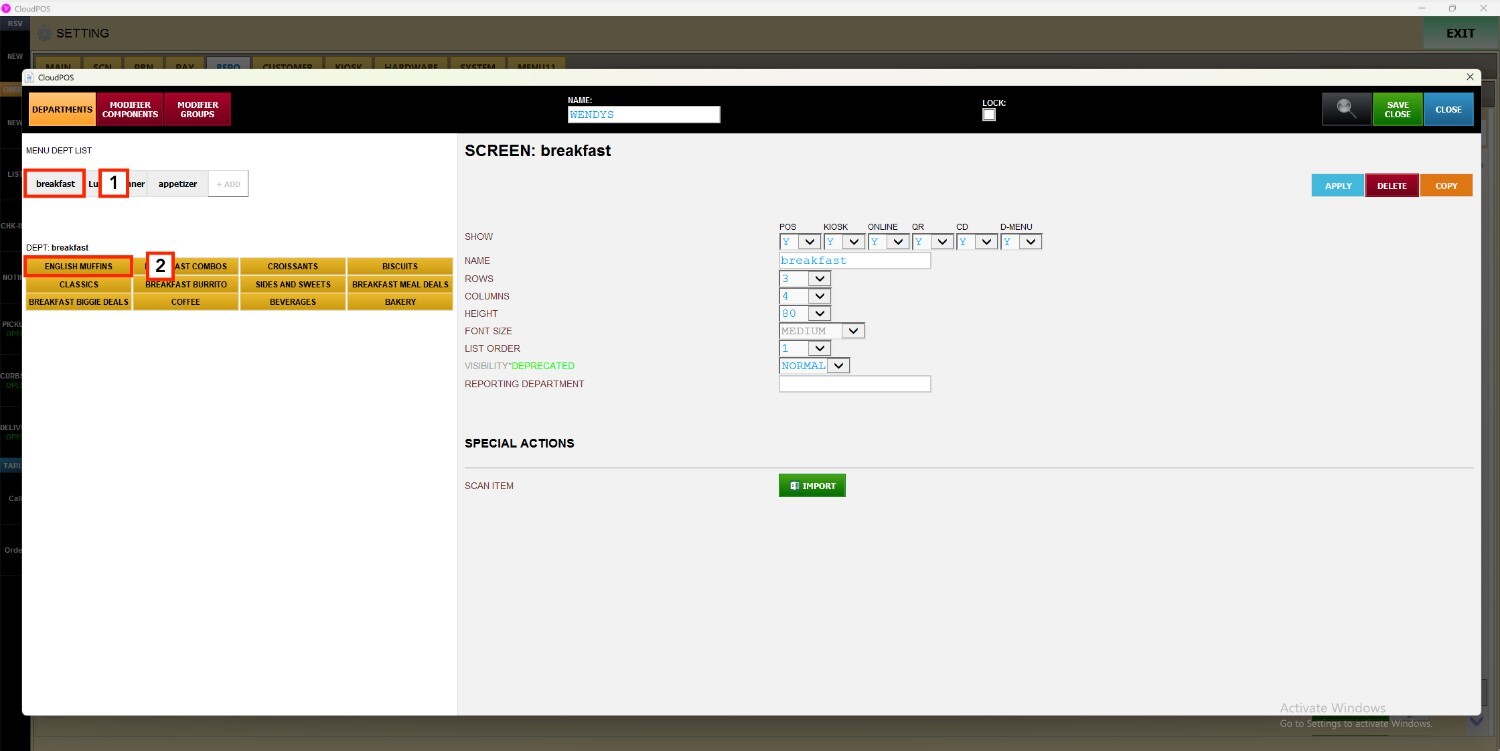
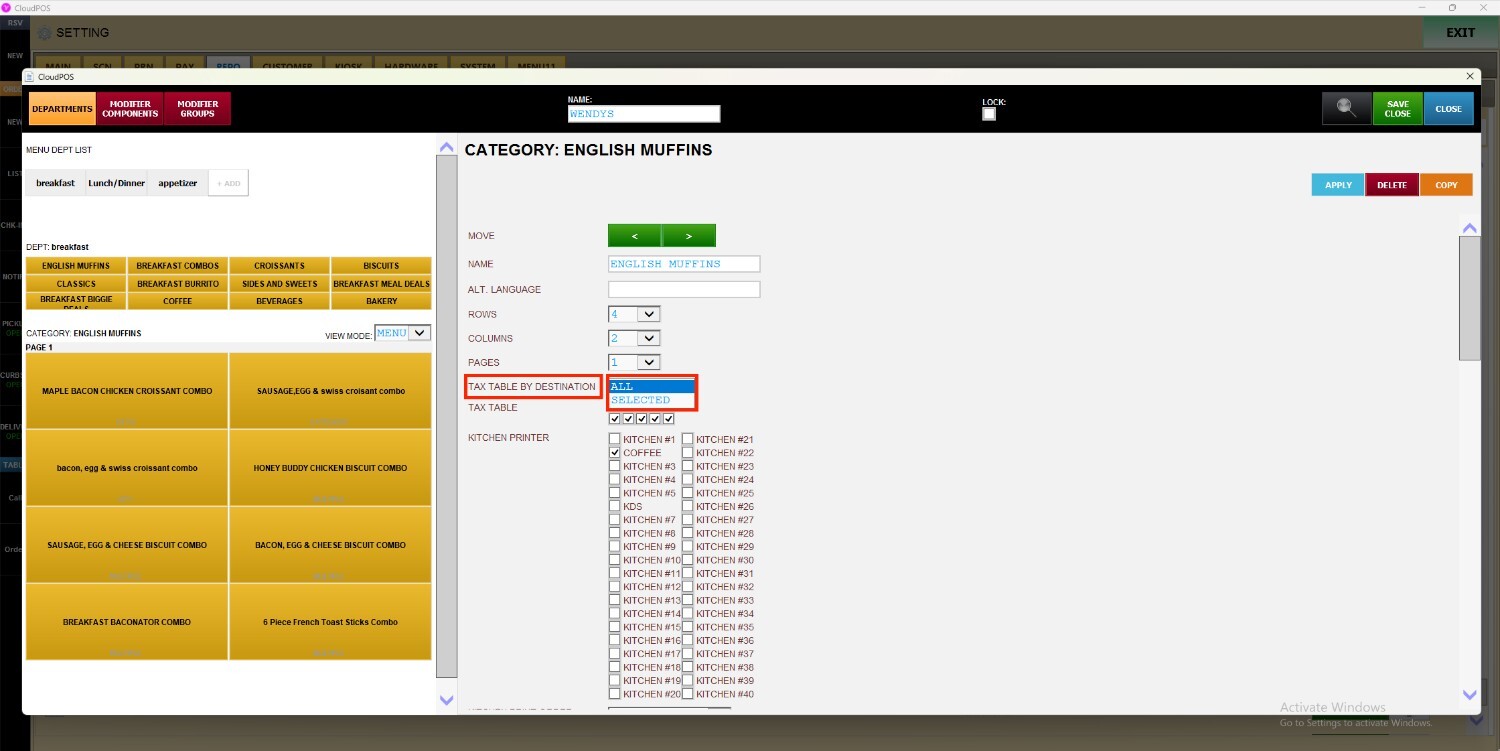
Once the category is selected, locate the TAX TABLE BY DESTINATION dropdown menu on the left side of the screen.
The following options are available:
Hint: Watch this video for complete guidance on configuring the tax table and applying it to a category.
ALL OPTION
All sales destinations will use the same tax configuration.
When ALL is chosen, use the TAX TABLE beneath to pick from the five available tax boxes.
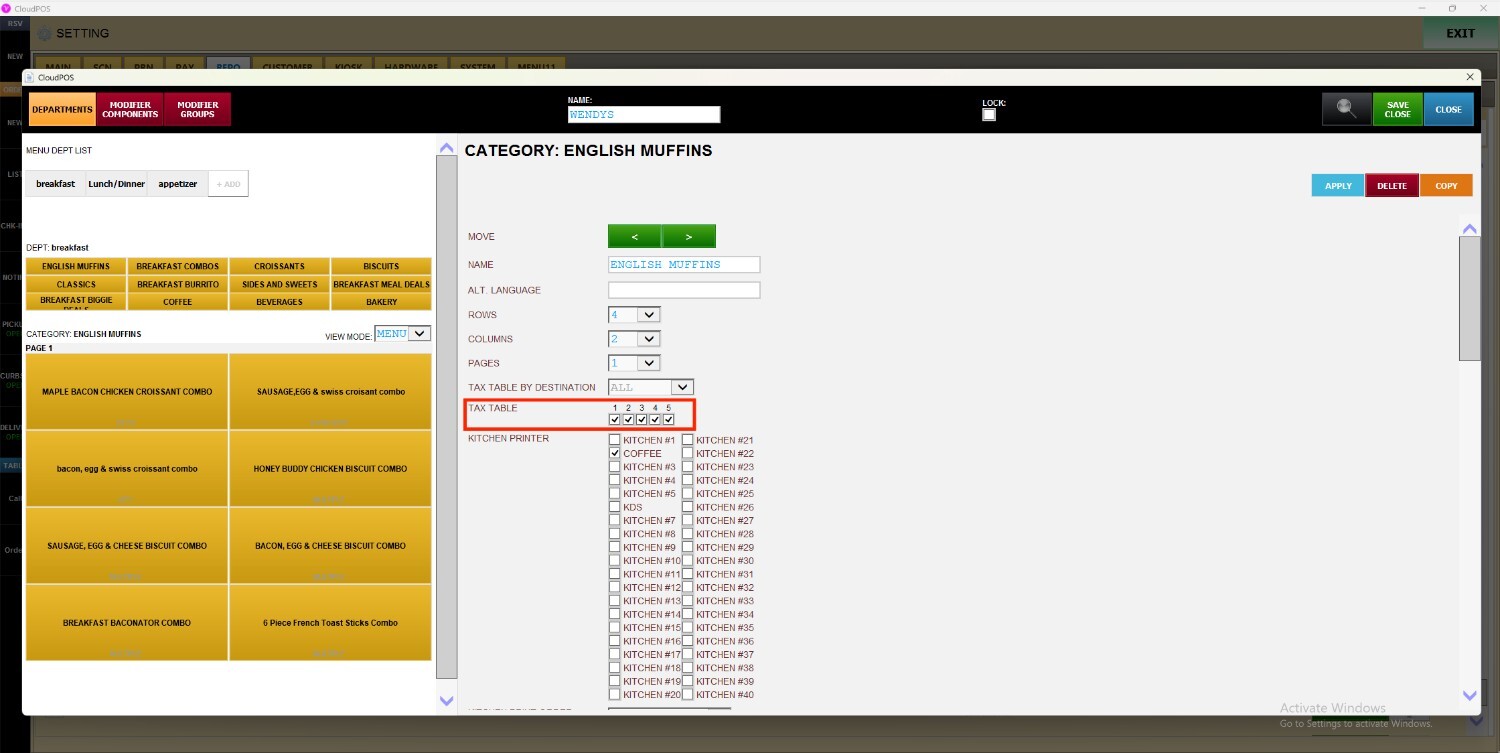
The same taxes will apply across all order destinations.
Dine-In Taxes and Take-Out Taxes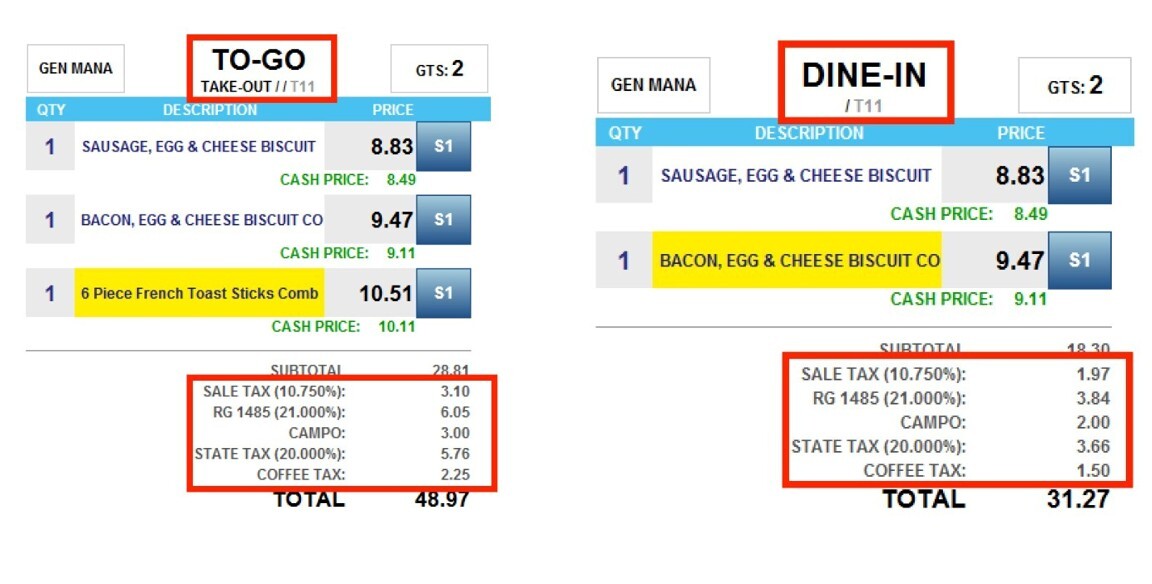
CUSTOM OPTION
When you select Custom, each destination will display with its own tax table beside it. Check the boxes for the taxes you want applied to that specific destination.
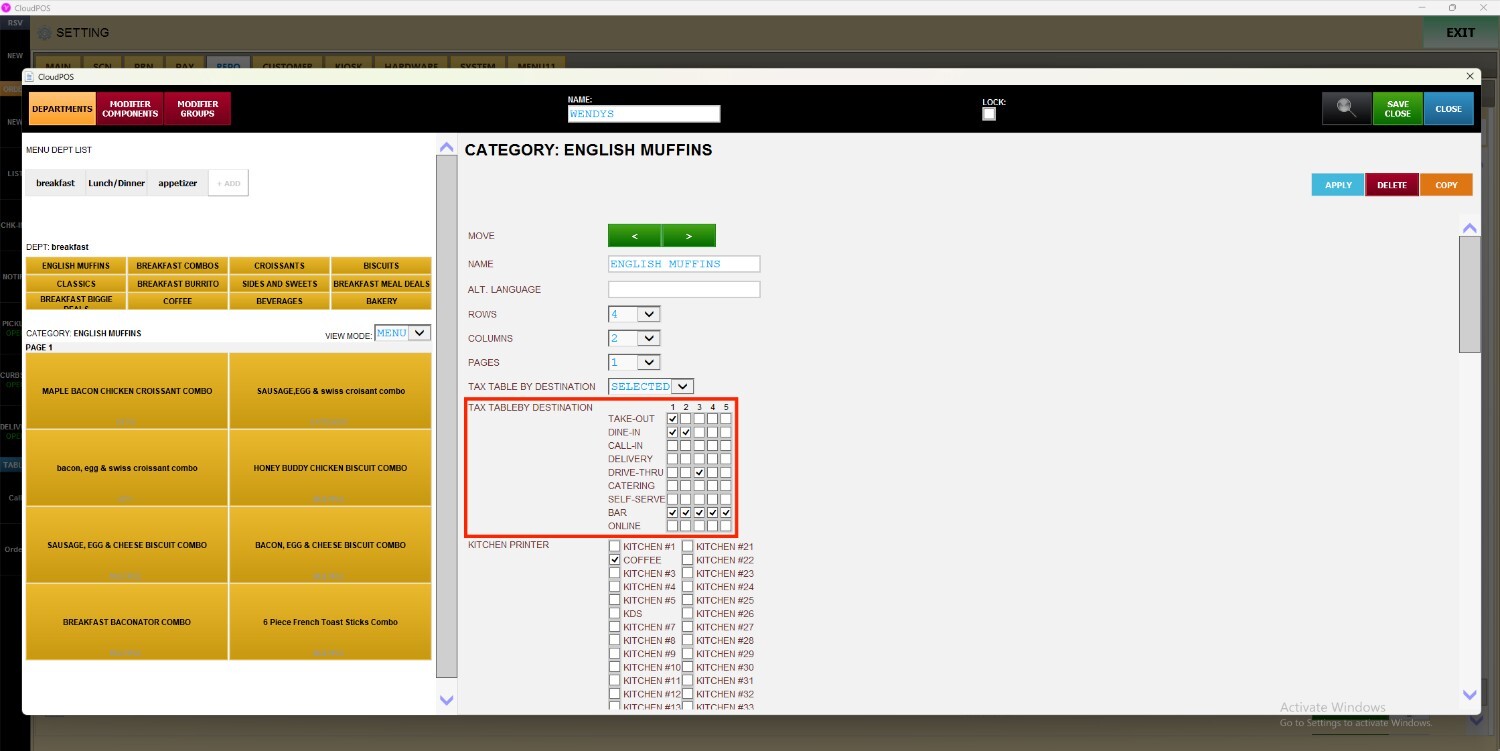
Taxes will vary depending on the selected order destination.
Dine-In Taxes and Take-Out Taxes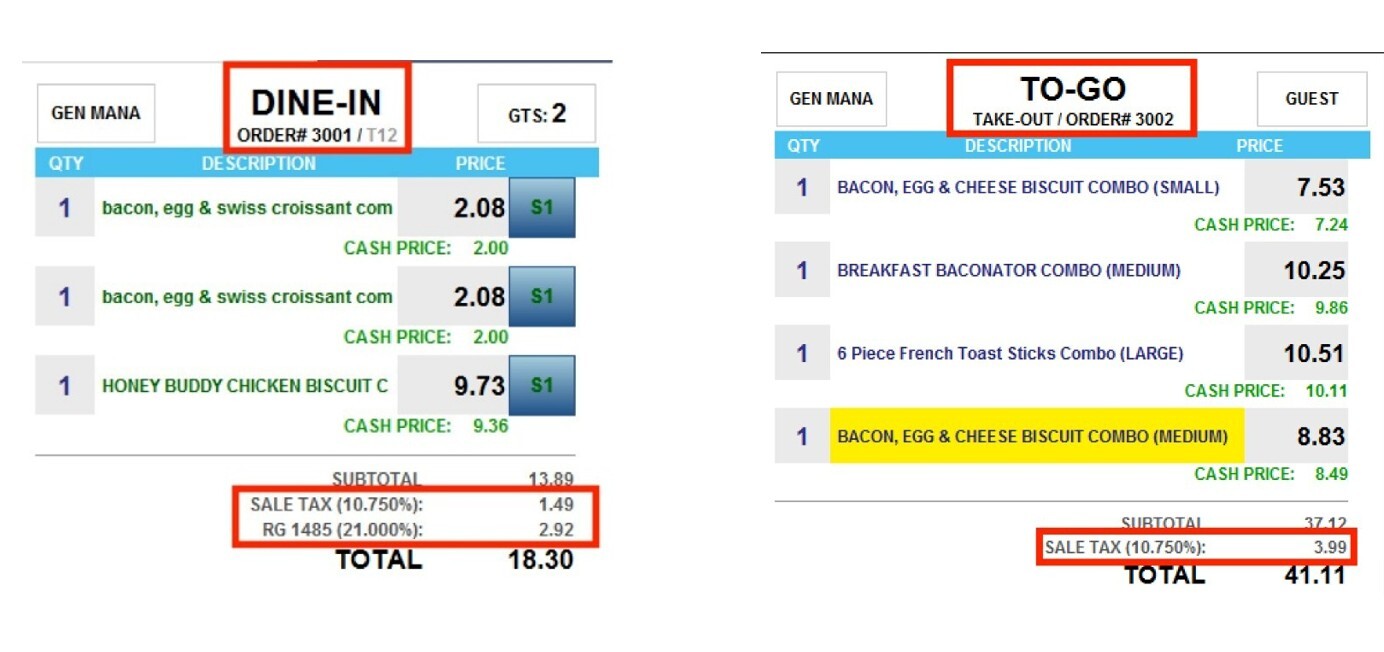
After configuring the taxes, click APPLY to confirm the changes. Then select SAVE AND CLOSE to finalize and store the setup.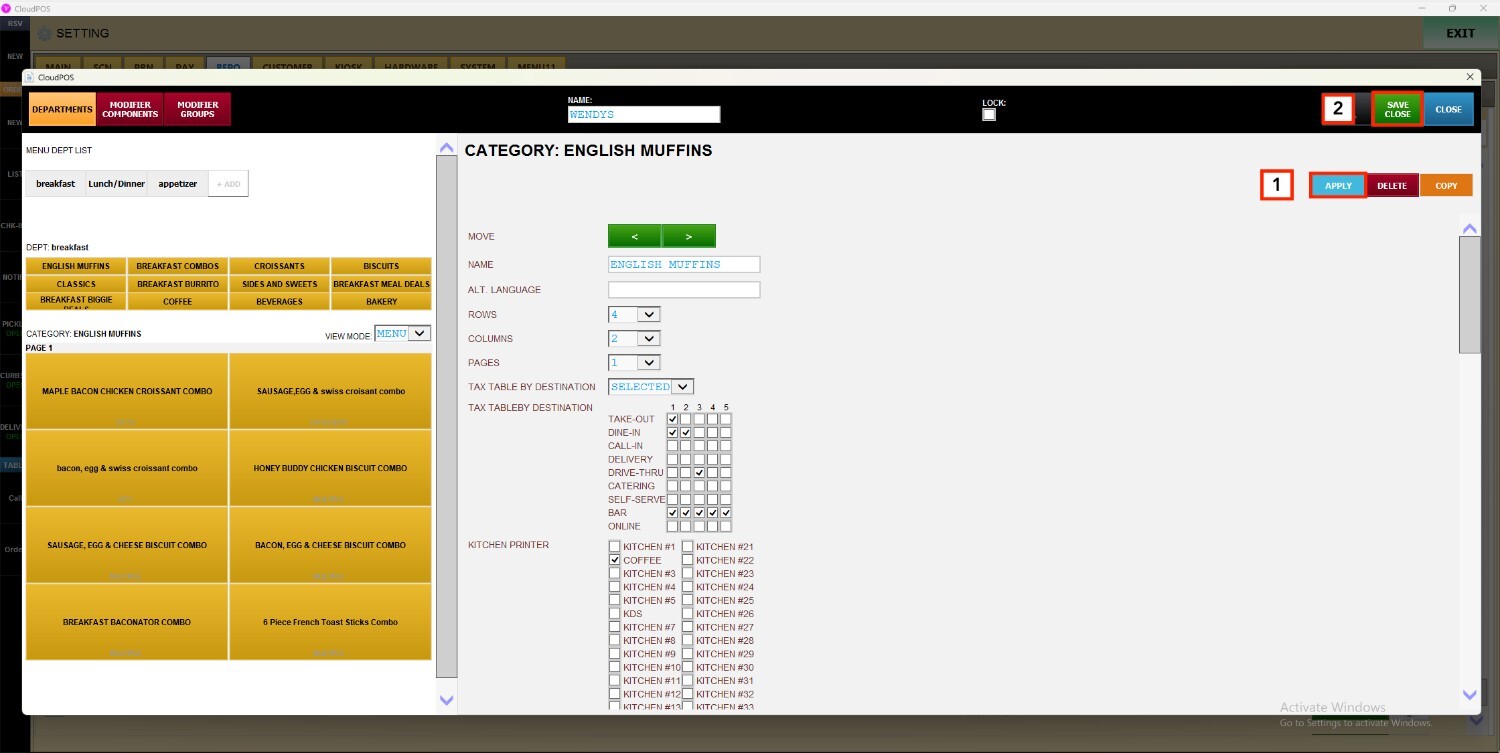
Note: To set up the tax table, refer to Tax Table on settings
The selected tax rules will automatically apply to items within that category based on the configured destination settings.