How to assign a menu to the sales screen
In this article, you’ll learn how to assign menus to the Sales Screen for the entire store or for individual terminals.This feature allows different terminals to display different menus when needed, while also providing a default store-wide menu configuration.
Main Screen> MENU> SETTINGS> SCREEN> MENU
Go to MENU and press SETTINGS.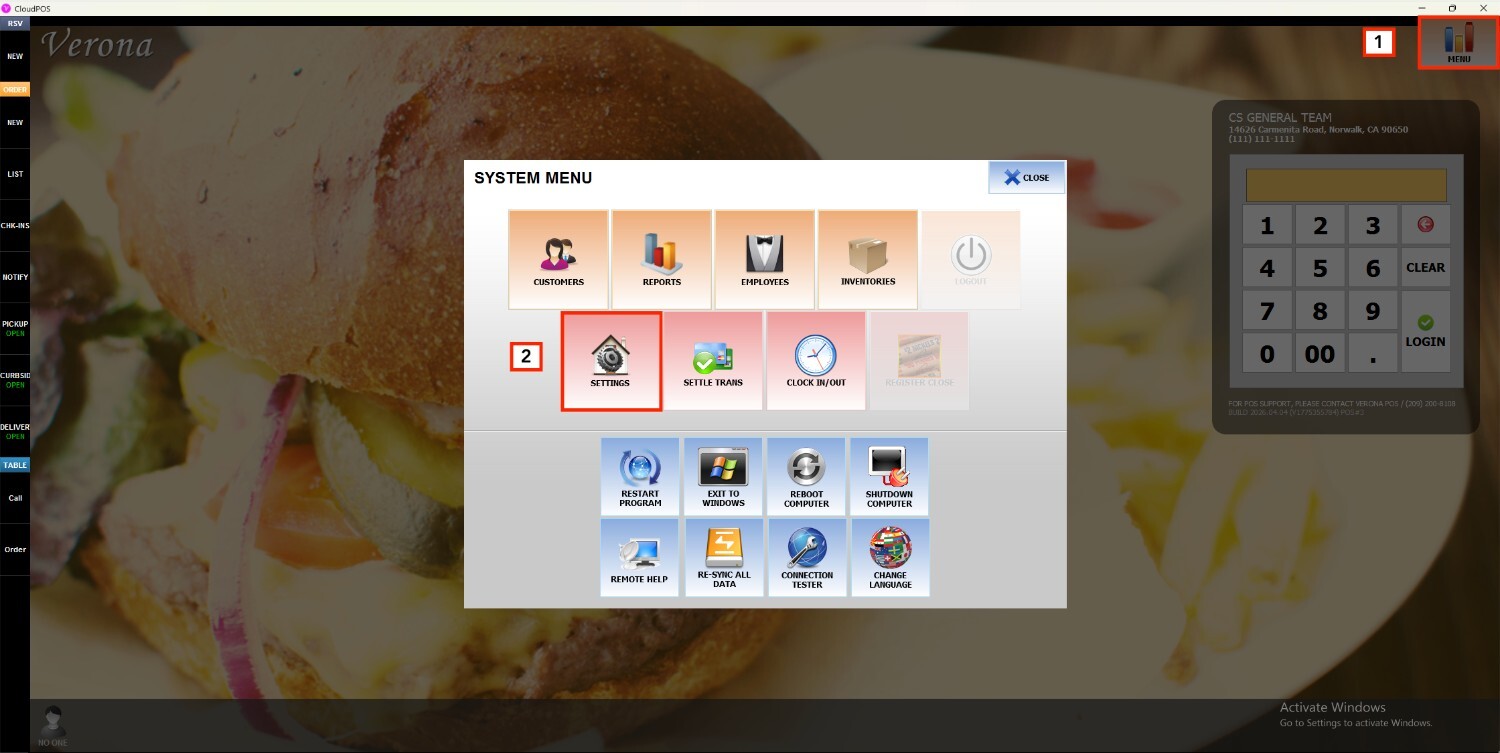
Select SCREEN and press MENU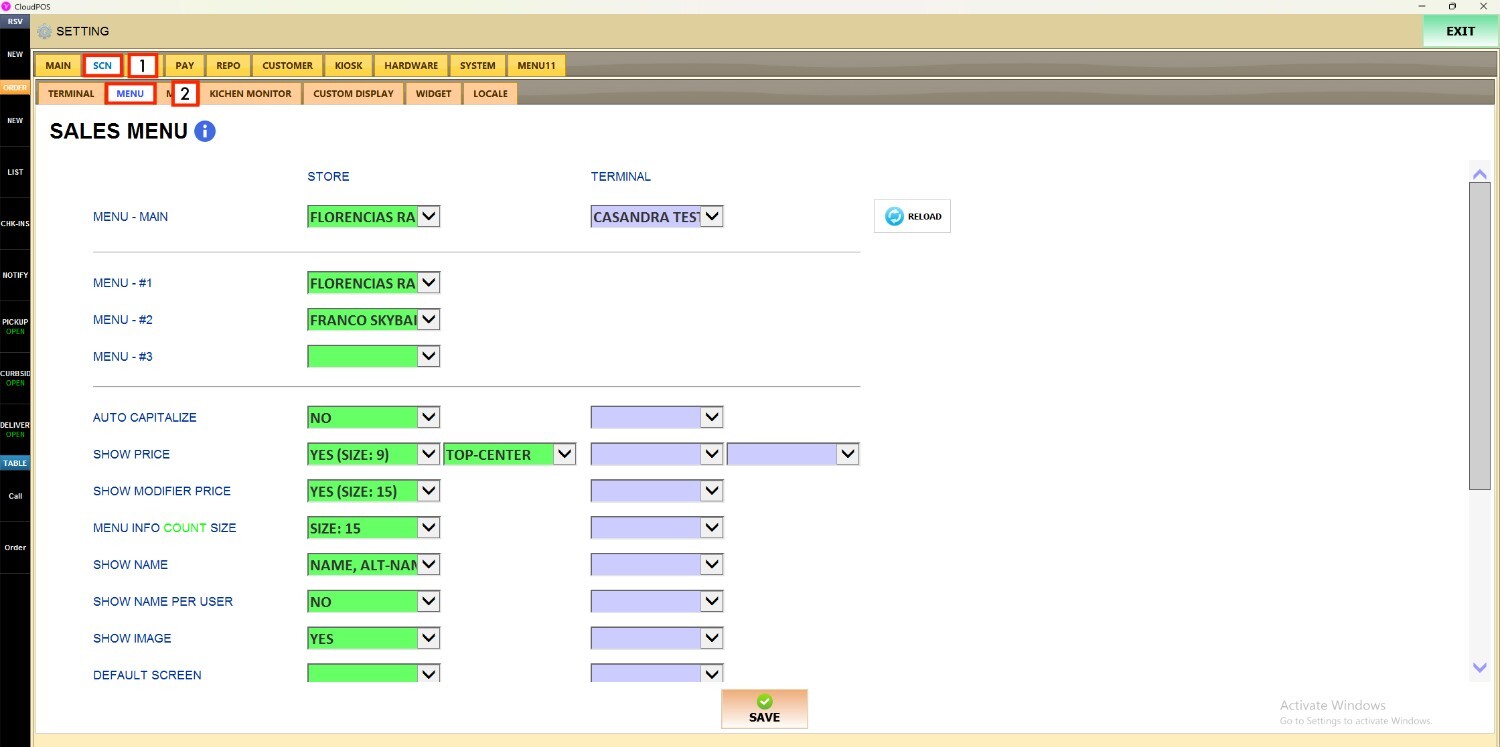
Assign a store-wide menu
Next to MENU‑MAIN, open the STORE dropdown menu to select the menu you want displayed across the sales screen for the entire store.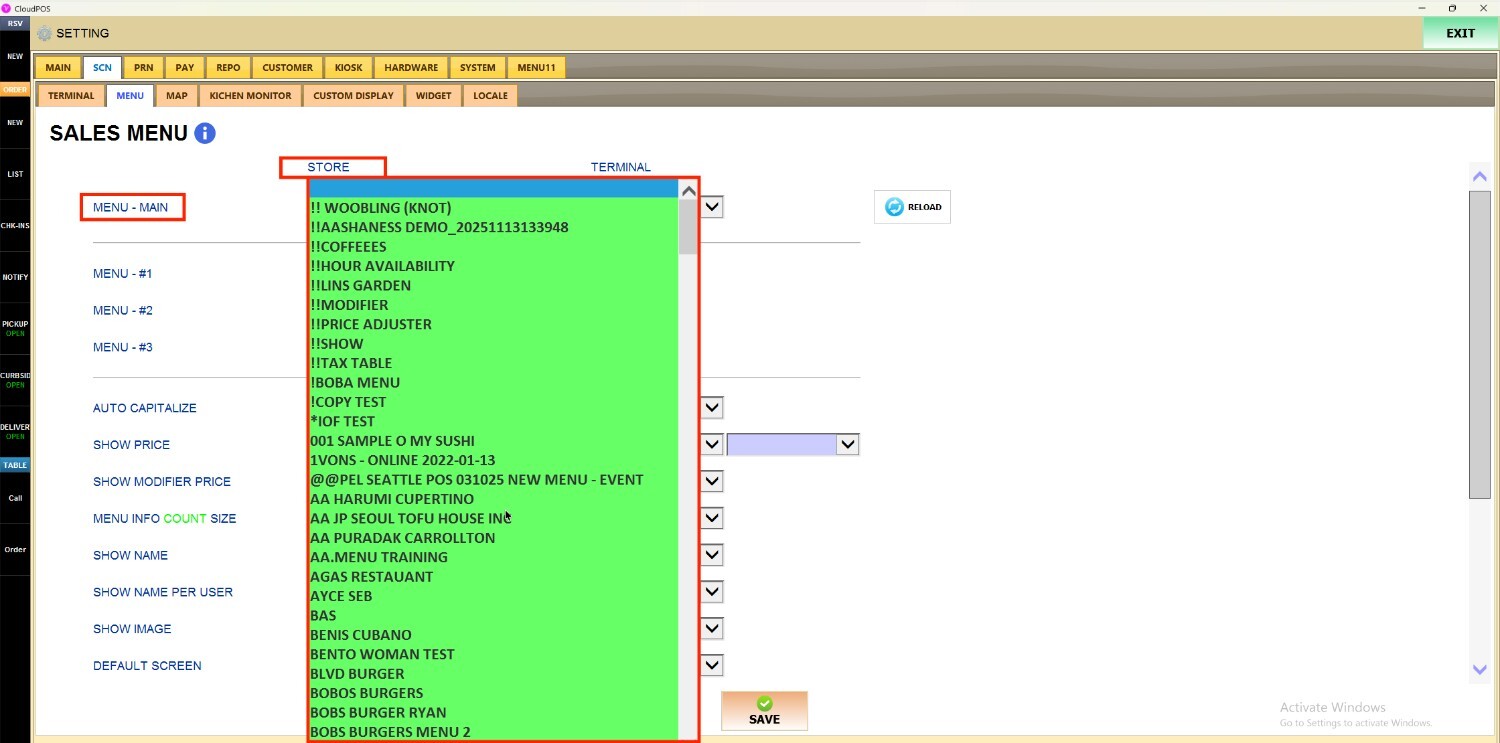
This menu will be used as the default menu configuration for all terminals unless a terminal-specific menu is assigned
Assign a Menu to a Specific Terminal
If you need to configure a menu for a specific terminal, use the dropdown located under TERMINAL to assign the menu of your choice to that individual terminal.
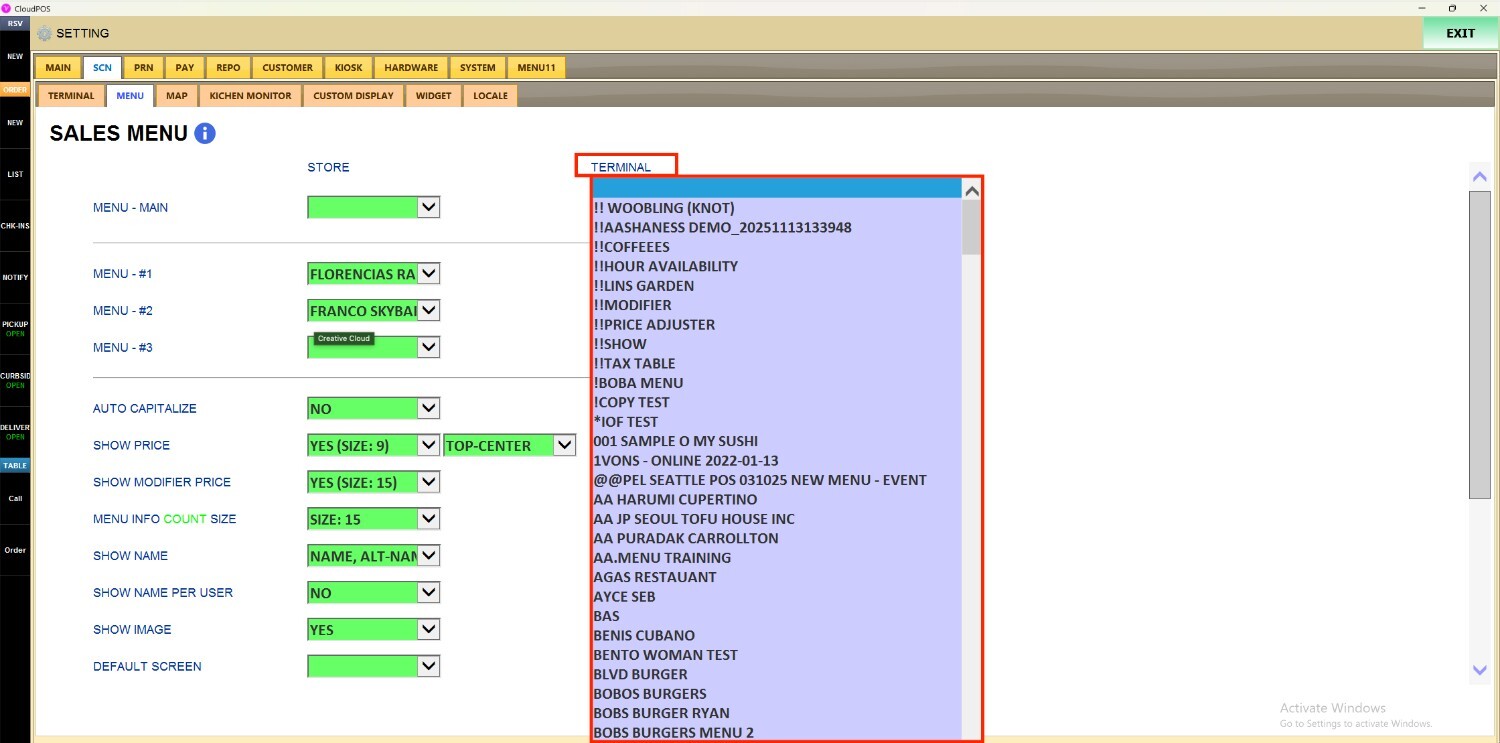
Once you've selected the desired menu, press SAVE and then RESTART THE PROGRAM to apply the changes to the sales screen.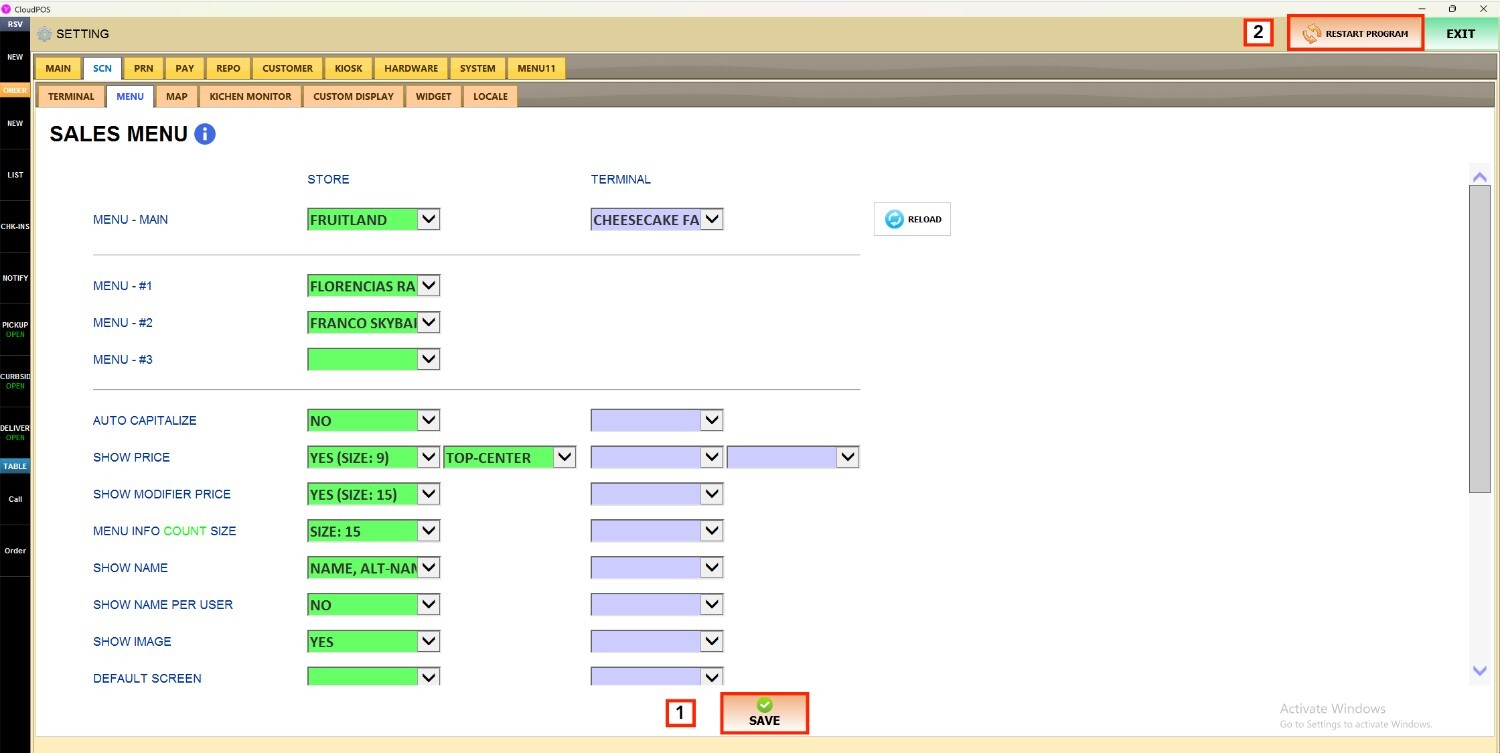
Once the program restarts, the selected menu will appear on the Sales Screen based on the configured store-wide or terminal-specific settings.